Pioneer AVIC-D1 Other Manual - Page 22
DIN Front/Rear-mount, DIN Front-mount
 |
UPC - 012562739496
View all Pioneer AVIC-D1 manuals
Add to My Manuals
Save this manual to your list of manuals |
Page 22 highlights
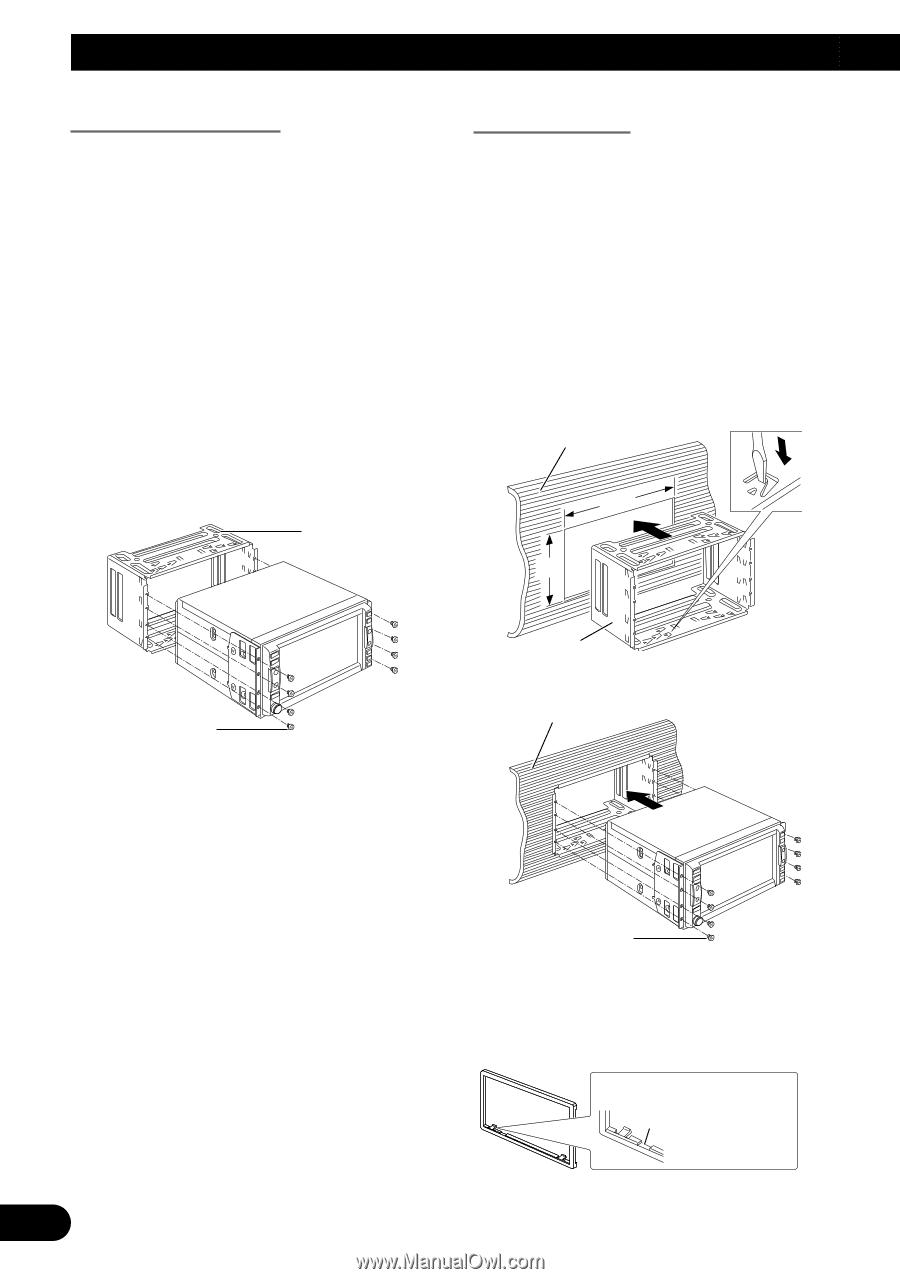
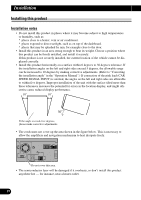
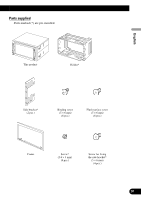
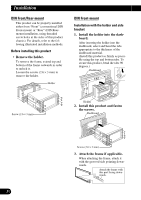
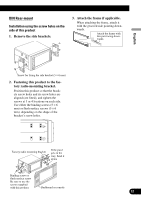
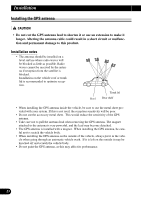
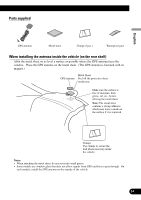
Installation DIN Front/Rear-mount This product can be properly installed either from "Front" (conventional DIN Front-mount) or "Rear" (DIN Rearmount installation, using threaded screw holes at the sides of this product chassis). For details, refer to the following illustrated installation methods. Before installing this product • Remove the holder. To remove the frame, extend top and bottom of the frame outwards in order to unlock it. Loosen the screws (2.6 × 3 mm) to remove the holder. Holder Screw (2.6 × 3 mm) DIN Front-mount Installation with the holder and side bracket 1. Install the holder into the dash- board. After inserting the holder into the dashboard, select and bend the tabs appropriate to the thickness of the dashboard material. (Install this product as firmly as possible using the top and bottom tabs. To secure this product, bend the tabs 90 degrees.) Dashboard 182 111 Holder 2. Install this product and fasten the screws. Dashboard Screw (2.6 × 3 mm) 3. Attach the frame if applicable. When attaching the frame, attach it with the grooved side pointing downwards. Attach the frame with this part facing downwards. 21
-
 1
1 -
2
-
3
-
4
-
5
-
6
-
7
-
8
-
9
-
10
-
11
-
12
-
13
-
14
-
15
-
16
-
 17
17 -
 18
18 -
 19
19 -
 20
20 -
 21
21 -
 22
22 -
 23
23 -
 24
24 -
 25
25 -
 26
26 -
 27
27 -
28
-
29
-
30
-
31
-
32
-
33
-
34
-
35
-
36
-
37
-
38
-
39
-
40
-
41
-
42
-
43
-
44
-
45
-
46
-
47
-
48
-
49
-
50
-
51
-
52
-
53
-
54
 |
 |