Pioneer AVIC N4 Other Manual - Page 18
When connecting a rear view, camera, Connecting the System
 |
UPC - 012562863078
View all Pioneer AVIC N4 manuals
Add to My Manuals
Save this manual to your list of manuals |
Page 18 highlights
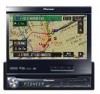
Section 03 Connecting the System When connecting a rear view camera When using this navigation system with a rear view camera, automatic switching to video from a rear view camera is possible when the shift lever is moved to REVERSE (R) position. Rear view mode also allows you to check what is behind you while driving. WARNING USE INPUT ONLY FOR REVERSE OR MIRROR IMAGE REAR VIEW CAMERA. OTHER USE MAY RESULT IN INJURY OR DAMAGE. Rear view camera To video output RCA cable (sold separately) Brown (REAR VIEW CAMERA IN) CAUTION ! The screen image may appear reversed. ! The rear view camera function is to use this product as an aid to keep an eye on trailers, or backing into a tight parking spot. Do not use this function for entertainment purposes. ! The object in rear view may appear closer or more distant than in reality. ! Please note that the edges of the rear view camera images may differ slightly according to whether full screen images are displayed when backing, and whether the images are used for checking the rear when the vehicle is moving forward. CAUTION Be sure to use only the supplied extension lead. Use of another lead could cause fire, smoke and/or damage this navigation system. The hide-away unit Violet/White Extension lead (for reverse signal) 5 m (16 ft. 5 in.) Fuse resistor Connection method Clamp the backup light lead. Clamp firmly with needle-nosed pliers. Notes ! It is necessary to set to "Camera" in "System" when connecting the rear view camera. (For details, see the Operation Manual.) ! Connect to the rear view camera. Do not connect to any other equipment. 18 En
-
 1
1 -
2
-
3
-
4
-
5
-
6
-
7
-
8
-
9
-
10
-
11
-
12
-
 13
13 -
 14
14 -
 15
15 -
 16
16 -
 17
17 -
 18
18 -
 19
19 -
 20
20 -
 21
21 -
 22
22 -
 23
23 -
24
-
25
-
26
-
27
-
28
-
29
-
30
-
31
-
32
-
33
-
34
-
35
-
36
-
37
-
38
-
39
-
40
-
41
-
42
-
43
-
44
-
45
-
46
-
47
-
48
-
49
-
50
-
51
-
52
-
53
-
54
-
55
-
56
-
57
-
58
-
59
-
60
-
61
-
62
-
63
 |
 |
