Pioneer BDP-43FD Owner's Manual - Page 22
Version, System, Communication Setup
 |
View all Pioneer BDP-43FD manuals
Add to My Manuals
Save this manual to your list of manuals |
Page 22 highlights
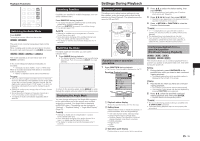
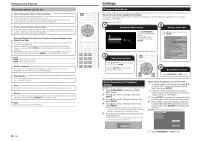
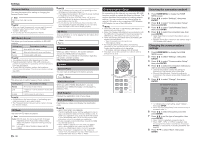
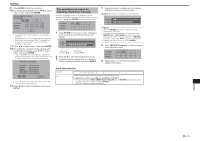
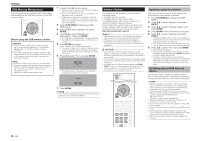
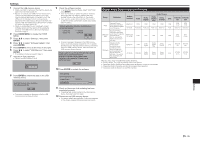
Settings Password Setting This sets the password for setting or changing the Parental Control Level. Item Yes: Enter the 4-digit number. No NOTE • When you forget the password, you can reset the current password using "System Reset" under "Settings"- "System". (See right.) • You can also set the new password if desired. BD Internet Access This allows you to set access restriction to BD-LIVE contents. Setting item Description of setting Permit Allow all BD-LIVE discs. Limit Allow only discs with owner certification. Prohibit Prohibit all BD-LIVE discs. NOTE • The available functions differ depending on the disc. • Regarding playback method of BD-LIVE contents, etc., perform the operations in accordance with the instructions in the BD disc manual. • To enjoy BD-LIVE functions, perform the broadband internet connection (page 11) and communication settings (see right). Internet Setting This allows you to restrict viewing of web contents. Setting item Description of setting Permit Allow access to web contents. Limit A password must be entered to access web contents. Prohibit Prohibits access to web contents. NOTE • A connection to the Internet (page 11) and settings (see right) are required to enjoy web contents. • The "Password Setting" (above) must be made to change the "Internet Setting". 3D Mode This sets how 3D discs are played. Item Auto: With 3D discs, the disc is played with 3D images. Regardless of the "Audio Video Setting" setting, videos are played at a resolution setting prioritizing 3D transfer. 2D: Even with 3D discs, the disc is played with 2D images. 22 NOTE • The 3D indicator on the main unit front panel lights when 3D images are being played (page 7). • The images may be played in 2D when the screen switches or depending on the TV being used. • Depending on the type of 3D disc, when "2D" is set or when connected to a device not supporting 3D, it may not be possible to play the disc. • To view side-by-side contents you have recorded in 3D, you must make the proper 3D setting on your TV. In this case, this Player's OSD will not display properly. 3D Notice This sets whether or not to display the 3D notice when playing 3D images. Item Yes, No Version When you select "Version", the system software version and Netflix ESN are displayed. Please refer to our website for information regarding the system software updates. http://www.pioneerblu-ray.com Communication Setup By connecting to the Internet, you can enjoy BD-LIVE functions as well as update this Player's software. This section describes the procedure for making network settings. You can connect to the Internet either by using a LAN cable or by connecting a USB Wireless LAN Adaptor to one of the USB ports. NOTE • Check that LAN cable or USB Wireless LAN Adaptor is properly connected (page 11). • When USB Wireless LAN Adaptors are connected to both the USB ports on the player's front and rear panels, the USB Wireless LAN Adaptor last connected is used. • Check the following information about the wireless LAN access point beforehand: - Type of encryption and encryption key - SSID (network name) • For manually performing the setting, the following information of the connected router or modem is required. Confirm the information prior to the setting. - IP address, netmask, gateway, DNS IP address • This player cannot be connected to a network when a proxy server is used. System System Reset You can reset all settings to the factory presets. Item Reset, Not Reset Netflix Deactivate When you select "Netflix Deactivation", you can deactivate your Netflix information on the player by selecting "Yes". DivX Register Displays the registration code of your player. DivX Deactivate Deactivate your player and display the deactivation code. NOTE • ABOUT DIVX VIDEO-ON-DEMAND: This DivX Certified® device must be registered in order to play purchased DivX Video-on-Demand (VOD) movies. To obtain your registration code, locate the DivX VOD section in your device setup menu. Go to vod.divx.com for more information on how to complete your registration. • To play copyright-protected DivX files, connect the HDMI OUT terminal to the TV. • When "HDMI" is selected from the "Video Out Select" menu, video signals are not output from the VIDEO OUTPUT or COMPONENT VIDEO OUTPUT terminals. • When "Component" is selected from the "Video Out Select" menu, file playback may stop. If this happens, set "Component Video Out" to "480i" or "480p". Selecting the connection method 1 Press HOME MENU to display the HOME MENU screen. 2 Press to select "Settings", then press ENTER. 3 Press to select "Communication Setup", then press ENTER. 4 Press to select "Cable/Wireless Select", then press ENTER. 5 Press to select the connection type, then press ENTER. • Cable: Select this to connect to the network using a LAN cable. • Wireless: Select this to connect to the network using a USB Wireless LAN Adaptor. Changing the communications settings 1 Press HOME MENU to display the HOME MENU screen. 2 Press to select "Settings", then press ENTER. 3 Press to select "Communication Setup", then press ENTER. 4 Press to select the connection method you want to set, then press ENTER. • Ethernet Setup(Cable): Change the settings for connecting to the network using a LAN cable. • Ethernet Setup(Wireless): Change the settings for connecting to the network using a USB Wireless LAN Adaptor. 5 Press to select "Change", then press ENTER. Current Ethernet setup info. IP Address : Auto Setup Netmask : Auto Setup Gateway : Auto Setup DNS : Auto Setup Change Initialize • For initializing the current setting, select "Initialize", then press ENTER. • When "Ethernet Setup(Cable)" was selected at step 4, proceed to step 10. 6 Press to select the access point, then press ENTER. 7 Press to set the type of encryption, then press ENTER. • When "OPEN" is selected, proceed to step 9. • When "WEP", "WPA" or "WPA2" is selected, input the encryption key. Select "security key", then press ENTER. For instructions on inputting characters, see page 23. 8 Press to select "Next", then press ENTER.
-
 1
1 -
2
-
3
-
4
-
5
-
6
-
7
-
8
-
9
-
10
-
11
-
12
-
13
-
14
-
15
-
16
-
 17
17 -
 18
18 -
 19
19 -
 20
20 -
 21
21 -
 22
22 -
 23
23 -
 24
24 -
 25
25 -
 26
26 -
 27
27 -
28
-
29
-
30
-
31
-
32
-
33
-
34
-
35
-
36
-
37
-
38
-
39
-
40
-
41
-
42
-
43
-
44
-
45
-
46
-
47
-
48
-
49
-
50
-
51
-
52
-
53
-
54
-
55
-
56
-
57
-
58
-
59
-
60
-
61
-
62
-
63
-
64
-
65
-
66
-
67
-
68
 |
 |