Pioneer DEH 2000MP Owner's Manual - Page 16
Fastening the front panel, DEH-2000MP, Installation
 |
UPC - 012562876603
View all Pioneer DEH 2000MP manuals
Add to My Manuals
Save this manual to your list of manuals |
Page 16 highlights
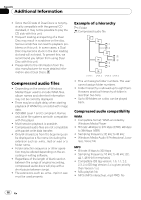
Section 04 Installation DIN Rear-mount 1 Extend top and bottom of the trim ring outwards to remove the trim ring. (When reattaching the trim ring, point the side with a groove downwards and attach it.) Fastening the front panel (DEH-2000MP) If you do not plan to detach the front panel, the front panel can be fastened with supplied screw. Trim ring ! It becomes easy to remove the trim ring if the front panel is released. 2 Determine the appropriate position where the holes on the bracket and the side of the unit match. Screw 3 Tighten two screws on each side. Screw Mounting bracket Dashboard or console ! Use either truss screws (5 mm × 8 mm) or flush surface screws (5 mm × 9 mm), depending on the shape of screw holes in the bracket. 16 En
-
 1
1 -
2
-
3
-
4
-
5
-
6
-
7
-
8
-
9
-
10
-
 11
11 -
 12
12 -
 13
13 -
 14
14 -
 15
15 -
 16
16 -
 17
17 -
 18
18 -
 19
19 -
 20
20 -
 21
21 -
22
-
23
-
24
-
25
-
26
-
27
-
28
-
29
-
30
-
31
-
32
-
33
-
34
-
35
-
36
-
37
-
38
-
39
-
40
-
41
-
42
-
43
-
44
-
45
-
46
-
47
-
48
-
49
-
50
-
51
-
52
-
53
-
54
-
55
-
56
-
57
-
58
-
59
-
60
-
61
-
62
 |
 |
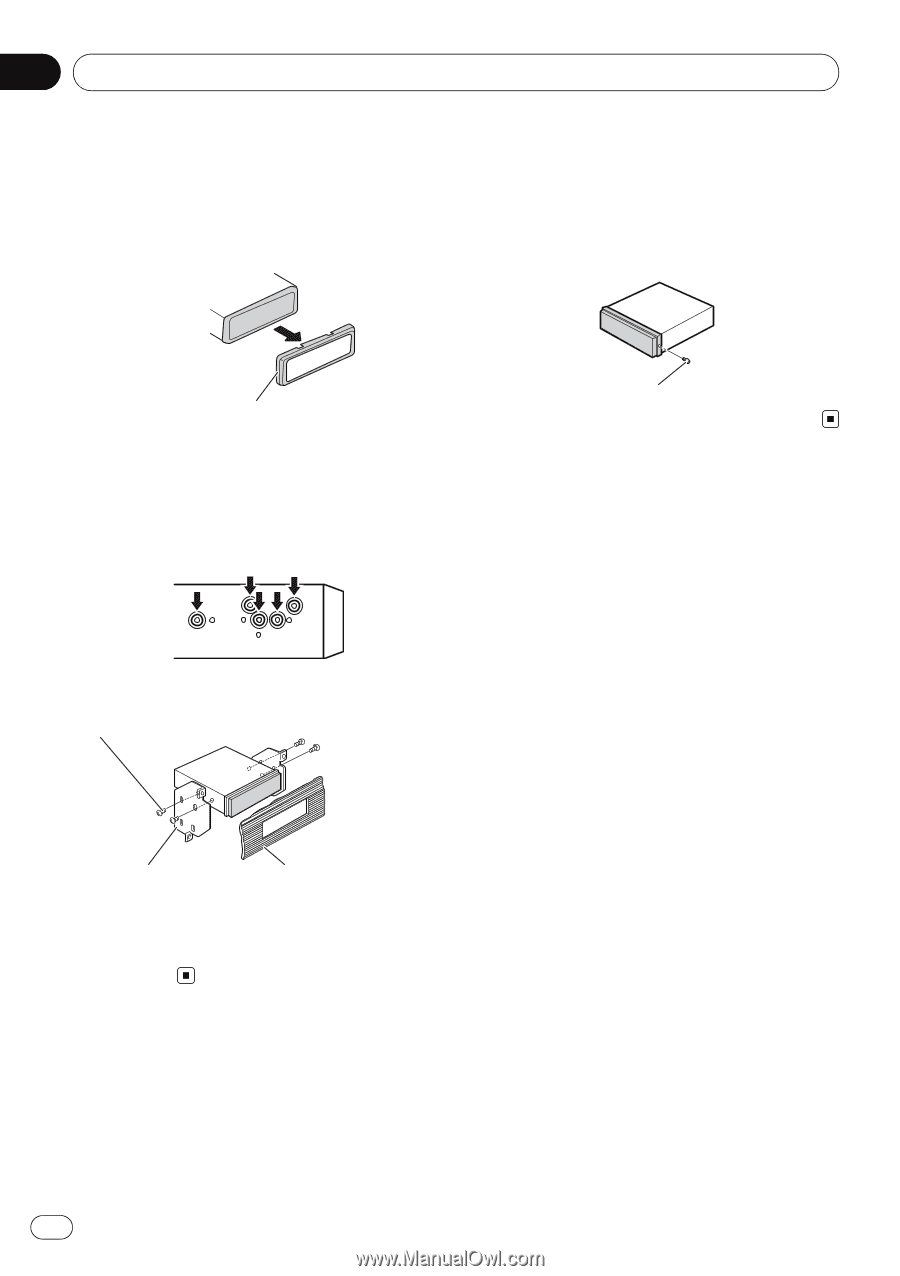
DIN Rear-mount
1
Extend top and bottom of the trim ring
outwards to remove the trim ring. (When
reattaching the trim ring, point the side
with a groove downwards and attach it.)
Trim ring
!
It becomes easy to remove the trim ring if
the front panel is released.
2
Determine the appropriate position
where the holes on the bracket and the
side of the unit match.
3
Tighten two screws on each side.
Screw
Mounting bracket
Dashboard or console
!
Use either truss screws (5 mm × 8 mm) or
flush surface screws (5 mm × 9 mm), de-
pending on the shape of screw holes in the
bracket.
Fastening the front panel
(DEH-2000MP)
If you do not plan to detach the front panel,
the front panel can be fastened with supplied
screw.
Screw
Installation
En
16
Section
04