Pioneer DEH-P600UB Owner's Manual - Page 32
Switching the sound, muting/attenuation, Setting the internal power, amplifier, Switching
 |
UPC - 012562883588
View all Pioneer DEH-P600UB manuals
Add to My Manuals
Save this manual to your list of manuals |
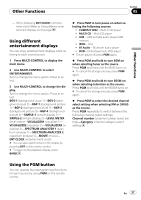
Page 32 highlights
Section 04 Initial Settings # When a subwoofer is connected to the rear output, set for subwoofer Rear SP :S/W. Notes ! Even if you change this setting, there is no output unless you turn the subwoofer output on (refer to Using subwoofer output on page 27). ! If you change this setting, subwoofer output in the audio menu return to the factory settings. ! Both rear speaker lead outputs and RCA rear output are switched simultaneously in this setting. Switching the sound muting/attenuation Sound from this system is muted or attenuated automatically when the signal from the equipment with mute function is received. ! The sound is muted or attenuated, MUTE or ATT are displayed and no audio adjustment is possible. ! Sound from this system returns to normal when the muting or attenuation is canceled. ! For this function, verify the topic Adjusting initial settings before initiating the operation. 1 Display the intial setting menu. 2 Use MULTI-CONTROL to select Mute. 3 Press MULTI-CONTROL to switch the telephone muting/attenuation. Pressing MULTI-CONTROL will switch between TEL ATT (attenuation) and TEL mute (muting) and that status will be displayed. Setting the internal power amplifier This unit features high power amplifier. However, in particular system, external amplifiers are used instead of internal amplifier. If you use external amplifiers in order to establish a multi-amp system, and don't use internal amplifier, it is recommended to turn off the internal amplifier. Turning off internal amplifier reduces the noise that comes from the behavior of internal amplifier. ! For this function, verify the topic Adjusting initial settings before initiating the operation. 1 Display the intial setting menu. 2 Use MULTI-CONTROL to select Built-in AMP. 3 Press MULTI-CONTROL to turn the internal power amplifier on. # To turn the internal power amplifier off, press MULTI-CONTROL again. Switching the feature demo The feature demo automatically starts when power to this unit is turned off while the ignition switch is set to ACC or ON. ! For this function, verify the topic Adjusting initial settings before initiating the operation. 1 Display the intial setting menu. 2 Use MULTI-CONTROL to select Demonstration. 3 Press MULTI-CONTROL to turn the feature demo on. # To turn the feature demo off, press MULTI-CONTROL again. 32 En
-
 1
1 -
2
-
3
-
4
-
5
-
6
-
7
-
8
-
9
-
10
-
11
-
12
-
13
-
14
-
15
-
16
-
17
-
18
-
19
-
20
-
21
-
22
-
23
-
24
-
25
-
26
-
 27
27 -
 28
28 -
 29
29 -
 30
30 -
 31
31 -
 32
32 -
 33
33 -
 34
34 -
 35
35 -
 36
36 -
 37
37 -
38
-
39
-
40
-
41
-
42
-
43
-
44
-
45
-
46
-
47
-
48
-
49
-
50
-
51
-
52
-
53
-
54
-
55
-
56
-
57
-
58
-
59
-
60
-
61
-
62
-
63
-
64
-
65
-
66
-
67
-
68
-
69
-
70
-
71
 |
 |
