Pioneer DV-440 Owner's Manual - Page 25
Changing to the Setup Screen, Expert, Menu Mode
 |
View all Pioneer DV-440 manuals
Add to My Manuals
Save this manual to your list of manuals |
Page 25 highlights
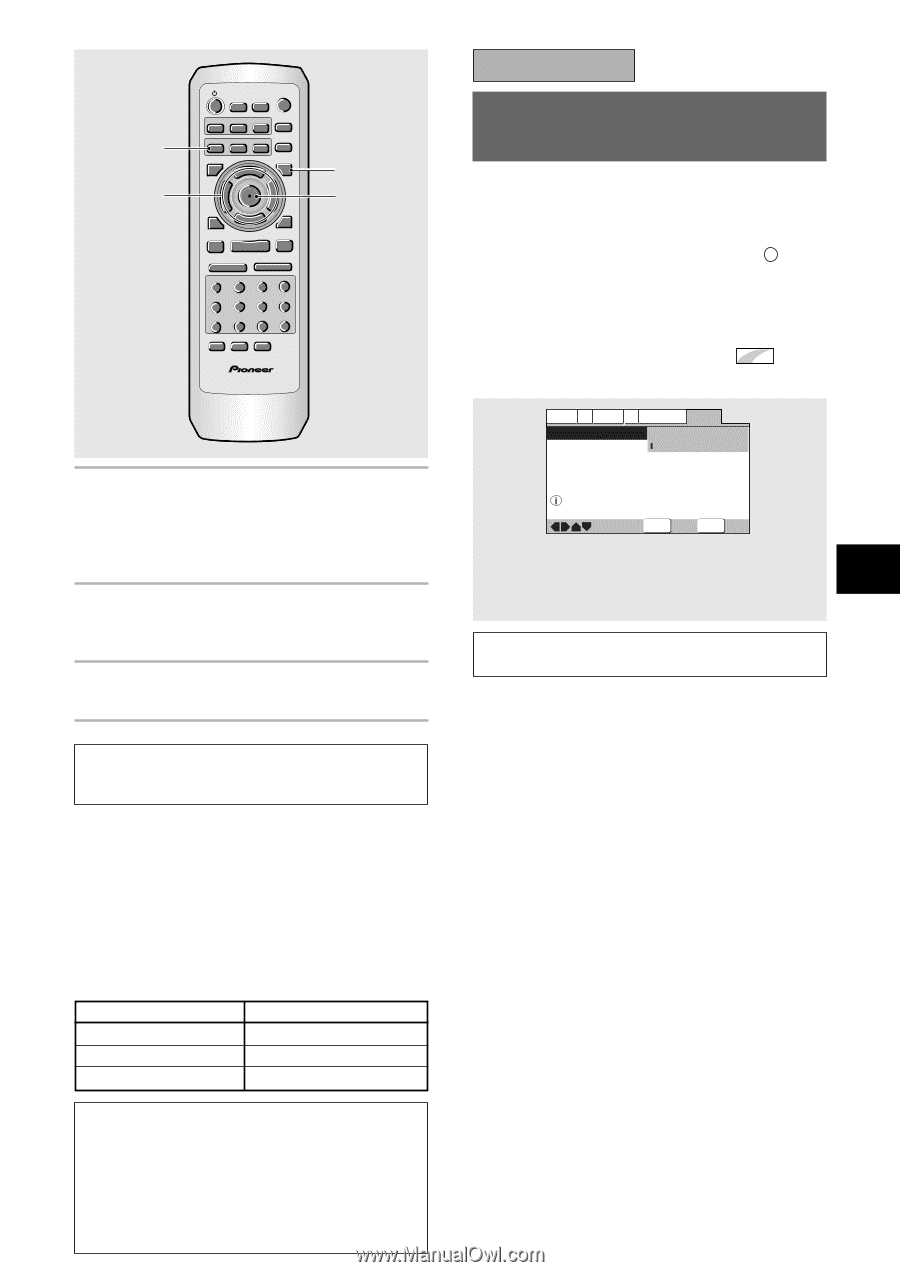
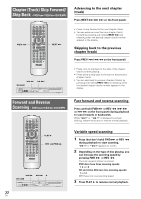
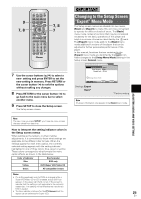
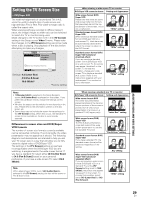
ADJUSTING AUDIO AND VIDEO SETTINGS 5 5 9 7, 8 OPEN/ LAST CONDITION CLOSE MEMORY MEMORY AUDIO SUB TITLE ANGLE REPEAT SETUP REPEAT MENU TOP MENU A-B DISPLAY RETURN ¶ 5 ¶ ENTER 2 3 PREV 4 ¶ ∞ 5 NEXT ¢ ¶ STOP 7 PLAY 3 ¶ PAUSE 8 eSTEP/SLOWE 1REV FWD ¡ 1 2 3 CLEAR 4 5 6 +10 ¶ 7 8 9 0 RANDOM PROGRAM SEARCH MODE Î 7, 8 7 7 Use the cursor buttons (5/∞) to select a new setting and press ENTER to set the new setting in memory. Press RETURN or the cursor button (2) to exit the options without making any changes. 8 Press RETURN or the cursor button (2) to go back to the main menu bar to select another menu. 9 Press SETUP to close the Setup screen. The Setup screen closes. IMPORTANT Changing to the Setup Screen "Expert" Menu Mode The Setup screen menus are divided into two levels, [Basic] and [Expert], to make this unit more convenient to operate for different levels of users. The [Basic] menu mode contains functions that may be considered necessary for the basic operations of this player and helpful on-screen information identified by the i mark. The [Expert] menu mode adds to the [Basic] menu mode additional functions of the player that can be adjusted to further personalize performance of the player. In this manual, functions that are contained in the [Expert] menu mode are identified by the Expert icon. Make changes to the [Setup Menu Mode] setting in the Setup screen General menu. Audio1 A2 Video1 V2 Language General Setup Menu Mode - Expert Setup Navigator Basic Parental Lock - Off (us) Change menu mode Move ENTER Select SETUP Exit Settings: Expert Basic* *Factory setting Note On-screen information only appears in the [Basic] menu mode. . Note The next time you press SETUP, you'll see the menu screen that you exited from last time. How to interpret the setting indicator colors in the Setup screen menus When setting up the system, or when making adjustments, it is convenient to know what settings are applicable to the different disc formats. When the settings appear for each menu option, the currently selected setting appears with the setting indicator highlighted in one of three colors: blue, green or yellow. These colors correspond to what formats the menu option effects as shown in the table below. Color of indicator Blue Disc format(s) DVD only Yellow DVD/Super VCD/Video CD Green All compatible formats Notes • If a setting applicable only to DVDs is changed while a Super VCD/Video CD or CD is loaded, a blue DVD icon appears in the upper right hand corner of the screen to indicate that the setting is not applicable to the currently loaded disc. The setting will be effective the next time a DVD is loaded. • The blue indicator is shown for the [TV Screen], but the aspect can be switched for Super VCD. 25 En
-
 1
1 -
2
-
3
-
4
-
5
-
6
-
7
-
8
-
9
-
10
-
11
-
12
-
13
-
14
-
15
-
16
-
17
-
18
-
19
-
 20
20 -
 21
21 -
 22
22 -
 23
23 -
 24
24 -
 25
25 -
 26
26 -
 27
27 -
 28
28 -
 29
29 -
 30
30 -
31
-
32
-
33
-
34
-
35
-
36
-
37
-
38
-
39
-
40
-
41
-
42
-
43
-
44
-
45
-
46
-
47
-
48
-
49
-
50
-
51
-
52
-
53
-
54
-
55
-
56
-
57
-
58
-
59
-
60
-
61
-
62
-
63
-
64
 |
 |