Pioneer PDP-427CMX User Manual - Page 22
Power cord connection, Attaching the ferrite cores - accessories
 |
View all Pioneer PDP-427CMX manuals
Add to My Manuals
Save this manual to your list of manuals |
Page 22 highlights
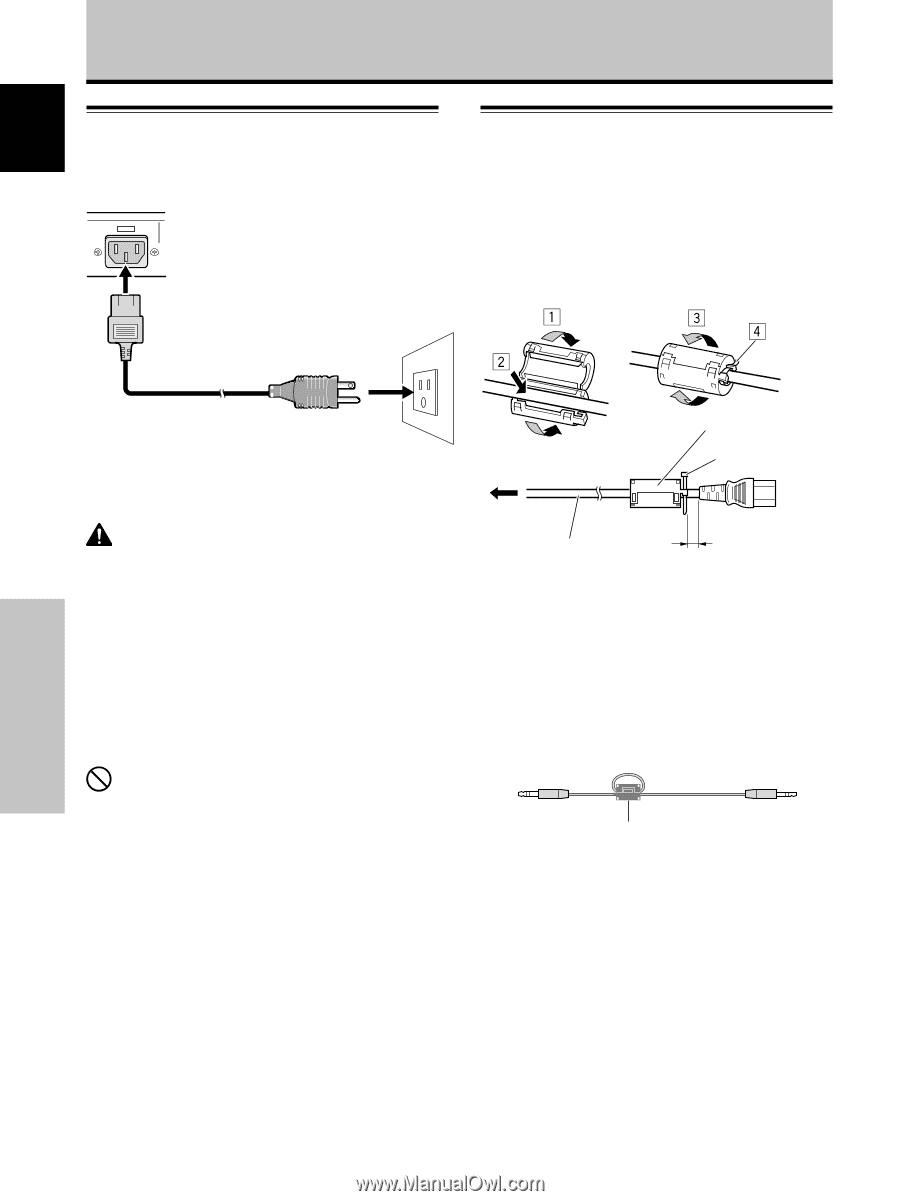
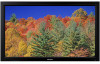
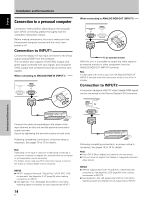
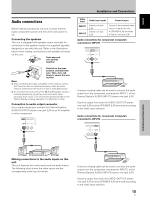
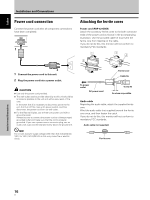
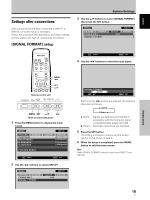
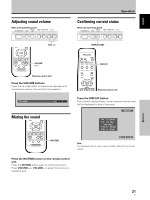
English Installation and Connections Power cord connection Connect the power cord after all component connections have been completed. AC IN 1 Attaching the ferrite cores Power cord (PDP-427CMX) Attach the accessory ferrite cores to the both connector ends of the power cord as shown in the accompanying illustration. Use the provided cable tie to prevent the ferrite core from slipping on the cable. If you do not do this, this monitor will not conform to mandatory FCC standards. 2 1 Connect the power cord to this unit. 2 Plug the power cord into a power outlet. CAUTION ÷ Use only the power cord provided. ÷ The wall outlet used to provide electricity to this unit should be as close as possible to the unit and within easy reach of the user. In the event that it is necessary to disconnect power to the unit, first turn off the main unit's power switch, and then disconnect the power cord from its wall outlet. ÷ For the Plasma Display, use a three-core power cord with a ground terminal. Always be sure to connect the power cord to a three-pronged grounded outlet and make sure that the cord is properly grounded. If you use a power source converter plug, use an outlet with a ground terminal and screw down the ground line. NO! Do not use a power supply voltage other than that indicated (AC 100 V to 120 V, 50 Hz/60 Hz) as this may cause fire or electric shock. Ferrite core Cable tie To power outlet AC power cord To AC IN As close as possible Audio cable Regarding the audio cable, attach the supplied ferrite core. Wind the audio cable (not supplied) around the ferrite core once, and then fasten the catch. If you do not do this, this monitor will not conform to mandatory FCC standards. Audio cable (not supplied) Ferrite core Installation and Connections 16 En
-
 1
1 -
2
-
3
-
4
-
5
-
6
-
7
-
8
-
9
-
10
-
11
-
12
-
13
-
14
-
15
-
16
-
 17
17 -
 18
18 -
 19
19 -
 20
20 -
 21
21 -
 22
22 -
 23
23 -
 24
24 -
 25
25 -
 26
26 -
 27
27 -
28
-
29
-
30
-
31
-
32
-
33
-
34
-
35
-
36
-
37
-
38
-
39
-
40
-
41
-
42
-
43
-
44
-
45
-
46
-
47
-
48
-
49
-
50
-
51
-
52
-
53
-
54
-
55
-
56
-
57
-
58
-
59
-
60
-
61
-
62
-
63
-
64
-
65
-
66
-
67
-
68
-
69
-
70
-
71
-
72
-
73
-
74
-
75
-
76
-
77
-
78
-
79
-
80
-
81
-
82
-
83
-
84
-
85
-
86
-
87
-
88
-
89
-
90
-
91
-
92
-
93
-
94
-
95
-
96
-
97
-
98
-
99
-
100
-
101
-
102
-
103
-
104
-
105
-
106
-
107
-
108
-
109
-
110
-
111
-
112
-
113
-
114
-
115
-
116
-
117
-
118
-
119
-
120
-
121
-
122
-
123
-
124
-
125
-
126
-
127
-
128
-
129
-
130
-
131
-
132
-
133
-
134
-
135
-
136
-
137
-
138
-
139
-
140
-
141
-
142
-
143
-
144
-
145
-
146
-
147
-
148
-
149
-
150
-
151
-
152
-
153
-
154
-
155
-
156
-
157
-
158
-
159
-
160
-
161
-
162
-
163
-
164
 |
 |