Pioneer VSX-819H-K Owner's Manual - Page 58
Other connections - iphone
 |
UPC - 012562946702
View all Pioneer VSX-819H-K manuals
Add to My Manuals
Save this manual to your list of manuals |
Page 58 highlights
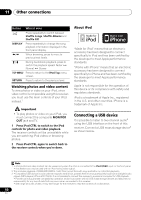
11 Other connections Chapter 11: Other connections Caution USB iPod VIDEO INPUT VIDEO L AUDIO R • Before making or changing the connections, switch off the power and disconnect the power cord from the power outlet. Plugging in components should be the last PRESET - PRESET + ENTER connection you make with your system. SPEAKERS MULTI-ZONE CONTROL ON/OFF MASTER VOLUME • Do not allow any contact between speaker wires from different terminals. USB iPod VIDEO INPUT VIDEO L AUDIO R MCACC SETUP MIC Connecting an iPod This receiver has a dedicated iPod terminal that will allow you to control playback of audio content from your iPod using the controls of this receiver.1 • Push down on the PUSH OPEN tab to access the iPod terminal. iPod cable This receiver Music Genius > Playlists Artists Albums Songs Radio Genres Composers Audiobooks MENU iPod Connecting your iPod to the receiver 1 Set this receiver to the standby mode, and then use the iPod cable to connect your iPod to the iPod terminal on the front panel of this receiver. For the cable connection, refer to also the operating instructions for iPod. Note 1 • This system is compatible with the audio and the video of the iPod nano, iPod (fifth generation), iPod classic, iPod touch and iPhone (iPod shuffle not supported). However, that some of the functions may be restricted for some models. Note, however, compatibility may vary depending on the software version of your iPod and iPhone. Please be sure to use the latest available software version. • iPod and iPhone are licensed for reproduction of non-copyrighted materials or materials the user is legally permitted to reproduce. • Features such as the equalizer cannot be controlled using this receiver, and we recommend switching the equalizer off before connecting. • Pioneer cannot under any circumstances accept responsibility for any direct or indirect loss arising from any inconvenience or loss of recorded material resulting from the iPod failure. 58 En
-
 1
1 -
2
-
3
-
4
-
5
-
6
-
7
-
8
-
9
-
10
-
11
-
12
-
13
-
14
-
15
-
16
-
17
-
18
-
19
-
20
-
21
-
22
-
23
-
24
-
25
-
26
-
27
-
28
-
29
-
30
-
31
-
32
-
33
-
34
-
35
-
36
-
37
-
38
-
39
-
40
-
41
-
42
-
43
-
44
-
45
-
46
-
47
-
48
-
49
-
50
-
51
-
52
-
 53
53 -
 54
54 -
 55
55 -
 56
56 -
 57
57 -
 58
58 -
 59
59 -
 60
60 -
 61
61 -
 62
62 -
 63
63 -
64
-
65
-
66
-
67
-
68
-
69
-
70
-
71
-
72
-
73
-
74
-
75
-
76
-
77
-
78
-
79
-
80
-
81
-
82
-
83
-
84
-
85
-
86
-
87
-
88
-
89
-
90
-
91
-
92
-
93
-
94
-
95
-
96
-
97
-
98
-
99
-
100
-
101
-
102
-
103
-
104
-
105
-
106
-
107
-
108
-
109
-
110
-
111
-
112
-
113
-
114
-
115
-
116
-
117
-
118
-
119
-
120
-
121
-
122
-
123
-
124
-
125
-
126
-
127
-
128
-
129
-
130
-
131
-
132
-
133
-
134
-
135
-
136
-
137
-
138
-
139
-
140
-
141
-
142
-
143
-
144
-
145
-
146
-
147
-
148
-
149
-
150
-
151
-
152
-
153
-
154
-
155
-
156
-
157
-
158
-
159
-
160
-
161
-
162
-
163
-
164
-
165
-
166
-
167
-
168
-
169
-
170
-
171
-
172
-
173
-
174
-
175
-
176
-
177
-
178
-
179
-
180
-
181
-
182
-
183
-
184
-
185
-
186
-
187
-
188
-
189
-
190
-
191
-
192
-
193
-
194
-
195
-
196
-
197
-
198
-
199
-
200
-
201
-
202
-
203
-
204
-
205
-
206
-
207
-
208
-
209
-
210
-
211
-
212
-
213
 |
 |
