ProForm C90 English Manual - Page 15
Start/stop
 |
View all ProForm C90 manuals
Add to My Manuals
Save this manual to your list of manuals |
Page 15 highlights
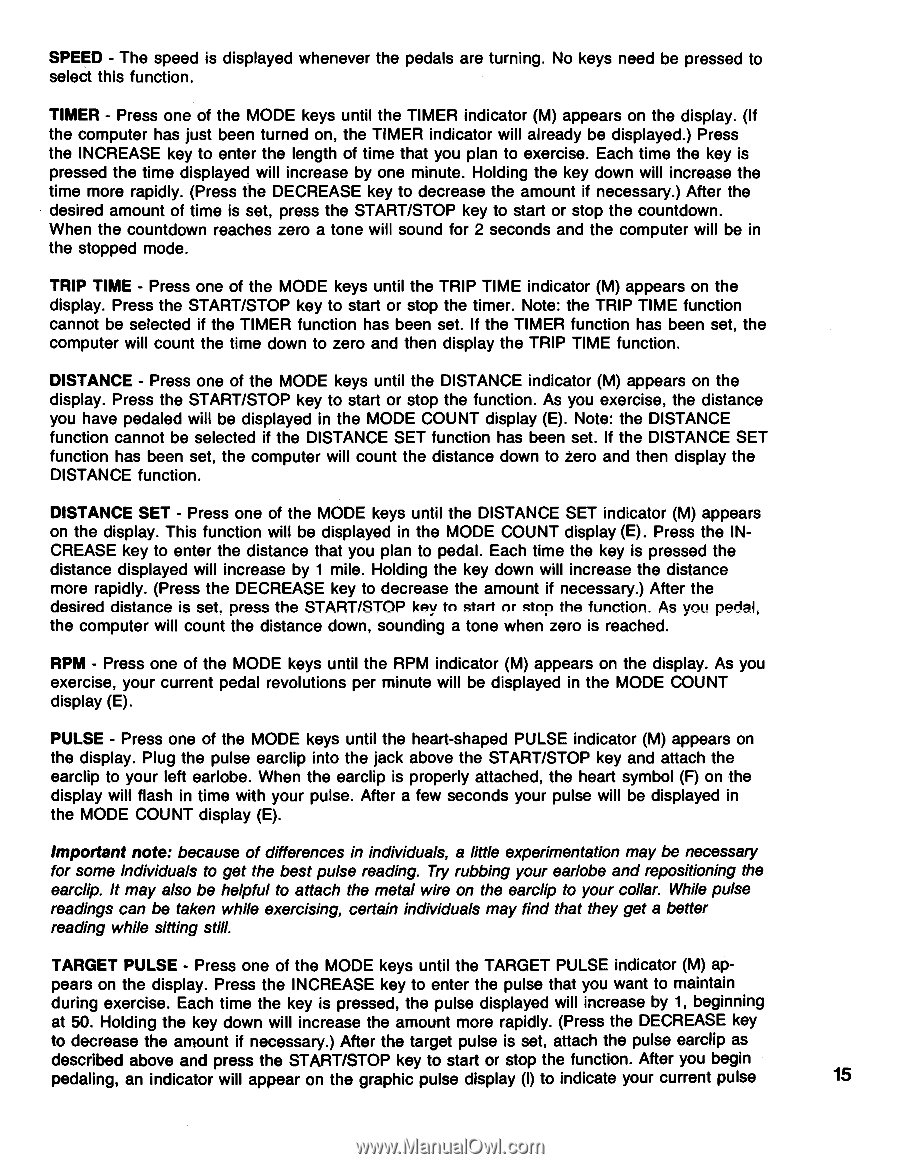
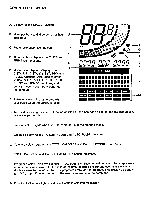
SPEED - The speed is displayed whenever the pedals are turning. No keys need be pressed to select this function. TIMER - Press one of the MODE keys until the TIMER indicator (M) appears on the display. (If the computer has just been turned on, the TIMER indicator will already be displayed.) Press the INCREASE key to enter the length of time that you plan to exercise. Each time the key is pressed the time displayed will increase by one minute. Holding the key down will increase the time more rapidly. (Press the DECREASE key to decrease the amount if necessary.) After the desired amount of time is set, press the START/STOP key to start or stop the countdown. When the countdown reaches zero a tone will sound for 2 seconds and the computer will be in the stopped mode. TRIP TIME - Press one of the MODE keys until the TRIP TIME indicator (M) appears on the display. Press the START/STOP key to start or stop the timer. Note: the TRIP TIME function cannot be selected if the TIMER function has been set. If the TIMER function has been set, the computer will count the time down to zero and then display the TRIP TIME function. DISTANCE - Press one of the MODE keys until the DISTANCE indicator (M) appears on the display. Press the START/STOP key to start or stop the function. As you exercise, the distance you have pedaled will be displayed in the MODE COUNT display (E). Note: the DISTANCE function cannot be selected if the DISTANCE SET function has been set. If the DISTANCE SET function has been set, the computer will count the distance down to zero and then display the DISTANCE function. DISTANCE SET - Press one of the MODE keys until the DISTANCE SET indicator (M) appears on the display. This function will be displayed in the MODE COUNT display (E). Press the INCREASE key to enter the distance that you plan to pedal. Each time the key is pressed the distance displayed will increase by 1 mile. Holding the key down will increase the distance more rapidly. (Press the DECREASE key to decrease the amount if necessary.) After the desired distance is set, press the START/STOP key to start or stop the function. As you pedal, the computer will count the distance down, sounding a tone when zero is reached. RPM - Press one of the MODE keys until the RPM indicator (M) appears on the display. As you exercise, your current pedal revolutions per minute will be displayed in the MODE COUNT display (E). PULSE - Press one of the MODE keys until the heart-shaped PULSE indicator (M) appears on the display. Plug the pulse earclip into the jack above the START/STOP key and attach the earclip to your left earlobe. When the earclip is properly attached, the heart symbol (F) on the display will flash in time with your pulse. After a few seconds your pulse will be displayed in the MODE COUNT display (E). Important note: because of differences in individuals, a little experimentation may be necessary for some individuals to get the best pulse reading. Try rubbing your earlobe and repositioning the earclip. It may also be helpful to attach the metal wire on the earclip to your collar. While pulse readings can be taken while exercising, certain individuals may find that they get a better reading while sitting still. TARGET PULSE - Press one of the MODE keys until the TARGET PULSE indicator (M) ap- pears on the display. Press the INCREASE key to enter the pulse that you want to maintain during exercise. Each time the key is pressed, the pulse displayed will increase by 1, beginning at 50. Holding the key down will increase the amount more rapidly. (Press the DECREASE key to decrease the amount if necessary.) After the target pulse is set, attach the pulse earclip as described above and press the START/STOP key to start or stop the function. After you begin pedaling, an indicator will appear on the graphic pulse display (I) to indicate your current pulse 15
-
 1
1 -
2
-
3
-
4
-
5
-
6
-
7
-
8
-
9
-
 10
10 -
 11
11 -
 12
12 -
 13
13 -
 14
14 -
 15
15 -
 16
16 -
 17
17 -
 18
18 -
 19
19 -
 20
20
 |
 |