ProForm R950 Space Saver English Manual - Page 4
Assembly
 |
View all ProForm R950 Space Saver manuals
Add to My Manuals
Save this manual to your list of manuals |
Page 4 highlights
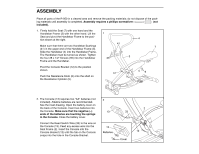
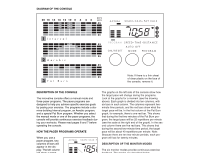
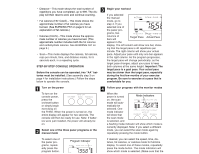
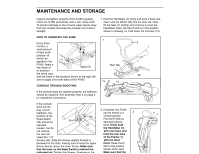
ASSEMBLY Place all parts of the R-950 in a cleared area and remove the packing materials; do not dispose of the pack- ing materials until assembly is completed. Assembly requires a phillips screwdriver (not included). 1. Firmly hold the Seat (7) with one hand and the Handlebar Frame (3) with the other hand. Lift the 1 Seat and pivot the Handlebar Frame to the position shown at the right. 4 41 Make sure that there are two Handlebar Bushings 7 (41) in the upper end of the Handlebar Frame (3). Slide the Handlebar (4) into the Handlebar Frame. The Handlebar must be turned as shown. Tighten the four #8 x 1/2Ó Screws (35) into the Handlebar 35 3 Frame and the Handlebar. Pivot the Console Bracket (12) to the position shown. 12 Push the Resistance Knob (6) onto the shaft on the Resistance Cylinder (5). 56 2. The Console (13) requires two ÒAAÓ batteries (not included). Alkaline batteries are recommended. See the inset drawing. Open the battery cover on the back of the Console. Insert two batteries into the Console. Make sure that the negative (Ð) ends of the batteries are touching the springs in the Console. Close the battery cover. Connect the Reed Switch Wire (33) to the wire on the Console (13). Feed any excess wire into the Seat Frame (2). Insert the Console into the Console Bracket (12) until the tab on the Console snaps into the hole in the Console Bracket. 2 13 13 Batteries 33 Cover 2 12
-
 1
1 -
 2
2 -
 3
3 -
 4
4 -
 5
5 -
 6
6 -
 7
7 -
 8
8 -
 9
9 -
 10
10 -
11
-
12
 |
 |
