RCA 25415RE3 User's Guide - Page 20
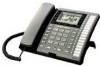
Pm 12/25, 00total Calls, Newcalls, 01john, John Smith, Incoming Call, L1: 1-317-123-4567, L3: 555
 |
UPC - 044319400595
View all RCA 25415RE3 manuals
Add to My Manuals
Save this manual to your list of manuals |
Page 20 highlights
Caller ID Paging All Stations 1. Lift the handset. 2. Press the PAGE button and listen for the beep. The other stations not in use automatically activate their speakerphones and receive your page. 3. Speak into the handset. You have 30 seconds to page in this mode. After 30 seconds, the page is cancelled. 4. When finished, hang up the handset. NOTE: You will not receive a page when Do Not Disturb is turned on. NOTE: Paging can be done with optional headset. plug in headset, press HEADSET button, the press PAGE button Caller ID Summary Screen The summary screen shows the current time, current date, number of CID records to be reviewed and total number of records saved to CID memory. It is displayed until any button is pressed. Within 60 seconds of receiving a new call, the new caller information is displayed. Phone ID Battery indicator Time and date (01)JOHN Name of phone 00 NEWCALLS 00Total CALLS ANS OFF CID records waiting to be reviewed 12:34 PM 12/25 SUN Number of records in CID memory Receiving and Storing CID Records This unit receives and displays information transmitted by your local phone company. This information can include the phone number, date and time; or the name, phone number, date and time. The unit can store up to 99 calls for later review. When the memory is full, a new call automatically replaces the oldest call in memory. NEW appears in the display for calls received that have not been reviewed. The line number for the call received is also displayed. In case multiple incoming calls come in at the same time, the CID information is displayed according to the unit's priority line setting. Example: the priority line is 3. INCOMING CALL L1 JOHN SMITH 1-317- 123-4567 12:34 PM 12/25 L3: 555-1234 L1 L1: 1-317-123-4567 L2: L4: Reviewing CID Records • Press the < REVIEW > button to scroll through the call records. NOTE: If you press the > button, the oldest record shows in the display. If you press the < button, the most recent record shows in the display. • When you scroll to the start/end of the list, START/END appears in the display. Saving a CID Record to the Intercom/Memory Log or to Phone Book Memory 1. While a name and telephone number shows in the display, if you need to edit the information, press the SELECT/SAVE button and follow the steps for Storing a Name and Number in Memory. 2. If you do not need to edit the name or number, press the STORE button. 3. To store data in the Phone Book Directory, press the DIRECTORY button, OR To store data in the Intercom/Memory Log, press a memory log button (1-16). CID REVIEW L1 JOHN SMITH 1-317-123-4567 12:34 PM 12/25 Deleting a CID Record To delete the record shown in the display, press the DELETE button once. NEW Deleting All Call Records This feature allows you to clear all CID records at once. 1. While viewing a CID record, press and hold the DELETE button. PRESS DELETE AGAIN CLEAR ALL CALLER ID shows in the display. 2. Press the DELETE button again to confirm. 20
-
 1
1 -
2
-
3
-
4
-
5
-
6
-
7
-
8
-
9
-
10
-
11
-
12
-
13
-
14
-
 15
15 -
 16
16 -
 17
17 -
 18
18 -
 19
19 -
 20
20 -
 21
21 -
 22
22 -
 23
23 -
 24
24 -
 25
25 -
26
-
27
-
28
-
29
-
30
-
31
-
32
 |
 |
