RCA EZDVD1BD User Manual - EZDVD2BD - Page 6
Recording from Small Wonder camcorder, Watching images from connected devices, Display - digital camcorder
 |
View all RCA EZDVD1BD manuals
Add to My Manuals
Save this manual to your list of manuals |
Page 6 highlights
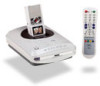
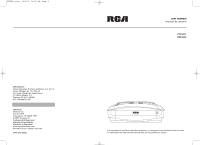
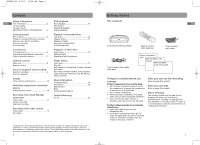
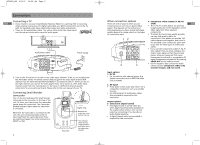
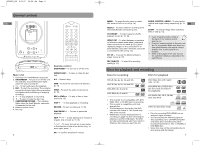
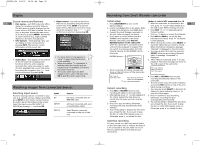
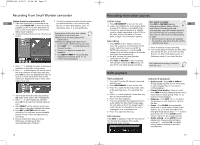
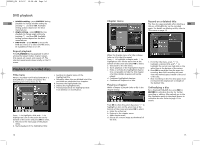
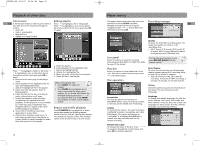
EZDVD1_EN 8/9/07 10:08 AM Page 10 Display Screen menus and banners EN • Disc menus - each DVD video disc offers menus for accessing more disc features. The disc menu is usually displayed on the screen when a DVD disc is loaded. You can also, at any time, display the main menu of the disc by pressing MENU. Availability of some functions (e.g. angle, subtitle) depend on the disc's manufacturer. • Info banners - while playing a disc, you can display or hide info banners by pressing INFO. The banners contain information of the current disc. • Player menus - the unit has functions that are not accessible using the remote control keys. Press SETUP to access the player menus. Move around in the menus using the navigation keys ( ) and confirm your selections by pressing OK. • Action bars - they appear at the bottom of the TV screen for accessing more functions while the unit is playing recorded discs, mp3, wma, jpeg, or audio CD discs. Highlight the icons in the action bars using the navigation keys ( ) and confirm selections by pressing OK. • If a menu item or icon appears in "grey" it means that the function is not available. • When this symbol is displayed, it indicates that the function you are requesting is not available or that the key used is incorrect. • The screen saver may have been triggered if the unit is left idle, press OK to quit the screen saver mode. Watching images from connected devices Selecting input source To select viewing a device connected to your unit (e.g. satellite receiver, digital camcorder), press INPUT on the remote control to show the action bar at the bottom of the screen. Select the input source (DV, INPUT1 or INPUT2) by pressing / and then OK. Input DV INPUT1 INPUT2 Source DV input connected with an IEEE1394 cable AV input connected with a set of Audio/Video cables Small Wonder camcorder connected on the top of the unit 10 Recording from Small Wonder camcorder Initial setup 1. Press ON/STANDBY to turn on the Memory Maker. 2. Load a recordabale disc in the player. Refer to page 9 for details on recordable discs. 3. Connect the Small Wonder camcoder to the unit. Refer to page 6 for details. • If you want to record videos from the SD/MMC card installed in the Small Wonder camcorder, press the red RECORD button on the camcorder while the camcorder is connected to the unit and video playback is stopped. This can switch to accessing videos from the internal memory to the SD/MMC card or vice versa. RECORD button Option 1: unit is NOT connected to a TV 1. After the camcorder is connected to the EN unit, press to start video playback on the LCD screen. While viewing, you may: • Press SKIP / to skip backward or forward a video. • Press to pause or resume the playback. • Press REV /FWD to quickly play backward or forward. Press to resume normal playback. 2. While viewing the videos, press SELECT to mark the videos that you want to record. When the button is pressed, a message "Marked" is displayed on the LCD screen. • You may de-select the video by pressing SELECT while you are viewing the same video. A message "Unmarked" is displayed. 3. After videos are selected, press to stop playback. The below message will show on the LCD screen of the camcorder: • Once connected, the below message will show on the LCD screen of the camcorder: REC: Copy marked SELECT: Unmark all PLAY: Play videos REC: Copy all PLAY: Play videos The card icon shows if videos on the SD/MMC card are accessed. Instant recording 1. Press REC or RECORD twice to start recording all videos on the camcorder. • Alternatively, press to start playback of the videos. Repeat the step above to record only the video you are currently viewing. 2. Press to stop recording. Otherwise, recording will stop automatically when finished. 3. You will be asked to finalize the disc when you unload the disc. If you want to play the disc on other DVD players, press . Otherwise, press to unload the disc. 4. Press REC or RECORD twice to start recording the selected videos on the camcorder. • The LCD screen turns off and the indicator around the REC button on top of the unit lights during recording. • You may also press SELECT to de-select all videos you have marked or press to view the videos again. 5. Press anytime to stop recording. Otherwise, recording will stop automatically when finished. 6. You will be asked to finalize the disc when you unload the disc. If you want to play the disc on other DVD players, press . Otherwise, press to unload the disc. Selective recording You may record on a disc only desired videos on the camcorder with or without the help of a TV connected to the unit. Refer to one of the two options below according to your connections. 11
-
 1
1 -
 2
2 -
 3
3 -
 4
4 -
 5
5 -
 6
6 -
 7
7 -
 8
8 -
 9
9 -
 10
10 -
 11
11 -
 12
12
 |
 |