RCA EZDVD1BD User Manual - EZDVD2BD - Page 7
Recording from Small Wonder camcorder, Recording from other sources, DVD playback - digital camcorder dvd recorder player
 |
View all RCA EZDVD1BD manuals
Add to My Manuals
Save this manual to your list of manuals |
Page 7 highlights
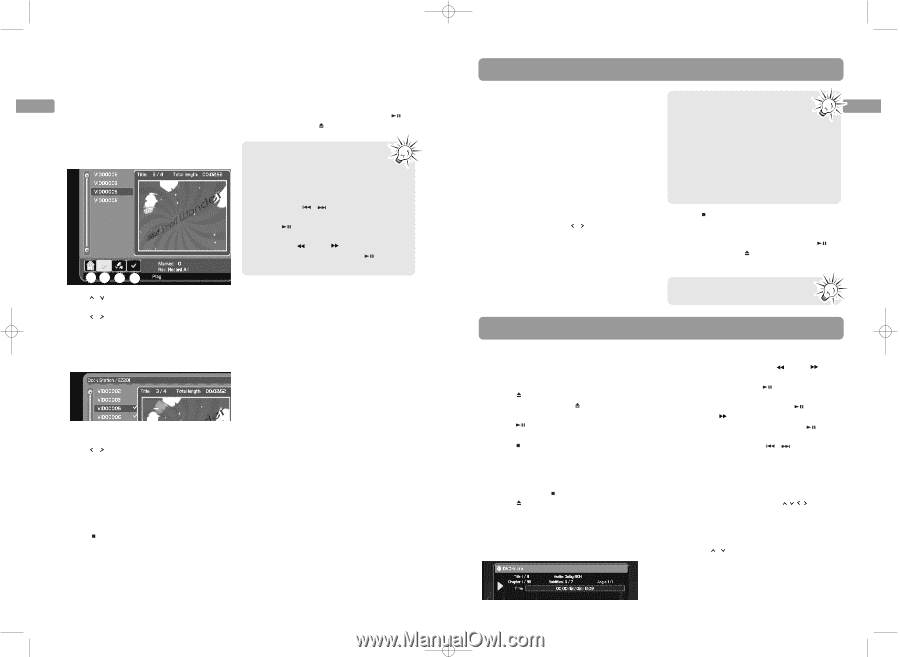
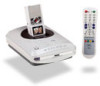
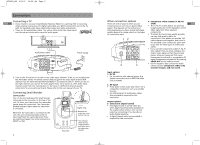
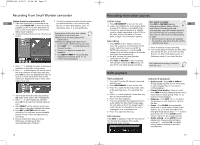
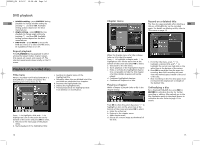
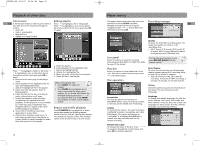
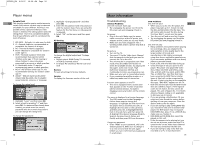
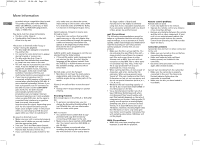
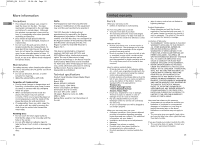
EZDVD1_EN 8/9/07 10:08 AM Page 12 Recording from Small Wonder camcorder Option 2: unit is connected to a TV EN 1. After the camcorder is connected to the unit, press VIDEO OUT to show the video playback on the TV screen. Remember to turn on the TV and tune it to the correct Video Input Channel. 2. A video browser shows on the TV screen as below: abc d 7. You will be asked to finalize the disc when you unload the disc. If you want to play the disc on other DVD players, press . Otherwise, press to unload the disc. Explanation of the other two options (a) and (b) on the action bar: (a) Returns to the main page of the player menu. (b) Plays the highlighted video in full screen mode. While viewing, you may: • Press SKIP / to skip backward or forward a video. • Press to pause or resume the playback. • Press REV /FWD to quickly play backward or forward. Press to resume normal playback. • Press / to highlight a video. A preview is available on the right of the screen. 3. Press / to select option (d) on the action bar at the bottom of the screen and then press OK to select the highlighted video to record. A check mark shows next to the video title. Repeat this step to select more videos to record. • You may de-select the video by pressing OK again while option (d) is highlighted. • Press / to select option (c) and then press OK to de-select all marked videos at once. • Press SELECT on the remote control may also select or de-select highlighted videos. 5. Press REC or RECORD twice to start recording. The indicator around the REC button on top of the unit lights during recording. 6. Press anytime to stop recording. Otherwise, recording will stop automatically when finished. 12 Recording from other sources Initial setup 1. Press ON/STANDBY to turn on the unit. 2. Load a recordabale disc in the player. Refer to page 9 for details on recordable discs. 3. Connect an external device (e.g. satellite receiver, digital camcorder) to the DV IN or AV input jacks on the back of the unit. Refer to page 7 for connection options. Recording 1. Press INPUT on the remote control to show the action bar at the bottom of the screen. Select the input source (DV or INPUT1) by pressing / and then OK. • Images from the external device should be seen from the connected TV. • Do NOT connect the Small Wonder camcorder on the unit. 2. Press REC or RECORD to start recording. The indicator around the REC button on top of the unit lights during recording. One touch recording Press REC or RECORD again to EN select among 30min, 60min, 90min and 120min. Recording will stop automatically after the selected duration. The unit will keep on recording until the disc is full no one touch recording setting is made . • Record duration options are available for selection only when the disc has the sufficient disc space. 3. Press anytime to stop recording. 4. You will be asked to finalize the disc when you unload the disc. If you want to play the disc on other DVD players, press . Otherwise, press to unload the disc. No scheduled recording is available with this unit. DVD playback Basic playback 1. Tune the TV to the AV channel connected with the unit. 2. Press ON/STANDBY to turn on the unit. 3. Press to open the disc tray. Insert a disc in the disc tray. Press to close the disc tray. 4. Press to start playback. Some discs may start to play automatically. 5. Press to stop playback. • The unit remembers the stopped point on a disc. When the disc starts to play again, the unit picks up from the stopped point unless the disc is unloaded or the unit is unplugged, or is pressed twice. 6. Press to open the disc tray. Info banner Press INFO to display or hide the info banner for checking the playback time, audio, subtitle and angle settings. Advanced playback • Quick search - Press REV /FWD during playback (press one or more times to select speed). Press normal playback. to resume • Foward slow motion - Press and then FWD during playback (press one or more times to select speed). Press to resume normal playback. • Skipping - Press SKIP / to skip to the previous or next chapter or track on the disc. • Zoom - Press ZOOM during playback (press one or more times to select zoom options: 2x, 3x, 4x and 1/2x). Move the enlarged image by pressing to see a specific part of it. Press ZOOM several times to return to the original format. • Audio setting - press AUDIO during playback to change audio setting by pressing / and then OK. Available setting options depend on the disc's manufacturer. 13
-
 1
1 -
 2
2 -
 3
3 -
 4
4 -
 5
5 -
 6
6 -
 7
7 -
 8
8 -
 9
9 -
 10
10 -
 11
11 -
 12
12
 |
 |