RCA RT2500 User Guide - Page 13
Using the Receiver to Play DVD or - remote
 |
UPC - 044319902433
View all RCA RT2500 manuals
Add to My Manuals
Save this manual to your list of manuals |
Page 13 highlights
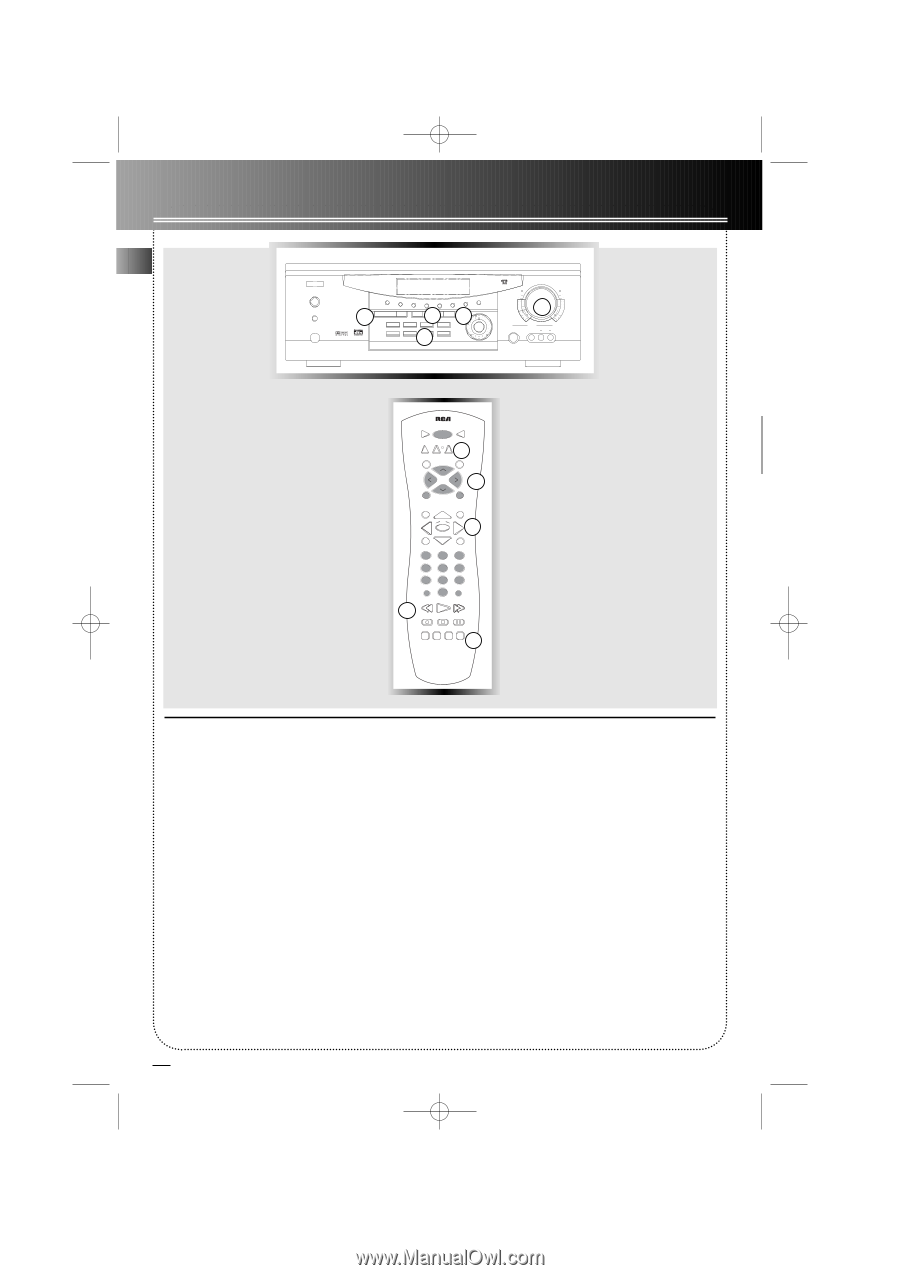
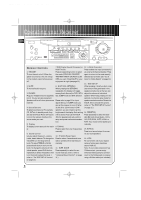
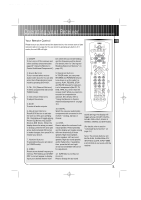
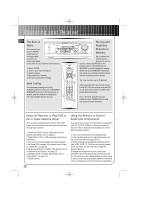
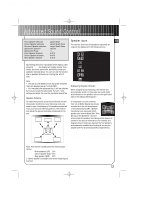
RT2500 ENG 5/26/00 2:56 PM Page 14 Operating your Receiver EN The Built-in Radio STANDBY STADIUM CONCERT THEATER CHURCH ARENA CLUB DSP OFF NIGHT The receiver has built-in AM/FM radio function. MUTE PHONES 2 I I I I TUNING P.SCAN SURR. MODE 5 4 6 CH TEST/SETUP PRESET EQ BYPASS DVD SAT CD FM/ AM HOME THEATER AUDIO VIDEO RECEIVER VCR-1 1TV VCR-2 TAPE SET DEMO MULTI JOG You can simply connect it to power and speak- ers to listen to your favorite radio stations. 1. Select TUNER. 2. Tune to your favorite station. 3. Adjust volume. 4. Set preset EQ if needed 5. Set surround mode if needed. Seek Tuning You can keep pressing one of the TUNING buttons on the unit or REVERSE/ FORWARD buttons on the remote for a second, and the receiver will search for the next available station for you. VCR1 ON OFF TV DVD•6 CH VCR2 AM•FM SAT•CABLE 1 CD TAPE CH + VOL VOL G TY 3 K• DISK MUTE RDM•P CH O BAC INFO•RDS OK 4 GUIDE• MENU 1 2 CLEAR 3 4 5 6 7 8 INPUT•SEEK 0 9 ANT•FMS REVERSE PLAY FORWARD 2 RECORD STOP PAUSE AUDIO DIGITALLEVEL SURR 5 universal Digital Sound Processor VOLUME BASS 3 TREBLE S-VIDEO VCR 2 VIDEO L AUDIO R LEVEL Storing and Recalling Stations in Memory Set to desired frequency by the receiver or remote control , then press MENU on the remote control. The flashing word MEMORY in red will appear in display. While the word MEMORY is still flashing, input your desired channel number and the frequency will be stored. Tip: You can store up to 30 stations. After you have done so, you can rotate the MULTI JOG on receiver or press CH+ or CH- buttons on remote to select the preset stations directly. Note: The CH+ and CH- buttons respond only in TUNER mode in case you want to switch channels. Using the Receiver to Play DVD or CD or Video Cassette Player After you have connected your DVD or CD or VCR player with the receiver, you can partly control them through your receiver: 1. Connect the DVD or CD or VCR player with the receiver. (For details, refer to page 4.) 2. Select DVD or CD or VCR according to the source connected. 3. Turn on the connected player and start playback. 4. Set Preset EQ if needed. (For details, refer to item 11 "Preset EQ" on page 8.) 5. Set Surround Mode if needed. (For details, refer to "Advanced Sound Control" on page 12) 6. Set Night Mode if needed. (For details, refer to "Night Mode" on page 12.) 7. Adjust Volume. Using the Remote to Control Additional Components You can set your remote to control other components (like CD, TV, DVD, TAPE, etc.). What you need is to encode them in advance (not necessary for recent RCA & Proscan models) 1. Turn on the component to be programmed. 2. Look up the brand and corresponding code number in the code list from page 15 to17. 3. While keeping the corresponding Source Button (like VCR1, VCR2, TV, DVD) on the remote pressed, enter the code from the code list through the Number Buttons. 4. Release the component button, then press ON•OFF to see if the component will be turned off. 5. If this does not work, repeat steps 3 and 4 by trying to use the next code (if available) listed for the brand of your component until the component responds to 10
-
 1
1 -
2
-
3
-
4
-
5
-
6
-
7
-
 8
8 -
 9
9 -
 10
10 -
 11
11 -
 12
12 -
 13
13 -
 14
14 -
 15
15 -
 16
16 -
 17
17 -
 18
18 -
19
-
20
-
21
-
22
-
23
 |
 |