RCA RT2600 User Guide - Page 6
Unpacking The Speakers, Inserting Batteries into Remote Control, Set up and Maintenance of
 |
UPC - 044319201284
View all RCA RT2600 manuals
Add to My Manuals
Save this manual to your list of manuals |
Page 6 highlights
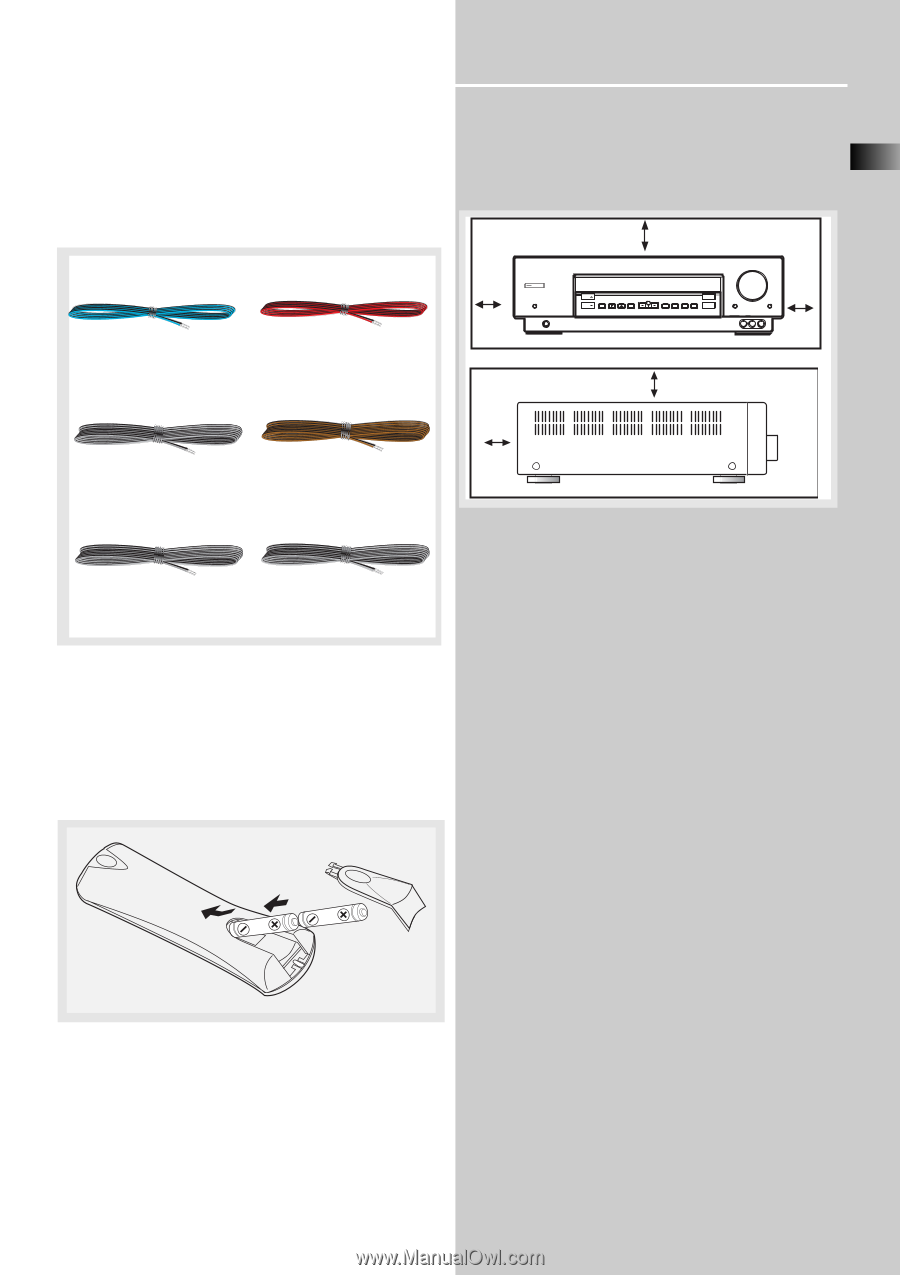
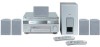
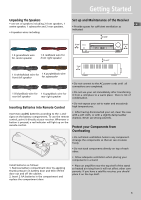
Getting Started Unpacking The Speakers • one set of speakers including 2 front speakers, 1 centre speaker, 1 subwoofer and 2 rear speakers. • 6 speaker wires including: Set up and Maintenance of the Receiver EN • Provide spaces for sufficient ventilation as indicated: 10 cm/4" 10 cm/ 4" ON/STANDBY MUTE PHONES HOME THEATER AUDIO VIDEO RECEIVER SOURCE FM/AM TUNING MEMORY OK SOURCE SETUP TEST TONE EQ DIGITAL INPUT SURR MODE DSP MODE ST / MONO VOLUME BASS/TREBLE LEVEL V-AUX VIDEO L - AUDIO - R 10 cm/ 4" 1 X green/black wire for center speaker 1 X red/black wire for front right speaker 10 cm/4" 5 cm/ 2" 1 X white/black wire for 1 X purple/black wire front left speaker for subwoofer • Do not connect to the AC power cords until all connections are completed. 1 X blue/black wire for 1 X gray/black wire for rear left speaker rear right speaker • Do not use your set immediately after transferring it from a cold place to a warm place: there is risk of condensation. Inserting Batteries into Remote Control Insert two AA(R6) batteries according to the + and signs on the battery compartment. To use the remote control, point it directly at your receiver. Whenever a button is pressed, a red indicator will light up on the remote control. • Do not expose your set to water and excessively high temperatures. • After having disconnected your set, clean the case with a soft cloth, or with a slightly damp leather chamois. Never use strong solvents. Protect your Components from Overheating Install batteries as follows: 1. Remove battery compartment door by applying thumb pressure on battery door and then lift the door out and off the cabinet. 2. Insert 2 AA batteries in the compartment and replace the compartment door. • Do not block ventilation holes in any component. Arrange the components so that air can circulate freely. • Do not stack components directly on top of each other. • Allow adequate ventilation when placing your components in a stand. • Place an amplifier near the top shelf of the stand so heated air rising from it will not affect other components. If you have a satellite receiver, you should place it on the top shelf. 3
-
 1
1 -
 2
2 -
 3
3 -
 4
4 -
 5
5 -
 6
6 -
 7
7 -
 8
8 -
 9
9 -
 10
10 -
 11
11 -
 12
12 -
13
-
14
-
15
-
16
-
17
-
18
-
19
-
20
-
21
-
22
-
23
-
24
-
25
-
26
-
27
-
28
-
29
-
30
-
31
 |
 |