RCA SPS36123 SPS36123 Product Manual - Page 16
Setting The Clock, Setting The Cooking Timer
 |
View all RCA SPS36123 manuals
Add to My Manuals
Save this manual to your list of manuals |
Page 16 highlights
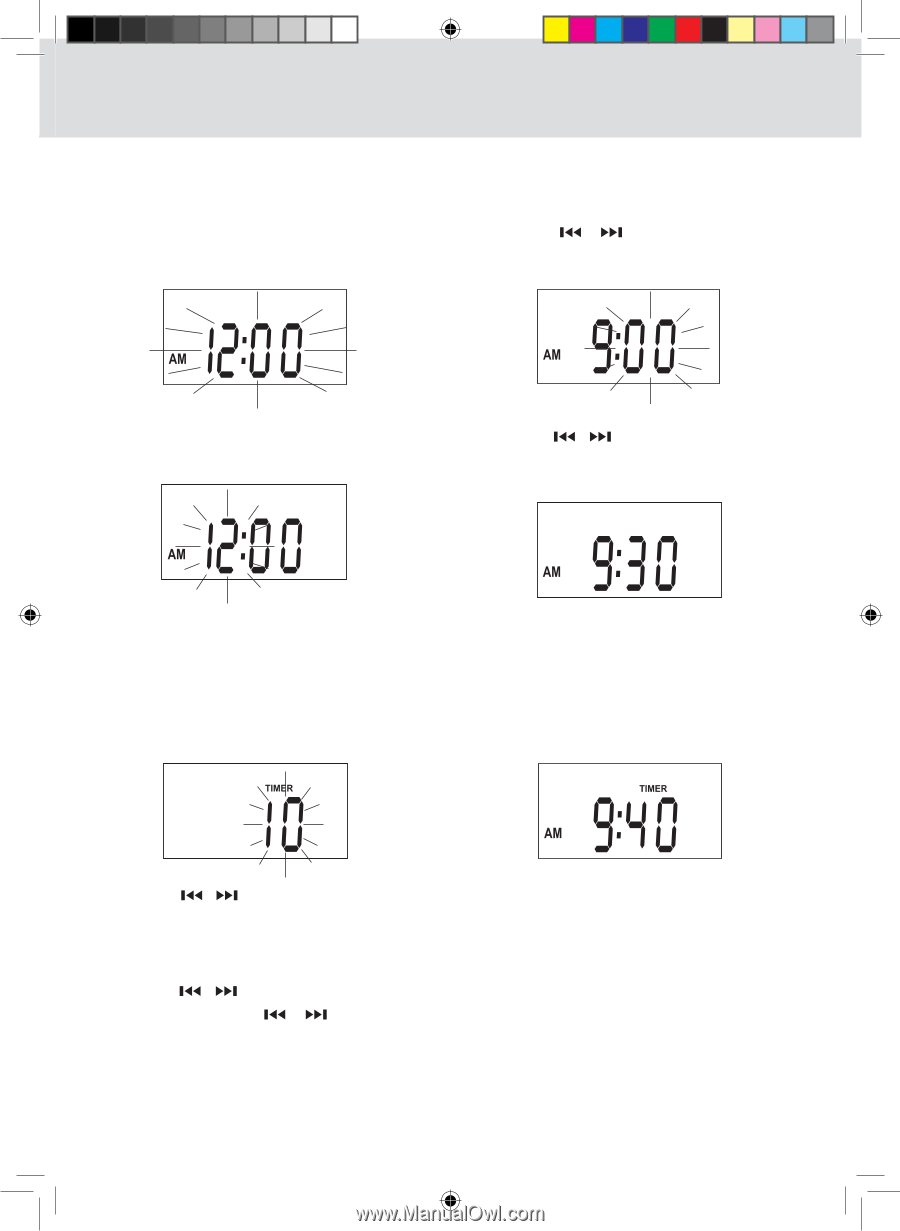
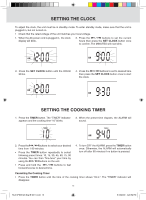
SETTING THE CLOCK To adjust the clock, the unit must be in standby mode. To enter standby mode, make sure that the unit is plugged in, but not turned on. • Check that the rated voltage of the unit matches your local voltage. 1. When the AC power cord is plugged in, the clock display will blink. 3. Press the / buttons to set the current hours then press the SET CLOCK button once to confirm. The MINUTES will now blink. 2. Press the SET CLOCK button until the HOUR blinks. 4. Press the / buttons to set to desired time then press the SET CLOCK button once to start the clock. SETTING THE COOKING timer 1. Press the TIMER button. The "TIMER" indicator appears and the cooking time "10" blinks. 3. When the preset time elapses, the ALARM will sound. 2. Press the / buttons to select your desired time from 1-99 minutes. • Press the TIMER button repeatedly to select following preset times: 10, 15, 30, 45, 60, 75, 90 minutes. You can then "fine-tune" your time by using the / buttons on the unit. • Press and hold the / buttons to fast forward/reverse to desired time. 4. To turn OFF the ALARM, press the TIMER button once. Otherwise, the ALARM will automatically turn off after 60 minutes if no button is pressed. Cancelling the Cooking Timer • Press the TIMER button until the time of the cooking timer shows "OFF". The "TIMER" indicator will disappear. 15 RCA SPS36123 Eng IB W011.indd 16 8/18/2009 4:29:52 PM
-
 1
1 -
2
-
3
-
4
-
5
-
6
-
7
-
8
-
9
-
10
-
 11
11 -
 12
12 -
 13
13 -
 14
14 -
 15
15 -
 16
16 -
 17
17 -
 18
18 -
 19
19 -
 20
20 -
 21
21 -
22
-
23
-
24
-
25
-
26
-
27
-
28
-
29
-
30
-
31
-
32
 |
 |