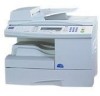
Ricoh 002052MIU User Guide
Ricoh 002052MIU - AC 204 B/W Laser Manual
 |
UPC - 026649118692
View all Ricoh 002052MIU manuals
Add to My Manuals
Save this manual to your list of manuals |
Ricoh 002052MIU manual content summary:
- Ricoh 002052MIU | User Guide - Page 1
B173 SERVICE DOCUMENTATION RICOH GROUP COMPANIES 001954MIU - Ricoh 002052MIU | User Guide - Page 2
- Ricoh 002052MIU | User Guide - Page 3
® ® RICOH GROUP COMPANIES B173 SERVICE DOCUMENTATION - Ricoh 002052MIU | User Guide - Page 4
- Ricoh 002052MIU | User Guide - Page 5
B173 SERVICE DOCUMENTATION 001954MIU - Ricoh 002052MIU | User Guide - Page 6
- Ricoh 002052MIU | User Guide - Page 7
responsibility when discussing the information contained within this document to maintain a level of confidentiality that is in the best interest of Ricoh Corporation and its member companies. NO PART OF THIS DOCUMENT MAY BE REPRODUCED IN ANY FASHION AND DISTRIBUTED WITHOUT THE PRIOR PERMISSION OF - Ricoh 002052MIU | User Guide - Page 8
- Ricoh 002052MIU | User Guide - Page 9
techniques, procedures, processes and spare parts of office equipment distributed by Ricoh Corporation. Users of this manual should be either service trained or certified by successfully completing a Ricoh Technical Training Program. Untrained and uncertified users utilizing information contained in - Ricoh 002052MIU | User Guide - Page 10
- Ricoh 002052MIU | User Guide - Page 11
LEGEND PRODUCT CODE B173 GESTETNER DSm516 COMPANY LANIER AC017 RICOH AC104 SAVIN AC104 DOCUMENTATION HISTORY REV. NO. * DATE 6/2004 COMMENTS Original Printing - Ricoh 002052MIU | User Guide - Page 12
- Ricoh 002052MIU | User Guide - Page 13
PRECAUTIONS ON DISASSEMBLY 3-1 You must do these before you service the machine 3-1 Releasing Plastic Latches 3-1 3.2 REAR COVER ASS'Y AND SOLENOID 3-26 TROUBLESHOOTING 4. TROUBLESHOOTING 4-1 4.1 PAPER PATH 4-1 4.1.1 COPY & SCAN DOCUMENT PATH 4-2 4.1.2 PRINTER PAPER PATH 4-2 4.2 CLEARING - Ricoh 002052MIU | User Guide - Page 14
Paper Feed Area 4-4 JAM1 (In the Fuser Area of Around the Toner Cartridge Area 4-5 JAM2 (In the Paper Exit Area 4-6 BYPASS JAM 4.4.7 PAPER ROLLED IN THE OPC 4-15 4.4.8 DEFECTIVE ADF 4-15 4.5 PRINTING PROBLEMS 4-16 4.5.1 DEFECTIV OPEPATION (LCD WINDOW) DISPLAY 4-16 4.5.2 DEFECTIVE LCD OPERATION - Ricoh 002052MIU | User Guide - Page 15
DEFECTIVE AUTOMATIC RECEIVING 4-35 4.8 COPY PROBLEMS 4-36 4.8.1 WHITE COPY 4-36 4.8.2 TONER EMPTY 4-41 TONER LOW 4-41 4.11 TONER CARTRIDGE (AIO) SERVICE 4-42 4.11.1 PRECAUTIONS ON SAFE-KEEPING OF TONER CARTRIDGE ...4-42 4.11.2 SERVICE FOR THE LIFE OF TONER CARTRIDGE 4-42 Redistributing Toner - Ricoh 002052MIU | User Guide - Page 16
SERVICE TABLES 5. SERVICE TABLES 5-1 5.1 USER MODE 5-1 5.2 TECH MODE 5-2 5.2.1 HOW TO GO INTO TECH MODE 5-2 5.2.2 SETTING-UP SYSTEM IN TECH MODE 5-3 5.2.3 DATA SET-UP 5-4 SEND LEVEL 5-4 DIALING MODE 5-4 MODEM SPEED 5-4 ERROR RATE 5-4 NOTIFY TONER 6-1 6.1 PRINTER COMPONENTS 6-1 - Ricoh 002052MIU | User Guide - Page 17
6.2.3 DRIVER ASSEMBLY 6-2 6.2.4 FUSING 6-3 Thermostat 6-3 Thermistor 6-3 Heat Roller 6-3 Pressure roller 6-3 Safety Features 6-3 6.2.5 SCANNER 6-4 Hardware 6-4 Mechanical 6-4 6.2.6 LSU (LASER SCANNER UNIT 6-4 6.3 CRU (ALSO KNOWN AS AIO 6-5 6.3.1 NEW CRU (AIO) DETECTION 6-6 6.3.2 TONER - Ricoh 002052MIU | User Guide - Page 18
SPECIFICATIONS SPECIFICATIONS 1. GENERAL SPECIFICATIONS 7-1 2. PRINT SPECIFICATION 7-2 3. SCAN SPECIFICATION 7-2 4. COPY SPECIFICATION 7-3 5. TELEPHONE SPECIFICAITON 7-4 6. FAX SPECIFICATION 7-5 7. PAPER HANDING 7-6 8. SOFTWARE 7-7 9. CONSUMABLES 7-7 APPENDIX BLOCK DIAGRAM 1 CONNECTION - Ricoh 002052MIU | User Guide - Page 19
any human access to laser radiation above a Class I level during normal operation, user maintenance, or prescribed service condition. WARNING Never operate or service the printer with the protective cover removed from Laser/Scanner assembly. The reflected beam, although invisible, can damage your - Ricoh 002052MIU | User Guide - Page 20
toner in a printer cartridge contains a chemical material, if swallowed, might harm a human body. Please keep the toner cartridge away from children. PRECAUTION RELATED ELECTRIC SHOCK OR FIRE It is possible to get an electric shock or burn by fire if you don't follow the instructions of the manual - Ricoh 002052MIU | User Guide - Page 21
9. Use caution during lightning storms. It may cause a fire or electric shock. Unplug the power plug off under these conditions. Do not touch cable and device during a lightning storm. 10. Avoid damp or dusty areas. Do not install the machine in dusty areas or around humidifiers. A fire can occur. - Ricoh 002052MIU | User Guide - Page 22
. All the stored information will be erased when the main board is replaced. 2. Disconnect the power cord before servicing or replacing electrical parts. 3. Remove the printer cable. 4. Use formal parts and same standardized goods when replacing parts. Check the product name, part code, rated - Ricoh 002052MIU | User Guide - Page 23
4. Only use an "anti-static" solder removal device. Some solder removal devices not classified as "anti-static" and can generate an electrical charge sufficient to damage ESD's. 5. Do not use Freon-propelled chemicals. When sprayed, these can generate electrical charges sufficient to damage ESD's. - Ricoh 002052MIU | User Guide - Page 24
- Ricoh 002052MIU | User Guide - Page 25
TA B POSITION 1 TA B POSITION 2 TA B POSITION 3 TA B POSITION 4 INSTALLATION PREVENTIVE MAINTENANCE REPLACEMENT AND ADJUSTMENT TROUBLESHOOTING SERVICE TABLES DETAILED DESCRIPTIONS SPECIFICATIONS APPENDIX TA B POSITION 5 TA B POSITION 6 TA B POSITION 7 TA B POSITION 8 - Ricoh 002052MIU | User Guide - Page 26
- Ricoh 002052MIU | User Guide - Page 27
INSTALLATION - Ricoh 002052MIU | User Guide - Page 28
- Ricoh 002052MIU | User Guide - Page 29
Installation 1. INSTALLAITON Refer to the operating instructions for details. INSTALLAITON SM 1-1 B173 - Ricoh 002052MIU | User Guide - Page 30
- Ricoh 002052MIU | User Guide - Page 31
PREVENTIVE MAINTENANCE - Ricoh 002052MIU | User Guide - Page 32
- Ricoh 002052MIU | User Guide - Page 33
The cycle period shown below is for maintenance. Environmental conditions and use will change. The cycle period shown is for reference only. Scanner Printer Component ADF Rubber ADF Pick-up Ass'y Friction Pad Paper Feed Roller Transfer Roller Fuser Replacement Cycle 20,000 Pages 60,000 Pages 60 - Ricoh 002052MIU | User Guide - Page 34
- Ricoh 002052MIU | User Guide - Page 35
REPLACEMENT AND ADJUSTMENT - Ricoh 002052MIU | User Guide - Page 36
- Ricoh 002052MIU | User Guide - Page 37
in the correct position, after you replace a part. You must do these before you service the machine: 1. Make sure that no documents are in the memory. 2. Disconnect the power cord. 3. Remove the toner and drum cartridges before you disassemble parts. 4. Use a flat and clean surface. 5. Replace only - Ricoh 002052MIU | User Guide - Page 38
REAR COVER 3.2 REAR COVER 1. Remove the four screws from the rear cover. 2. Remove the rear cover [A] from the frame assembly and scanner assembly. B173R900.WMF [A] 3. Release the cover - face up [B] that attaches the rear cover. Then lift the cover - face up out. B173R901.WMF [B] B173 - Ricoh 002052MIU | User Guide - Page 39
SIDE COVERS 3.3 SIDE COVERS 1. You must remove the rear cover (! 3.2) before you remove the side covers. 2. Disconnect the speaker [A]. [A] Replacement and Adjustment 3. Lift the Left cover [B] and Right cover [C] in the direction of arrow. [B] B173R903.WMF [C] B173R904.WMF SM 3-3 B173 - Ricoh 002052MIU | User Guide - Page 40
FRONT COVER 3.4 FRONT COVER 1. Remove the cassette [A]. [A] 2. Open the front cover[B]. [B] 3. Remove the front cover that attaches the frame assembly. Then remove the front cover. B173R905.WMF B173R906.WMF B173 B173R907.WMF 3-4 SM - Ricoh 002052MIU | User Guide - Page 41
Replacement and Adjustment SCANNER ASS'Y 3.5 SCANNER ASS'Y 1. You must remove these before you remove the scanner ass'y: • Rear cover (! 3.2) • Side covers (! 3.3) 2. Remove the two screws from the scanner ass'y [A]. [A] 3. Disconnect the 6 connectors from the connector PBA [B]. [B] B173R908.WMF - Ricoh 002052MIU | User Guide - Page 42
SCANNER ASS'Y 4. Pull up the scanner ass'y [A]. [A] 5. Pull the platen cover [B] up. Then remove it. B173R910.WMF [B] B173 B173R911.WMF 3-6 SM - Ricoh 002052MIU | User Guide - Page 43
6. Remove three screws from the scan lower assembly. 7. Remove the OPE unit [A]. Then disconnect the two connectors from the OPE unit. Then remove it. [A] SCANNER ASS'Y B173R912.WMF Replacement and Adjustment 8. Remove the four screws from the window cover. B173R913.WMF B173R914.WMF SM 3-7 - Ricoh 002052MIU | User Guide - Page 44
SCANNER ASS'Y [A] 9. Release the window cover [A] from the scan lower assembly. Then pull the window cover up. Then remove it. 10. Remove the CCD Cable [B]. B173R915.WMF [B] 11. Push the belt holder. Then remove the Belt [C]. B173R916.WMF [C] B173R917.WMF B173 3-8 SM - Ricoh 002052MIU | User Guide - Page 45
Replacement and Adjustment 12. Pull up the CCD shaft [A]. Then remove the scanner module [B]. SCANNER ASS'Y [B] [A] 13. Remove the reduction gear [C] and idle gear [D]. [C] B173R918.WMF [D] 14. Remove the two screws. Then remove the motor bracket [E]. B173R919.WMF [E] B173R920.WMF SM 3-9 - Ricoh 002052MIU | User Guide - Page 46
SCANNER ASS'Y 15. Disconnect the connector [A] from the open sensor assembly [B]. [A] [B] 16. Release the open sensor [C]. Then [C] remove it. B173R921.WMF B173R922.WMF B173 3-10 SM - Ricoh 002052MIU | User Guide - Page 47
ADF MOTOR ASS'Y 3.6 ADF MOTOR ASS'Y 1. Before you remove the ADF Motor Ass'y, you must remove these: • Rear Cover (! 3.2) • Side Covers (! 3.3) • Scanner Ass'y (! 3.5) [A] 2. Remove the two screws from the ADF ass'y [A]. Then remove it. 3. Remove the open cover [B]. B173R923.WMF [B] - Ricoh 002052MIU | User Guide - Page 48
ADF MOTOR ASS'Y [A] 4. Pull the white bush [A]. Then turn it until it gets to the slot. Then remove the pick- [B] up ass'y [B]. 5. Remove the two screws from the upper cover [C]. Then remove it. [C] B173R925.WMF 6. Disconnect the connector. Then remove four screws from the ADF motor ass'y - Ricoh 002052MIU | User Guide - Page 49
OPE UNIT (ALSO KNOWN AS OP-PORT) 3.7 OPE UNIT (ALSO KNOWN AS OP-PORT) 1. Before you remove the OPE Unit, you must remove these: • Rear Cover (! 3.2) • Side Covers (! 3.3) [B] • Scanner Ass'y (! 3.5) 2. Remove the six screws from the OPE PBA [A] and OPE cover [B]. [A] Replacement and - Ricoh 002052MIU | User Guide - Page 50
MIDDLE COVER AND EXIT ROLLER 3.8 MIDDLE COVER AND EXIT ROLLER 1. Before you remove the Exit Roller, you must remove these: • Rear Cover (! 3.2) • Front Cover Ass'y (! 3.4) • Side Covers (! 3.3) • Scanner Ass'y (! 3.5) 2. Remove the six screws from the top cover [A]. [A] 3. Release the top - Ricoh 002052MIU | User Guide - Page 51
MIDDLE COVER AND EXIT ROLLER 4. Remove the two screws from the rear upper cover [A]. [A] Replacement and Adjustment 5. Remove the exit gear [B] and bearing [C] from exit roller [D]. 1 2 B173R933.WMF [B] [C] [D] B173R934.WMF SM 3-15 B173 - Ricoh 002052MIU | User Guide - Page 52
ENGINE SHIELD ASS'Y 3.9 ENGINE SHIELD ASS'Y 1. Before you remove the engine shield ass'y, you must remove these: • Rear Cover (! 3.2) • Side Covers (! 3.3) • Scanner Ass'y (! 3.5) 2. Remove the two screws. Then [A] disconnect the FPC cable from the main PBA. Then remove the LIU PBA [A]. 3. - Ricoh 002052MIU | User Guide - Page 53
4. Remove the ten screws from the engine shield ass'y [A]. Then remove it. Then disconnect all connectors from the main PBA and SMPS. MAIN PBA (MAIN BOARD) Replacement and Adjustment B173R937.WMF 3.10 MAIN PBA (MAIN BOARD) NOTE: 1) Print out the system data list in Tech mode to keep programmed - Ricoh 002052MIU | User Guide - Page 54
SMPS (ALSO KNOWN AS POWER SUPPLY UNIT) 3.11 SMPS (ALSO KNOWN AS POWER SUPPLY UNIT) 1. Before you remove the SMPS, you must remove these: • Rear cover (! 3.2) • Side covers (! 3.3) • Scanner Ass'y (! 3.5) [A] • Engine shield ass'y (! 3.9) 2. Remove the three screws from the inlet bracket [A]. - Ricoh 002052MIU | User Guide - Page 55
FUSER ASS'Y (ALSO KNOWN AS FUSING UNIT) 3.12 FUSER ASS'Y (ALSO KNOWN AS FUSING UNIT) CAUTION The fusing unit has tapping screws. Assembly/disassembly should be kept to a minimum. Adjustments again and again can cause failure. To avoid hazardous situations, do not replace any components inside the - Ricoh 002052MIU | User Guide - Page 56
FAN 3.13 FAN 1. Before you remove the fan, you must remove these: • Rear cover (! 3.2) • Side covers (! 3.3) 2. Disconnect the connector from the SMPS. Then remove the one screw. Then remove the fan [A]. [A] B173R949.WMF CAUTION: Make sure to set the fan in the correct position. The label on the - Ricoh 002052MIU | User Guide - Page 57
LSU (LASER SCANNING UNIT) 3.14 LSU (LASER SCANNING UNIT) 1. Before you remove the LSU, you must remove these: • Rear cover (! 3.2) • Side covers (! 3.3) • Scanner Ass'y (! 3.5) • Front cover (! 3.4) • Middle cover (! 3.8) 2. Disconnect the two connectors. 3. Remove the four screws from the LSU [A]. - Ricoh 002052MIU | User Guide - Page 58
DRIVE ASS'Y 3.15 DRIVE ASS'Y 1. Before you remove the drive ass'y, you must remove these: • Rear cover (! 3.2) • Side covers (! 3.3) 2. Remove the six screws from the drive ass'y [A]. [A] 3. Remove the drive ass'y. Then disconnect the connector from the main PBA. B173R952.WMF B173R953.WMF - Ricoh 002052MIU | User Guide - Page 59
Replacement and Adjustment TRANSFER ASS'Y 3.16 TRANSFER ASS'Y 1. Before you remove the transfer ass'y, you must remove these: • Rear cover (! 3.2) • Side covers (! 3.3) • Scanner Ass'y (! 3.5) • Front cover (! 3.4) [A] • Middle cover (!3.8) • LSU (!3.14) 2. Remove the three screws from - Ricoh 002052MIU | User Guide - Page 60
• Side covers (! 3.3) • Scanner Ass'y (! 3.5) • Front cover (! 3.4) • Middle cover (!3.8) [A] • Drive ass'y (! 3.15) 2. Remove the two screws from the paper guide [A]. Then remove it. 3. Pull up the feed idle bushing [B]. Then [B] pull up the feed idle shaft [C]. B173R957.WMF [C] 4. Remove - Ricoh 002052MIU | User Guide - Page 61
Replacement and Adjustment 5. Remove the idle gear [A] and feed gear 2 [B]. [B] [A] 6. Remove feed gear 1 assembly [C] . [C] FEED ASS'Y B173R960.WMF 7. Pull up the feed roller [D] and feed roller 1 [E]. [E] B173R961.WMF [D] B173R962.WMF SM 3-25 B173 - Ricoh 002052MIU | User Guide - Page 62
PICK UP ASS'Y AND SOLENOID 3.18 PICK UP ASS'Y AND SOLENOID 1. Before you remove the pick up ass'y, you must remove these: • Rear cover (! 3.2) • Side covers (! 3.3) • Front cover (! 3.4) • Scanner Ass'y (! 3.5) • Middle cover (!3.8) • Engine shield Ass'y (! 3.9) • Drive Ass'y (! 3.15) [A] - Ricoh 002052MIU | User Guide - Page 63
Replacement and Adjustment 4. Remove the pick-up ass'y [A]. PICK UP ASS'Y AND SOLENOID 1 2 [A] 5. Remove the two screws from the manual solenoid [B] and pick-up solenoid [C]. Then remove the manual solenoid and pick-up solenoid. [C] [B] B173R965.WMF B173R966.WMF SM 3-27 B173 - Ricoh 002052MIU | User Guide - Page 64
- Ricoh 002052MIU | User Guide - Page 65
TROUBLESHOOTING - Ricoh 002052MIU | User Guide - Page 66
- Ricoh 002052MIU | User Guide - Page 67
r- Re gi Feed-Roller Sensor-Scan W hi te-S heet Sensor-Doc Doc-Paper(30Sheets) Exit-Roller CC D- Module PAPER PATH Engine Part 4 Fuser 7 PR 1 3 L S U CR Toner Cartridge DR OPC SR 2 6 PTL TR FR 8 5 B173T936.WMF Troubleshooting SM 4-1 B173 - Ricoh 002052MIU | User Guide - Page 68
- Doc. % Sensor - Regi & Sensor - Scan ' Feed Roller ( Exit Roller B173T937.WMF 4.1.2 PRINTER PAPER PATH Engine Part Fuser 7 PR 1 3 L S U CR Toner Cartridge DR OPC SR 2 6 PTL TR FR 4 5 ! Paper Input (Cassette) " Paper Input (Manual Feeder) # Paper Out (Face Down) $ Paper Empty Sensor - Ricoh 002052MIU | User Guide - Page 69
used that does not meet paper specifications. • Paper that is outside of the supported size range was used. If a paper jam occurs, the On Line/Error LED JAM 2: In the fuser area or around the toner cartridge BYPASS JAM: In the Bypass tray Troubleshooting Paper Jam 0 B173T939A.WMF Paper Jam 1 - Ricoh 002052MIU | User Guide - Page 70
there is any resistance when you pull the paper or the paper is not seen in this area, skip to the fuser area around the toner cartridge 4. Insert the paper tray into the machine until it snaps into place. 5. Open and close the front cover to resume printing. B173 4-4 B173T944.WMF - Ricoh 002052MIU | User Guide - Page 71
removing paper from the machine. 1. Open the front cover and remove the toner cartridge. 2. Remove the jammed paper by gently pulling it straight out. B173T950.WMF Troubleshooting 3. Replace the toner cartridge and close the front cover. Printing automatically resumes. SM 4-5 B173T951.WMF - Ricoh 002052MIU | User Guide - Page 72
CLEARING JAMS JAM 2 (In the Paper Exit Area) 1. Open and close the front cover. The jammed paper automatically exits the machine. If the paper does not exit, continue to Step 2. 2. Gently pull the paper out of the front output tray. 3. If there is any resistance when you pull the paper or the paper - Ricoh 002052MIU | User Guide - Page 73
JAM (In the Bypass Tray) CLEARING JAMS Troubleshooting B173T953.WMF "BYPASS JAM " appears on the in "Clearing Paper Jams " • Follow the procedures in "Loading Paper". Ensure that the adjustable guides are positioned correctly. • Do not overload the paper tray. Ensure that the paper is below the - Ricoh 002052MIU | User Guide - Page 74
CLEARING JAMS 4.2.2 CLEARING DOCUMENT JAMS If a document jams while it is feeding through the ADF (Automatic Document Feeder),"DOCUMENT JAM " appears on the display. Input Misfeed 1. Open the ADF top cover. 2. Pull the document gently to the right and out of the ADF. B173T940.WMF 3. Close the ADF - Ricoh 002052MIU | User Guide - Page 75
pulling it towards the right by using both hands. B173T942.WMF B173T943.WMF 3. Close the document cover. Then load the documents back into the ADF. Troubleshooting SM 4-9 B173 - Ricoh 002052MIU | User Guide - Page 76
AND DEFECTIVE ROLLER If abnormal image prints periodically, check the parts shown below. 1 2 43 Fuser PR 6 7 L S U CR OPC TR DR SR PTL Toner Cartridge MP Sensor FR 5 B173T954.WMF No Roller Abnormal image period Kind of abnormal image No Roller Abnormal Image Period Kind of Abnormal - Ricoh 002052MIU | User Guide - Page 77
PAPER FEEDING PROBLEMS 4.4 PAPER FEEDING PROBLEMS 4.4.1 WRONG PRINT POSITION Description -pickup become open or is broken away. If the paper feeds into the printer and Jam 0 occurs, perform Engine Test Mode to check feed-sensor of the up unit and/or shaft pick-up. Troubleshooting SM 4-11 B173 - Ricoh 002052MIU | User Guide - Page 78
stuck in the transfer roller and in the fuser just after passing through the Actuator-Feed. PAPER FEEDING PROBLEMS Check and Cause If the recording paper is jammed in front of or inside the toner cartridge. The actuator may be defective if the recording paper stays in the transfer roller and the - Ricoh 002052MIU | User Guide - Page 79
PROBLEMS is completely fed out of the printer, but Jam 2 occurs. • After occurs when a guide claw breaks away or becomes deformed. • It occurs when the guide spring breaks away toner particles stained on the rib. • Check the assembly and the performance of the exit. Troubleshooting SM 4-13 B173 - Ricoh 002052MIU | User Guide - Page 80
PAPER FEEDING PROBLEMS 4.4.5 MULTI-FEEDING Description Multiple sheets of paper are fed at once. Check and Cause Solenoid malfunction (the solenoid is not working properly): Perform Engine Test - Ricoh 002052MIU | User Guide - Page 81
PAPER FEEDING PROBLEMS 4.4.7 PAPER ROLLED IN THE OPC Description Paper stays in the OPC. Check and Cause Paper is too thin. The face of of OPE assembly (2 paper sensors) are normal. If you cannot visually confirm the damaged part, try to replace the ADF Ass'y. Troubleshooting SM 4-15 B173 - Ricoh 002052MIU | User Guide - Page 82
PRINTING PROBLEMS 4.5 PRINTING PROBLEMS 4.5.1 DEFECTIVE OPERATION (LCD WINDOW) DISPLAY Description Strange characters are displayed on the OPE Panel or buttons do not operated. Check and Cause Clear the memory. () 5.2.3) - Ricoh 002052MIU | User Guide - Page 83
Troubleshooting PRINTING PROBLEMS 4.5.4 PAPER EMPTY Description The paper lamp on the operator panel is on even when paper is loaded in the cassette. Check and Cause Bending or - Ricoh 002052MIU | User Guide - Page 84
PRINTING PROBLEMS 4.5.7 NO LAMP ON WHEN THE COVER IS OPEN Description The DEFECTIVE MOTOR OPERATION Description Main motor is not driving when printing, and paper does not feed into the printer, resulting "Jam 0". Check and Cause Motor harness or Main Board may be defective. Perform Engine Test - Ricoh 002052MIU | User Guide - Page 85
PRINTING PROBLEMS 4.5.10 VERTICAL LINES CURVED Description When printing, vertical lines curve. Check and Cause If the supply of +24v is LSU, check drive by Engine Test Mode: Diagnostic Code Check -1- LSU Motor on. Solution Replace LSU. Replace the Main Board. Troubleshooting SM 4-19 B173 - Ricoh 002052MIU | User Guide - Page 86
QUALITY PROBLEMS 4.6 PRINTING QUALITY PROBLEMS 4.6.1 VERTICAL BLACK LINE AND BAND Description 1. Straight thin black vertical line(s) occurs in the printing 2. Dark black vertical band(s) occur in the printing. Digital Printer Digital Printer Digital Printer Digital Printer Digital Printer Check - Ricoh 002052MIU | User Guide - Page 87
PROBLEMS Digital Printer Digital Printer Digital Printer Digital Printer Digital Printer Check and Cause Foreign matter stuck onto the window of internal lenses of LSU mirror. Foreign matter or toner . Remove if found. If the problems are not solved, replace the AIO. Troubleshooting SM 4-21 B173 - Ricoh 002052MIU | User Guide - Page 88
PROBLEMS 4.6.3 HORIZONTAL BLACK BAND Description Dark or blurry horizontal stripes occur in the printing periodically. (They may not occur on each print.) Digital Printer Digital Printer Digital Printer Digital Printer Digital Printer roller. (remove the toner particles and paper particles) - Ricoh 002052MIU | User Guide - Page 89
PROBLEMS 4.6.4 BLACK/WHITE SPOT Description 1. Dark or blurry black spots occur periodically in the printing. 2. White spots occur periodically in the printing. Digital Printer Digital Printer Digital Printer Digital Printer Digital Printer and try to print again. Troubleshooting SM 4-23 B173 - Ricoh 002052MIU | User Guide - Page 90
PRINTING QUALITY PROBLEMS 4.6.5 LIGHT IMAGE Description The printed image is light, with no ghost. Digital Printer Digital Printer Digital Printer Digital Printer Digital Printer Check and Cause Develop roller is stained when the toner of developer cartridge is almost consumed. B173T917.WMF - Ricoh 002052MIU | User Guide - Page 91
the problem, replace the HVPS (SMPS). 4.6.7 UNEVEN DENSITY Description Print density is uneven between left and right. Troubleshooting toner level is not even on the developer roller due to the bad blade. B173T920.WMF Solution Replace both the left and right Spring Holder. Problem with the toner - Ricoh 002052MIU | User Guide - Page 92
PRINTING QUALITY PROBLEMS 4.6.8 BACKGROUND Description Light dark background appears in whole area of the printing. Digital Printer Digital Printer Digital Printer Digital Printer Digital Printer Check and Cause Recycled recording paper has been used. The life of the Developer has expired. The up - Ricoh 002052MIU | User Guide - Page 93
blade in the developer. B173T922.WMF Solution Clean the contaminated terminals. Problem in the toner cartridge, replace the AIO and try to print again. Replace the power on before using machine. Problem in the toner cartridge, replace the AIO and try to print again. Troubleshooting SM 4-27 B173 - Ricoh 002052MIU | User Guide - Page 94
PROBLEMS 4.6.10 GHOST (2) Description Ghost occurs at 75 mm intervals of the OPC drum in the whole printing. (When printing on card stock or transparencies using manual of the developer may be expired. B173T924.WMF Solution Problem in the toner cartridge, replace the AIO and try to print again. - Ricoh 002052MIU | User Guide - Page 95
PROBLEMS DDiiggiittaall PPrriinntteerr DDiiggiittaall PPrriinntteerr DDiiggiittaall PPrriinntteerr B173T925.WMF Solution Toner Digital Printer Digital Printer Digital Printer Digital Printer Digital Printer B173T926.WMF Check and Cause Toner leakage contamination. Troubleshooting SM 4-29 B173 - Ricoh 002052MIU | User Guide - Page 96
PRINTING QUALITY PROBLEMS 4.6.14 STAINS ON BACK OF THE PAGE Description The back of the page is stained at 56.1 mm intervals. Digital Digital Pri Digital Printer Digital Printer Digital Printer Check and Cause Transfer roller is contaminated. Pressure roller is contaminated. B173T927.WMF - Ricoh 002052MIU | User Guide - Page 97
PRINTING QUALITY PROBLEMS 4.6.16 BLANK PAGE PRINT OUT (2) Description 1. Blank page is printed. 2. One or several blank pages are printed. 3. When the printer turns on, several blank pages print. Check and clear the print job on the computer, and try printing again. Troubleshooting SM 4-31 B173 - Ricoh 002052MIU | User Guide - Page 98
. If you can hear a CLICK sound, after checking the connection of HARNESS between the LIU and the Main Board, try to replace the HARNESS. The problem still persists, then replace the LIU and the Main Board in sequence. Notes: Product supports the Tone Dial type only. B173 4-32 SM - Ricoh 002052MIU | User Guide - Page 99
FAX & PHONE PROBLEMS 4.7.3 DEFECTIVE FAX FORWARD/RECEIVE Description The FAX FORWARD/ the LIU Board. If the MODEM testing is abnormal, try to replace the Main Board. Troubleshooting 4.7.4 DEFECTIVE FAX FORWARD Description RECEIVE is functioning, but FORWARD is not functioning or the received - Ricoh 002052MIU | User Guide - Page 100
FAX & PHONE PROBLEMS 4.7.6 DEFECTIVE FAX RECEIVE (2) Description The received data are lengthened or cut in the printing. Check and Cause Check if there is NOISE when pressing on- - Ricoh 002052MIU | User Guide - Page 101
FAX & PHONE PROBLEMS 4.7.9 DEFECTIVE AUTOMATIC RECEIVING Description The automatic receiving function is not working. Check and Cause Check if the RECEIVE mode is to the FAX mode, it cannot receive, then try to replace the LIU and the Main Board in sequence. Troubleshooting SM 4-35 B173 - Ricoh 002052MIU | User Guide - Page 102
page is printed out when Copy. Check and Cause Check the CCD problem in Main Board. Check shading profile. Solution Check the CCD harness contact Cause Check the Scanner Motor and any mechanical disturbance. Check the Motor Driver in the Main Board. Solution Check the right position of the Scanner - Ricoh 002052MIU | User Guide - Page 103
COPY PROBLEMS 4.8.4 DEFECTIVE IMAGE QUALITY Description The copied image is light or bad. Check and Cause Check shading profile. Check Check printing quality. Solution Remake shading profile in the tech mode. The gap above 0.5 mm can cause a blurred image. ) 4.6 Troubleshooting SM 4-37 B173 - Ricoh 002052MIU | User Guide - Page 104
the cable are not connected properly, reconnect it. Confirm that the printer driver is properly installed by performing a PC printing test related to driver setup. If it is not, reinstall the printer driver. (Refer to Operating Instructions.) If the copy function works, replace the Main Board. If - Ricoh 002052MIU | User Guide - Page 105
front panel shows the messages to indicate the printer's status or errors. Refer to the tables below to understand the message's meaning and clear the problem if necessary. Message details are shown in BUSY Description: Remote fax did not answer Solution: Try again. Troubleshooting SM 4-39 B173 - Ricoh 002052MIU | User Guide - Page 106
Then try again if you still have problems. LOAD DOCUMENT Description: You have attempted to : When the machine detected the toner cartridge has not been installed. manually with the keypad, or assign the number. NO PAPER [ADD PAPER] Description: The recording paper has run out. The printer - Ricoh 002052MIU | User Guide - Page 107
has encountered the Toner Empty. Solution: Replace the Toner Cartridge. TONER LOW Description: Toner may be low Solution: Toner may be unevenly distributed. Remove the toner cartridge and shake it gently to evenly distribute the toner. Then replace the toner cartridge. Troubleshooting SM 4-41 - Ricoh 002052MIU | User Guide - Page 108
cartridge. 4.11.2 SERVICE FOR THE LIFE OF TONER CARTRIDGE If the printed image is light due to the life of the toner, you can temporarily improve the print quality by redistributing the toner (Shake the toner cartridge), however, you should replace the toner cartridge to solve the problem thoroughly - Ricoh 002052MIU | User Guide - Page 109
Slide the new toner cartridge in until it locks into place. B173T932.WMF 5. Close the front cover. B173T934.WMF B173T935.WMF NOTE: Help the environment by recycling your used toner cartridge. Refer to the recycling brochure packed with the toner cartridge for details. Troubleshooting SM 4-43 - Ricoh 002052MIU | User Guide - Page 110
CARTRIDGE (AIO) SERVICE 4.11.3 SIGNS AND MEASURES AT POOR TONER CARTRIDGE Fault Light image and partially blank clean the Laser Scanning Unit (LSU) window with a cotton swab, then recheck. OK: Lack of toner 2. In case of 2if it becomes better after cleaning the LSU window, then the cartridge is - Ricoh 002052MIU | User Guide - Page 111
TONER CARTRIDGE (AIO) SERVICE Fault Toner Contamination Signs • Toner is fallen on the papers periodically. • Contaminated with toner on prints partly or over the whole surface. Cause & Check 1. Toner is fallen on the paper periodically. • Check the cycle of the falling of the toner. • Check the - Ricoh 002052MIU | User Guide - Page 112
TONER CARTRIDGE (AIO) SERVICE Fault White or Black Spots Signs • Light or dark black dots on the image occur periodically. • White spots occur in the image periodically. Cause & Check 1. - Ricoh 002052MIU | User Guide - Page 113
Troubleshooting TONER CARTRIDGE (AIO) SERVICE Fault Ghost & Image Contamination Signs • The printed image • Check whether the terminal assembly is normal. Solution 1. All of 1, 2, 3 (1) Remove toner and foreign sub-stances adhered to the contact point of the cartridge. (2) The contact point of - Ricoh 002052MIU | User Guide - Page 114
- Ricoh 002052MIU | User Guide - Page 115
SERVICE TABLES - Ricoh 002052MIU | User Guide - Page 116
- Ricoh 002052MIU | User Guide - Page 117
USER MODE 5. SERVICE TABLES 5.1 USER MODE Function 1. Paper Setting 2. Copy Setup 3. Fax Setup 4. Fax Feature 5. Advanced Fax 6. Reports 7. Sound / Volume Paper List Message Confirmation Report Junk Fax List On / Off / Comm. Off / Low / Med / High On / Off On / Off Service Tables SM 5-1 B173 - Ricoh 002052MIU | User Guide - Page 118
9. Maintenance Power Save CCD Power Save USB Mode Clean Drum Notify toner Remote Test Clear Memory Contents Enter number Set date and time 12 table shows functions the user can set. Examine the user manual for instructions. The service manual shows things that the user can set. 5.2 TECH MODE - Ricoh 002052MIU | User Guide - Page 119
No. Select Country Code Enter Password Total Page CNT (1934 enter) CRU Print CNT FLT Scan CNT ADF Scan CNT Used Toner CNT Edit Toner Dot Local / Remote 12 Sec / Unlimit / Off OK / NG Flash / Engine versions ! 5.2.4 Protocol List System Data List Yes / No Service Tables SM 5-3 B173 - Ricoh 002052MIU | User Guide - Page 120
below the set value. You can set the rate between 5% and 10%. NOTIFY TONER With this feature enabled, when the toner becomes low, the toner low information will be sent to a specified contact point, for example, the service company. After you access this menu, select ON, and when the LCD-prompts - Ricoh 002052MIU | User Guide - Page 121
countries when you scroll by pressing " " or " " • EU default (UK) • North America default (USA/Canada) • Asia default (Sinapore) • China default (China) Note: You cannot change the default country operation is concluded, the machine switches to receiving mode. Service Tables SM 5-5 B173 - Ricoh 002052MIU | User Guide - Page 122
's ROM. The LCD shows the result and the software version. Example: • FLASH VER: 6.04 V • ENGINE VER:1.08 V PATTERN TEST Use this to verify that the printer mechanism is operating correctly. The patterns are: • Pattern-1 ~ Pattern-7 • QA Pattern-1 ~ QA Pattern-4 B173 5-6 SM - Ricoh 002052MIU | User Guide - Page 123
CCD (Charge Coupled Device). Do this to examine the condition of the print out. Then examine if there is CCD problems. < Procedure > 1. Set the [ADJUST SHADING] in tech mode. 2. Press the Enter key. An image will cover is closed when you examine the CCD. B173S999.WMF Service Tables SM 5-7 B173 - Ricoh 002052MIU | User Guide - Page 124
DATE OF SALE 5.2.5 REPORT PROTOCOL LIST Use this list to examine the send and receive errors. The protocol list is automatically printed if a communication error occurs when the machine is in tech mode. SYSTEM DATA This gives the listing of the system data set by the user and the technician in the - Ricoh 002052MIU | User Guide - Page 125
update the machine. 4. Push the update button. The firmware file automatically goes to the printer. The printer is initialized when the update is finished. Ensure that the following message is shown in the list. • Example: Firmware/Engine/Emulation Version: 6.04 V1.0.8 Service Tables SM 5-9 B173 - Ricoh 002052MIU | User Guide - Page 126
FIRMWARE DOWNLOAD 5.4.2 RECOVERY PROCEDURE The machine will not operate if the update procedure did not work correctly. At this time, do these steps: 1. Set the power off and then on. 2. Do the steps in the download procedure from step 4 again. The machine will start the upgrade procedure again. - Ricoh 002052MIU | User Guide - Page 127
in sequence, and the LCD briefly displays 'Engine Test Mode', the machine has entered service (tech) mode. NOTE: It may cause any damage on the machine if a Engine Test Motor Test PickUp Test 0 MTR FAN SOL ETC Fan Test Manual Clt Test PTL Test LSU Motor Test 1 LSU TEST LSU Hsync Test - Ricoh 002052MIU | User Guide - Page 128
function is enabled a group of parameters are printed at the bottom of each page. This shows the print engine condition. This is not necessary for service use. This setting will remain on when you get out of Engine Mode. Make sure to set it off. B173 5-12 SM - Ricoh 002052MIU | User Guide - Page 129
DETAILED DESCRIPTIONS - Ricoh 002052MIU | User Guide - Page 130
- Ricoh 002052MIU | User Guide - Page 131
6. DETAILED DESCRIPTIONS 6.1 PRINTER COMPONENTS 6.1.1 FRONT VIEW PRINTER COMPONENTS Detailed Descriptions 6.1.2 REAR VIEW B173D900.WMF B173D901.WMF SM 6-1 B173 - Ricoh 002052MIU | User Guide - Page 132
load • Feed capacity: Cassette -250 sheets (75g/m2, 20 lb paper standard) Manual - 1 sheet (Paper, OHP, Envelope, etc.) • Paper detect sensor: Photo The transfer roller moves the toner from the OPC drum surface to the paper. 6.2.3 DRIVER ASSEMBLY The main motor driver controls the main motor. The - Ricoh 002052MIU | User Guide - Page 133
the paper. The heat roller is coated with Teflon to prevent the melted toner from sticking to the heat roller. Pressure roller The pressure roller, located resin, and the surface of the roller is coated with Teflon. The toner is fused onto the paper when the sheet of paper passes between the heat - Ricoh 002052MIU | User Guide - Page 134
SYSTEM LAYOUT 6.2.5 SCANNER The scanner reads an image with a photosensitive sensor. Hardware: • CCD module, connection board, ADF board, AFE (Analog Front End), and image processor (Located in CPU). Mechanical: • ADF (Automatic Document Feeder) 6.2.6 LSU (LASER SCANNER UNIT) The video controller - Ricoh 002052MIU | User Guide - Page 135
Developing procedure: Non magnetic 1 element contact procedure • Toner: Non magnetic 1 element shatter type toner • Toner near end sensor: None • OPC cleaning: Electric static + FILM OPC gets the toner. • Toner waste: Electrical static gets the toner. • OPC drum protect shutter: None SM 6-5 B173 - Ricoh 002052MIU | User Guide - Page 136
the total count). When the total number of dots reaches a pre-programmed count (toner near-end), the machine will display "TONER LOW". After another period of dots being counted, the machine will display "TONER EMPTY" (toner end), and the machine will stop printing. You can check the total dot count - Ricoh 002052MIU | User Guide - Page 137
on the same board. The CPU functions as the bus controller, I/O, drivers, and PC interface. The main board sends the current image video data • Print head control • Carrier motor control • Paper motor control • Toner generator • RTC with calendar function • S/W assistant function (Rotator) Detailed - Ricoh 002052MIU | User Guide - Page 138
the panel. MP Sensing: The MP Sensor (Photo Interrupter) uses an actuator to let the CPU know if paper is in the manual paper (MP) tray. Paper Feed and Toner Cartridge Sensor: When paper passes the actuator (feed sensor part), it detects the photo interrupter signal. Then lets the CPU know the - Ricoh 002052MIU | User Guide - Page 139
A diode prevents the transistor from the noise pulse generated when the solenoid is de-energizing. Motor Drive: The motor drive circuit starts when the driver IC is set. You can set the R sensor value and the voltage value of the V reference with the motor drive voltage value. Detailed Descriptions - Ricoh 002052MIU | User Guide - Page 140
exposed part by LSU (Laser Scanning Unit). * The electronic potential of exposed OPC is -180V and exposed developer is -350 V when the machine prints. Toner with minus (-) develops on an exposed part. • Output voltage: -200 V ~ 600 V DC ±20 V • Error: 1) If DEV is GND, density goes down. 2) If DEV - Ricoh 002052MIU | User Guide - Page 141
AS PSU AND POWER PACK) Supply voltage (SUP) • Function: Gives toner to the developing roller. • Output voltage: -400V ~ 800 V DC V, +12 V, +12 V and +24 Vs). These types of power are available: • 120 V (North America) • 220 V (Europe, Asia, China) AC input • Input voltage: AC 220 V ~ 240 V, AC - Ricoh 002052MIU | User Guide - Page 142
roller drive to feed paper from the cassette. The bypass solenoid controls the paper feed from the manual tray. You must put the paper in front of the feed sensor when you feed from the manual feeder. Jam conditions are below: Jam 0 • Paper does not move after pick-up. • Paper does not - Ricoh 002052MIU | User Guide - Page 143
ENGINE F/W 6.6.4 FUSING The resistance of the thermistor varies inversely with the temperature of the hot roller. The control circuit monitors the temperature through the thermistor and turns the fusing lamp on and off. This keeps the hot roller at the operating temperature. Error Type Error - Ricoh 002052MIU | User Guide - Page 144
LIU BOARD 6.7 LIU BOARD LIU board is a line interface unit, and circuit to interface with a telephone line. There is a ring-detect circuit to detect a ring signal from a switchboard. In addition there is a surge absorber to protect the machine during lightning storms. 6.8 OPE BOARD OPE board has - Ricoh 002052MIU | User Guide - Page 145
SPECIFICATIONS - Ricoh 002052MIU | User Guide - Page 146
- Ricoh 002052MIU | User Guide - Page 147
1. GENERAL SPECIFICATIONS SPECIFICATIONS Configuration Major Features: Desktop Copier, Print, Scan, Fax (with ADF) Operation Set: 474 x 436 x 417 mm Weight: 13 Kg (28.8 lbs.) With toner Cartridge Absolute Storage Condition Temperature: -200C ~ 400C Operating Condition Humidity: 10% RH ~ - Ricoh 002052MIU | User Guide - Page 148
/15/30/45 min.) Resolution: Normal 600 *600 dpi RET No Toner Save: Yes Memory: 8MB FPOT: Stand by Approx. 12 seconds Power Save Less than 54 seconds Duplex Print: Manual (driver support provided) Printable Area: 207.6 x 270.6 mm (Letter) 3. SCAN SPECIFICATION Configuration Halftone - Ricoh 002052MIU | User Guide - Page 149
SPECIFICATIONS 4. COPY SPECIFICATION Configuration Original mode Text Auto Photo FCOT: Other Platen ADF Copy Speed / Letter: Platen ADF Resolution: Zoom Range: Multi Copy: Preset: Contrast Control: Copy Mode: Collation Auto return to default mode: N-up copy: AutoFit Copy: Clone: Poster: - Ricoh 002052MIU | User Guide - Page 150
SPECIFICATIONS 5. TELEPHONE SPECIFICAITON Configuration Handset: On hook Dial: Search: 1-Touch Dial: Auto dial: TAD I/F: Tone/Pulse: Pause: Auto Redial: Last Number Redial: Distinctive Ring: Caller ID: External Phone Interface: Report & List Print Tx/Rx Journal out: Confirmation - Ricoh 002052MIU | User Guide - Page 151
6. FAX SPECIFICATION SPECIFICATIONS Configuration Compatibility: Communication System: Modem Speed: TX Speed: Compression: ECM: Resolution: Std Fine Super Fine Scan Speed Std Fine Super Fine Rx fax duplex print out: Multiple page scan speed: Receive Mode: Memory: Capacity - Ricoh 002052MIU | User Guide - Page 152
Optional Cassette: Output Capacity: Output Control: Paper Size: Main tray Bypass Paper Weight: Paper Path: Paper Size: Output Stacker: Input Guide: ADF: Main tray Bypass Standard output Straight through Max Min Paper Document Bypass tray Main tray Document Paper Weight Capacity Document size - Ricoh 002052MIU | User Guide - Page 153
XP Yes Mac Yes Linux No Driver: Printer GDI TWAIN Yes PC-FAX No SPECIFICATIONS Desktop WHQL for Printer Only Mac printer only PC fax is only available through PC Modem 9. CONSUMABLES Configuration Type: How to install Toner Level sensor Toner Count Yes Desktop Single cartridge - Ricoh 002052MIU | User Guide - Page 154
- Ricoh 002052MIU | User Guide - Page 155
APPENDIX - Ricoh 002052MIU | User Guide - Page 156
- Ricoh 002052MIU | User Guide - Page 157
APPENDIX BLOCK DIAGRAM APPENDIX Appendix APPENDIX B173X900.WMF 1 B173 - Ricoh 002052MIU | User Guide - Page 158
APPENDIX CONNECTION DIAGRAM B173 B173X901.WMF 2 APPENDIX - Ricoh 002052MIU | User Guide - Page 159
table in the below explains abbreviations used in this service manual. The contents of this service manual are declared with abbreviations in many parts. Please memory Organic Photo Conductor Printed Board Assembly Printer Command Language , Printer Control Language Page Discription Language Page - Ricoh 002052MIU | User Guide - Page 160
-
 1
1 -
 2
2 -
 3
3 -
 4
4 -
 5
5 -
 6
6 -
 7
7 -
8
-
9
-
10
-
11
-
12
-
13
-
14
-
15
-
16
-
17
-
18
-
19
-
20
-
21
-
22
-
23
-
24
-
25
-
26
-
27
-
28
-
29
-
30
-
31
-
32
-
33
-
34
-
35
-
36
-
37
-
38
-
39
-
40
-
41
-
42
-
43
-
44
-
45
-
46
-
47
-
48
-
49
-
50
-
51
-
52
-
53
-
54
-
55
-
56
-
57
-
58
-
59
-
60
-
61
-
62
-
63
-
64
-
65
-
66
-
67
-
68
-
69
-
70
-
71
-
72
-
73
-
74
-
75
-
76
-
77
-
78
-
79
-
80
-
81
-
82
-
83
-
84
-
85
-
86
-
87
-
88
-
89
-
90
-
91
-
92
-
93
-
94
-
95
-
96
-
97
-
98
-
99
-
100
-
101
-
102
-
103
-
104
-
105
-
106
-
107
-
108
-
109
-
110
-
111
-
112
-
113
-
114
-
115
-
116
-
117
-
118
-
119
-
120
-
121
-
122
-
123
-
124
-
125
-
126
-
127
-
128
-
129
-
130
-
131
-
132
-
133
-
134
-
135
-
136
-
137
-
138
-
139
-
140
-
141
-
142
-
143
-
144
-
145
-
146
-
147
-
148
-
149
-
150
-
151
-
152
-
153
-
154
-
155
-
156
-
157
-
158
-
159
-
160
 |
 |
B173
SERVICE DOCUMENTATION
001954MIU
RICOH GROUP COMPANIES