Ricoh 400672 User Manual - Page 31
igin of the area you wish to scan.
 |
View all Ricoh 400672 manuals
Add to My Manuals
Save this manual to your list of manuals |
Page 31 highlights
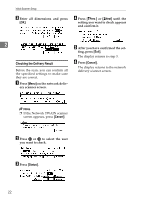
B Using the reference start point as the origin, enter the horizontal and vertical distances from the origin of the area you wish to scan. Next, enter the size of the area. Then, press {#}. This is an example when using millimeters. Scan Setup B When originals are set in the Auto Document Feeder (ADF): 2 Press {#} to move the cursor to the next field. You can also move the cursor by pressing 0 or 1. The following illustration shows how to make your adjustments using the reference start point of the scanner. A When originals are set on the platen glass: Positioning Start point, Scan area, markhorizontal horizontal Start point, vertical Scan area, vertical Scan area TNSY090E In this situation, you can scan monochrome and color originals up to 300 mm (11.8") vertically and 432 mm(17") horizontally from the origin. Make adjustments so that the area you wish to scan does not fall outside this perimeter. ZEPY030E In this situation, you can scan monochrome and color originals up to 297 mm (11.7") vertically from the origin. Horizontally, you can scan monochrome originals up to 2000 mm (78.74") from the origin, and color originals up to 630 mm (24.8") from the origin. Make adjustments so that the area you wish to scan does not fall outside this perimeter. Note ❒ The reference start point of the ADF is located on the inside of the fully extended paper guide on the operation panel side of the scanner. ❒ When performing duplex scans, you can scan monochrome and color originals up to 297 mm (11.7") vertically and 432 mm (17") horizontally from the origin. 21
-
 1
1 -
2
-
3
-
4
-
5
-
6
-
7
-
8
-
9
-
10
-
11
-
12
-
13
-
14
-
15
-
16
-
17
-
18
-
19
-
20
-
21
-
22
-
23
-
24
-
25
-
 26
26 -
 27
27 -
 28
28 -
 29
29 -
 30
30 -
 31
31 -
 32
32 -
 33
33 -
 34
34 -
 35
35 -
 36
36 -
37
-
38
-
39
-
40
-
41
-
42
-
43
-
44
-
45
-
46
-
47
-
48
-
49
-
50
-
51
-
52
-
53
-
54
-
55
-
56
-
57
-
58
-
59
-
60
 |
 |
