Ricoh Aficio MP C3000 Printer Reference
Ricoh Aficio MP C3000 Manual
 |
View all Ricoh Aficio MP C3000 manuals
Add to My Manuals
Save this manual to your list of manuals |
Ricoh Aficio MP C3000 manual content summary:
- Ricoh Aficio MP C3000 | Printer Reference - Page 1
Operating Instructions Printer Reference 1 Preparing the Machine 2 Setting Up the Printer Driver 3 Other Print Operations 4 Direct Printing from a Digital Camera (PictBridge) 5 Saving and Printing Using the Document Server 6 The Functions and Settings of the Machine 7 Appendix Read this manual - Ricoh Aficio MP C3000 | Printer Reference - Page 2
This manual contains detailed instructions and notes on the operation and use of this machine. For your safety and benefit, read this manual carefully before using the machine. Keep this manual in a handy place for quick reference. Important Contents of this manual are subject to change without - Ricoh Aficio MP C3000 | Printer Reference - Page 3
as registering fax numbers, e-mail addresses, and user codes. Also refer to this manual for explanations on how to connect the machine. ❖ Trouble Shooting Provides a guide to solving common problems, and explains how to replace paper, toner, staples, and other consumables. ❖ Security Reference This - Ricoh Aficio MP C3000 | Printer Reference - Page 4
Copy Guide • Quick Reference Fax Guide • Quick Reference Printer Guide • Quick Reference Scanner Guide • PostScript3 Supplement • UNIX Supplement • Manuals for DeskTopBinder Lite • DeskTopBinder Lite Setup Guide • DeskTopBinder Introduction Guide • Auto Document Link Guide Note ❒ Manuals provided - Ricoh Aficio MP C3000 | Printer Reference - Page 5
41 Windows Me - USB 41 Windows 2000 - USB 43 Windows XP, Windows Server 2003 - USB 44 Printing with Parallel Connection 46 Installing the Printer Driver Using IEEE 1394 (SCSI print 48 Windows 2000...48 Windows XP, Windows Server 2003 50 Printing with Bluetooth Connection 52 Supported Profiles - Ricoh Aficio MP C3000 | Printer Reference - Page 6
Printer Driver PCL - Accessing the Printer Properties 61 Windows 95 / 98 / Me - Accessing the Printer Properties 61 Windows 2000 - Accessing the Printer Properties 63 Windows XP, Windows Server 2003 - Accessing the Printer Properties 65 Windows NT 4.0 - Accessing the Printer Properties 67 RPCS - Ricoh Aficio MP C3000 | Printer Reference - Page 7
Trimming ...134 Date and File Name Printing 134 Paper Size...135 Image Print Size...136 Multi-Image-Layout 137 Printing Quality...138 Color Matching ...138 Paper type specification 139 Form Printing...139 Camera Memo Printing 139 Exiting PictBridge 140 Other Reference Information 141 5. Saving - Ricoh Aficio MP C3000 | Printer Reference - Page 8
vi - Ricoh Aficio MP C3000 | Printer Reference - Page 9
How to Read This Manual Symbols This manual uses the following symbols: Indicates important safety to read these explanations. Indicates supplementary explanations of the machine's functions, and instructions on resolving user errors. This symbol is located at the end of sections. It indicates where - Ricoh Aficio MP C3000 | Printer Reference - Page 10
status, such as "Ready", "Offline", and "Printing...". Information about the print job (user ID and document name) appears in this section. 2. [fOnline] / [ Offline] When dimly. • This function is not available with the RPCS printer language. 4. [Job Reset] Press to cancel the current print job. 2 - Ricoh Aficio MP C3000 | Printer Reference - Page 11
The paper tray settings appear. Note ❒ When the power is turned on, the copier display is shown. This is a factory default. This initial setting can be changed. See "System Settings", General Settings Guide. Simplified Display This section explains how to switch to the simplified display. When you - Ricoh Aficio MP C3000 | Printer Reference - Page 12
screen varies depending on whether [Job Order] is selected with Print Priority for the System Settings. For the setting procedure, see "General Features", General Settings Guide. ❖ When [Job Order] is not selected: The job list is displayed for each of the functions. 1 2 3 AMG059S 4 - Ricoh Aficio MP C3000 | Printer Reference - Page 13
❖ When [Job Order] is selected: The job list is displayed for all functions in the order of print jobs. 2 34 AMG060S A Switches between job lists for each function. B Switches between [Current / Waiting Job List] and [Job History]. C Displays reserved job numbers. D Displays the function used to - Ricoh Aficio MP C3000 | Printer Reference - Page 14
the order in which print jobs in the job list are served: A Press [Job List]. B Select the job whose order you want to change. C Press [Change Order]. D Change the order using [Top], [Previous], or [Next]. E Press [OK]. Holding print jobs The machine holds jobs that are queued and currently printing - Ricoh Aficio MP C3000 | Printer Reference - Page 15
Deleting jobs You can delete a job currently printing or jobs in the print queue: A Press [Job List]. B Select the job you want to delete. To delete multiple print jobs, select all print jobs you want to delete. C Press [Delete Reservation]. D Press [Yes]. Checking Job History You can view the - Ricoh Aficio MP C3000 | Printer Reference - Page 16
User Tools/Counter} key. For details, see "Printer Features", General Settings Guide. ❖ List / Test Print Menu Multiple Lists Configuration Page ErrorLog MenuList PCL and error log. You can print the machine's current configuration values. You can print error logs listing all errors that - Ricoh Aficio MP C3000 | Printer Reference - Page 17
Setting Bypass Tray Setting Priority Description You can print an error report when a printer or memoryerror occurs. You can copier and scanner functionsto interrupt it. You can specify the printer language. You can enable the Auto Substitute Paper Size (A4↔LT)feature. You can select the default - Ricoh Aficio MP C3000 | Printer Reference - Page 18
default printer language if the machinecannot find the printer language automatically. You can set to switch the paper tray. Description You can set the size of the I/OBuffer. Normally it is not necessary to change area width when printing onA4 sheet with PCL. When set to On, a carriage return - Ricoh Aficio MP C3000 | Printer Reference - Page 19
the color profile. ❖ PDF Menu (optional) Menu Change PDF Password PDF Group Password Resolution Color Setting Color Profile Description You can set the password for , see "Printer Features", General Settings Guide. For more information about copier features and system settings, see Copy - Ricoh Aficio MP C3000 | Printer Reference - Page 20
Paper on the Bypass Tray This section gives instructions for setting paper on the bypass tray. For paper guide and the paper do not match, skewing and misfeeds might occur. Do not stack paper over the limit mark, otherwise a skewed image or misfeeds might occur. Open out the extender to support paper - Ricoh Aficio MP C3000 | Printer Reference - Page 21
Tray Setting Priority] in [System] of [Printer Features]. In that case, set the paper size using the printer driver. Note ❒ Paper sizes that can be loaded onto the bypass tray are 90 - 305 mm (3.6" - 12") to its orientation. See General Settings Guide. For printer driver settings, see the printer - Ricoh Aficio MP C3000 | Printer Reference - Page 22
over the printer driver settings. ❒ If the printer driver is not used, select [Machine Settings] from [Bypass Tray Setting Priority] in [System] of [Printer Features] (see "Printer Features", General Settings Guide). Set paper size using the control panel. A Press the {User Tools/Counter} key - Ricoh Aficio MP C3000 | Printer Reference - Page 23
over the printer driver settings. ❒ If the printer driver is not used, select [Machine Settings] from [Bypass Tray Setting Priority] in [System] of [Printer Features] (see "Printer Features", General Settings Guide). Set paper size using the control panel. A Press the {User Tools/Counter} key - Ricoh Aficio MP C3000 | Printer Reference - Page 24
over the printer driver settings. ❒ If the printer driver is not used, select [Machine Settings] from [Bypass Tray Setting Priority] in [System] of [Printer Features] (see "Printer Features", General Settings Guide). Set the paper size using the control panel. A Press the {User Tools/Counter} key - Ricoh Aficio MP C3000 | Printer Reference - Page 25
H Press the {User Tools/Counter} key. The initial screen appears. Note ❒ The settings made will remain valid until they are reset again. After printing on OHP transparencies or thick paper, make sure to clear settings for the next user. ❒ For printer driver settings, see the printer driver Help. 17 - Ricoh Aficio MP C3000 | Printer Reference - Page 26
18 - Ricoh Aficio MP C3000 | Printer Reference - Page 27
Method This machine supports network and local connection. Before installing the printer driver, check how the machine is connected. Follow the driver installation procedure that is appropriate to the connection method. Network Connection This machine can be used as a Windows printing port or - Ricoh Aficio MP C3000 | Printer Reference - Page 28
SmartDeviceMonitor for Client port Standard TCP/IP LPR port None ❖ Windows XP Connection Method Ethernet / IEEE 802.11b IEEE 1394 (IPv4 port LPR port None Reference See the explanation about how to install the printer driver for each type of port. For the SmartDeviceMonitor for Client port, see p. - Ricoh Aficio MP C3000 | Printer Reference - Page 29
, Netware servers cannot be used. Reference See the explanation about how to install the printer driver for each type of network printer. For the Windows network printer, see p.36 "Using as a Windows Network Printer". For the NetWare print server and remote printer, see p.38 "Using as a NetWare - Ricoh Aficio MP C3000 | Printer Reference - Page 30
connections • Windows XP: USB, Parallel, IEEE 1394 (SCSI print), and Bluetooth connections • Windows Server 2003: USB, Parallel, IEEE 1394 (SCSI print), and Bluetooth connections • Windows NT 4.0: Parallel connections Reference See the explanation about how to install the printer driver for each - Ricoh Aficio MP C3000 | Printer Reference - Page 31
you want to use. 1 Quick Install Windows 95 / 98 / Me / 2000 / XP, Windows Server 2003, and Windows NT 4.0 users can easily install this software using the supplied CD-ROM. Using Quick Install, the PCL printer driver and/or RPCS printer driver, DeskTopBinder Lite and SmartDeviceMonitor for Client - Ricoh Aficio MP C3000 | Printer Reference - Page 32
software, click [Cancel] before installa- tion is complete. ❒ Auto Run may not work with certain operating system settings. If this happens, launch "Setup.exe" on the CD-ROM root directory. ❒ Select a machine to whose IP address is displayed in [Connect To] to install SmartDeviceMonitor for Client - Ricoh Aficio MP C3000 | Printer Reference - Page 33
Driver Installing the Printer Driver for the Selected Port Using the SmartDeviceMonitor for Client Port 1 Important ❒ To install SmartDeviceMonitor for Client under Windows 2000 / XP Professional, Windows Server 2003, and Windows default instructions Setup.exe" on the CD-ROM root directory. 25 - Ricoh Aficio MP C3000 | Printer Reference - Page 34
for Client Follow the procedure below to change the SmartDeviceMonitor for Client settings, such as TCP/IP timeout, recovery/parallel printing, and printer groups. 1 Windows 95 / 98: A Open the [Printers] window from the [Start] menu. B In the [Printers] window, click the icon of the printer you - Ricoh Aficio MP C3000 | Printer Reference - Page 35
Driver Windows XP, Windows Server 2003: A Open the [Printers and Faxes] window from the [Start] menu. The [Printers and Faxes] window ❒ For TCP/IP, timeout setting can be configured. ❒ User, proxy, and timeout settings can be configured for IPP. ❒ Guide, or SmartDeviceMonitor for Client Help. 27 - Ricoh Aficio MP C3000 | Printer Reference - Page 36
Installing the PCL or RPCS Printer Driver (TCP/IP) Important 1 ❒ To install this printer driver under Windows 2000 / XP Professional, Windows Server 2003, and Windows NT 4.0, you must have an account that has Manage Printers permission. Log on as an Administrators or Power Users group member - Ricoh Aficio MP C3000 | Printer Reference - Page 37
Installing the Printer Driver O Set a user code, if necessary. Up to 8 numeric characters can be entered. No alphabetic character or symbol can be entered. P Select the [Default Printer] check box to configure the printer as default. 1 Q Click [Continue]. Installation starts. R After the - Ricoh Aficio MP C3000 | Printer Reference - Page 38
Machine Installing the PCL or RPCS Printer Driver (IPP) Important 1 ❒ To install printer driver under Windows 2000 / XP Professional, Windows Server 2003, and Windows NT 4.0, you must have an account that has Man- age Printers permission. Log on as an Administrators or Power Users group member - Ricoh Aficio MP C3000 | Printer Reference - Page 39
"Setup.exe" on the CD-ROM root directory. ❒ Setting a user code allows a SmartDeviceMonitor for Admin user to display and check the number of sheets each user prints. For details, see SmartDeviceMonitor for Admin Help. Reference A message appears if there is a newer version of the printer driver - Ricoh Aficio MP C3000 | Printer Reference - Page 40
PCL or RPCS printer driver using the TCP/IP port. 1 Important ❒ To install this printer driver under Windows 2000 / XP Professional, and Windows language, and then click [OK]. The default interface language is English. D Click [PCL/RPCS Printer Drivers]. E The software license agreement appears - Ricoh Aficio MP C3000 | Printer Reference - Page 41
automatically obtains a port name. Change this name if necessary. When the device selection appears, select "RICOH NetworkPrinter Driver C Model". N Click [Next in [Port:]. Q Configure the default printer as necessary. R Click [Continue]. The printer driver installation starts. S After the - Ricoh Aficio MP C3000 | Printer Reference - Page 42
To install this printer driver under Windows 2000 / XP Professional, Win- dows Server 2003, and Windows NT 4.0, you must have an account that has Manage Printers permission. Log on as an Administrators or Power Users group member. Installing the PCL or RPCS Printer Driver A Quit all applications - Ricoh Aficio MP C3000 | Printer Reference - Page 43
Configure the default printer as necessary. P Click [Continue]. 1 The printer driver installation starts. Setup.exe" on the CD-ROM root directory. Reference A message appears if there is a newer version of the printer driver already installed. If there is, you cannot install the printer driver - Ricoh Aficio MP C3000 | Printer Reference - Page 44
PCL or RPCS printer driver when using the 1 printer as a Windows network printer. To use the print server, install the printer driver by selecting "Network printer server", and then select the Windows 2000 / XP, Windows default interface language is English. D Click [PCL/RPCS Printer Drivers]. - Ricoh Aficio MP C3000 | Printer Reference - Page 45
printer is displayed in [Port:]. O Configure the user code as necessary. For an RPCS printer driver, a user code can be set after the printer driver installation. For information about user code, see the printer driver Help. P Select the [Default Printer] check box to configure the printer as - Ricoh Aficio MP C3000 | Printer Reference - Page 46
certain operating system settings. In that case, launch "Setup.exe" on the CD-ROM root directory. B Select an interface language, and then click [OK]. The default interface language is English. C Click [PCL/RPCS Printer Drivers]. D The software license agreement appears in the [License Agreement - Ricoh Aficio MP C3000 | Printer Reference - Page 47
, clear the [Form Feed] and [Enable Banner] check boxes. Under Windows 2000 / XP, Windows Server 2003, or Windows NT 4.0, click the [NetWare setting] tab. Do not select these check boxes since they are automatically selected by the printer driver. If you select the check boxes, the printer may not - Ricoh Aficio MP C3000 | Printer Reference - Page 48
feed. Form feed is controlled by the print- 1 er driver on Windows. If NetWare form feed is configured, the printer may not Printer Settings] tab in the printer properties dialog box. • Under Windows 2000 / XP, Windows Server 2003, or Windows NT 4.0, clear the [Form feed] check box on the [NetWare - Ricoh Aficio MP C3000 | Printer Reference - Page 49
box appears, depending on the operating system. If the printer driver has already been installed, plug and play is enabled, and the icon of the printer connected to the "USB" port is added to the [Printers] window. A Download USB Printing Support from the supplier's Web site. Use a search to find - Ricoh Aficio MP C3000 | Printer Reference - Page 50
of the printer driver are stored in the following location: • RPCS D:\DRIVERS\RPCS\WIN9X_ME\(Language)\DISK1 • PCL 5c (for color printing) D:\DRIVERS\PCL5C\WIN9X_ME\(Language)\DISK1 • PCL 5e (for B & W printing) D:\DRIVERS\PCL5E\WIN9X_ME\(Language)\DISK1 • PCL 6 D:\DRIVERS\PCL6\WIN9X_ME\(Language - Ricoh Aficio MP C3000 | Printer Reference - Page 51
are stored in the following location: • RPCS D:\DRIVERS\RPCS\WIN2K_XP\(Language)\DISK1 • PCL 5c (for color printing) D:\DRIVERS\PCL5C\WIN2K_XP\(Language)\DISK1 • PCL 5e (for B & W printing) D:\DRIVERS\PCL5E\WIN2K_XP\(Language)\DISK1 • PCL 6 D:\DRIVERS\PCL6\WIN2K_XP\(Language)\DISK1 • PostScript - Ricoh Aficio MP C3000 | Printer Reference - Page 52
XP, Windows Server 2003 - USB Important ❒ Installing a printer driver requires Administrators permission. Log on using an account that has Administrators permission. When USB is first used, Found New Hardware Wizard starts, and USB Printing Support is installed automatically. If the printer driver - Ricoh Aficio MP C3000 | Printer Reference - Page 53
stored in the following location: 1 • RPCS D:\DRIVERS\RPCS\WIN2K_XP\(Language)\DISK1 • PCL 5c (for color printing) D:\DRIVERS\PCL5C\WIN2K_XP\(Language)\DISK1 • PCL 5e (for B & W printing) D:\DRIVERS\PCL5E\WIN2K_XP\(Language)\DISK1 • PCL 6 D:\DRIVERS\PCL6\WIN2K_XP\(Language)\DISK1 • PostScript - Ricoh Aficio MP C3000 | Printer Reference - Page 54
❒ To install this printer driver under Windows 2000 / XP Professional, Windows Server 2003, and Windows NT 4.0, you must have an account that has Manage Printers permission. Log on as an Administrators or Power Users group member. Installing the PCL or RPCS Printer Driver A Quit all applications - Ricoh Aficio MP C3000 | Printer Reference - Page 55
with certain operating system settings. In that case, launch "Setup.exe" on the CD-ROM root directory. Reference A message appears if there is a newer version of the printer driver already installed. If there is, you cannot install the printer driver using Auto Run. If you still want to install the - Ricoh Aficio MP C3000 | Printer Reference - Page 56
must be set to "active" from the control panel. For details, see Network Guide. Note ❒ This machine can receive print data from one computer at a time only the printer icon to change. Windows 2000 This describes how to install the printer driver to the computer with Windows 2000 installed, using - Ricoh Aficio MP C3000 | Printer Reference - Page 57
of the printer driver are stored in the following location: • RPCS D:\DRIVERS\RPCS\WIN2K_XP\(Language)\DISK1 • PCL 5c (for color printing) D:\DRIVERS\PCL5C\WIN2K_XP\(Language)\DISK1 • PCL 5e (for B & W printing) D:\DRIVERS\PCL5E\WIN2K_XP\(Language)\DISK1 • PCL 6 D:\DRIVERS\PCL6\WIN2K_XP\(Language - Ricoh Aficio MP C3000 | Printer Reference - Page 58
are stored in the following location: • RPCS D:\DRIVERS\RPCS\WIN2K_XP\(Language)\DISK1 • PCL 5c (for color printing) D:\DRIVERS\PCL5C\WIN2K_XP\(Language)\DISK1 • PCL 5e (for B & W printing) D:\DRIVERS\PCL5E\WIN2K_XP\(Language)\DISK1 • PCL 6 D:\DRIVERS\PCL6\WIN2K_XP\(Language)\DISK1 • PostScript - Ricoh Aficio MP C3000 | Printer Reference - Page 59
(SCSI print) F Follow the on-screen instructions. If the printer driver has already been installed, the printer icon is added to the [Printers and Faxes] window. In this case, printer driver installation is not nec- essary. Even if the printer driver is already installed, the message "Found New - Ricoh Aficio MP C3000 | Printer Reference - Page 60
be con- nected via BIP. • Only JPEG images that can be printed using BIP. • User codes are disabled for BIP. You cannot print if print functions are restricted. • Some printers do not support BIP. Note ❒ In this manual, the instruction referred to print using SPP. To print using HCRP or BIP, see the - Ricoh Aficio MP C3000 | Printer Reference - Page 61
driver under Windows 2000 / XP Professional or Win- dows Server 2003, you must have an account that has Manage Printers permission. Log on as an Administrators or Power Users standard and spec- ifications. For details, see the manuals supplied with each product. ❒ For information about setting up - Ricoh Aficio MP C3000 | Printer Reference - Page 62
all other security modes and custom settings, no password is required. For information about each mode, see the manuals supplied with the utility. D Click [OK]. the Bluetooth password is 1234. D The print job is sent. Note ❒ The Bluetooth password differs for each machine and cannot be changed. 54 - Ricoh Aficio MP C3000 | Printer Reference - Page 63
under Windows 2000, the [Change Accessories] tab is unavailable. Note ❒ The RPCS printer driver supports bidirectional communications and updates the machine status automatically. ❒ The PCL printer driver supports bidirectional communications. You can up- date the machine status manually. To support - Ricoh Aficio MP C3000 | Printer Reference - Page 64
the RPCS printer driver. • In addition to the above, one of the following conditions must also be met: • The SmartDeviceMonitor for Client port and the TCP/IP protocol must be used. • The standard TCP/IP port must be used without changing the default port name (for Windows 2000 / XP and Windows - Ricoh Aficio MP C3000 | Printer Reference - Page 65
properties in the [Printers] folder. Log on as an Administrators or Power Users group member. ❒ Under Windows NT 4.0, Full Control permission is required to change the printer properties in the [Printers] (Windows 2000) or [Printers and Faxes] (Windows XP / Windows Server 2003) folder. Log on as an - Ricoh Aficio MP C3000 | Printer Reference - Page 66
Preparing the Machine Installing Font Manager 2000 Important 1 ❒ Under Windows 2000 / XP, Windows Server 2003, or Windows NT 4.0, in- stalling applications by Auto Run requires administrator permission. To in- stall a printer driver by Auto Run, log on using an account that has administrator - Ricoh Aficio MP C3000 | Printer Reference - Page 67
Adobe PageMaker Version 6.0, 6.5, or 7.0 Under Windows 95 / 98 / Me / 2000 / XP, Windows Server 2003, or Windows 1 NT 4.0 with Adobe PageMaker, you need to copy PPD files to the PageMaker folder. PPD files have the .ppd extension in the folder "DRIVERS\PS\WIN9X_ME \(Language)\DISK1" on the CD - Ricoh Aficio MP C3000 | Printer Reference - Page 68
Preparing the Machine 1 60 - Ricoh Aficio MP C3000 | Printer Reference - Page 69
settings, open the printer properties dialog box from the [Printers] window. Important ❒ You cannot change the printer default settings for each user. Settings made in the printer properties dialog box are applied to all users. A On the [Start] menu, point to [Settings], and then click [Printers - Ricoh Aficio MP C3000 | Printer Reference - Page 70
manuals provided with the application you use. ❒ With some applications, the printer driver settings are not used, and the 2 application's own default settings are applied. ❒ Any settings you make in the following procedure are valid for the current application only. ❒ General users can change - Ricoh Aficio MP C3000 | Printer Reference - Page 71
you make here are used as the default settings for all applications. Reference For details, see the printer driver Help. Making Printer Default Settings - Printing Preferences Important ❒ You cannot change the printer default settings for each user. Settings made in the printer properties dialog - Ricoh Aficio MP C3000 | Printer Reference - Page 72
with Windows 2000. manuals provided with the application you use. ❒ Any settings you make in the following procedure are valid for the current application only. ❒ General users can change the properties displayed in the [Print] dialog box of an application. Settings made here are used as defaults - Ricoh Aficio MP C3000 | Printer Reference - Page 73
PCL - Accessing the Printer Properties Windows XP, Windows Server 2003 - Accessing the Printer Properties Making Printer Default Settings - The Printer Properties Important ❒ To change the printer default settings including option configuration settings, log on using an account that has Manage - Ricoh Aficio MP C3000 | Printer Reference - Page 74
with Windows XP. 2 manuals provided with the application you use. ❒ Any settings you make in the following procedure are valid for the current application only. ❒ General users can change the properties displayed in the [Print] dialog box of an application. Settings made here are used as defaults - Ricoh Aficio MP C3000 | Printer Reference - Page 75
Full Control permission by default. ❒ You cannot change the printer default settings for each user. Settings made in the printer properties dialog box are applied to all users. A On the [Start] menu, point to [Settings], and then click [Printers]. The [Printers] window appears. B Click the icon - Ricoh Aficio MP C3000 | Printer Reference - Page 76
Windows manuals provided with the application you use. ❒ With some applications, the printer driver settings are not used, and the application's own default settings are applied. ❒ Any settings you make in the following procedure are valid for the current application only. ❒ General users can change - Ricoh Aficio MP C3000 | Printer Reference - Page 77
Properties RPCS - Accessing the Printer Properties Windows 95 / 98 / Me - Accessing the Printer Properties There are two dialog box types of the printer properties dialog box. "Multi-tab" is used as an example in this manual. For details about changing the dialog box types, see the printer driver - Ricoh Aficio MP C3000 | Printer Reference - Page 78
Windows manuals provided with the application you use. ❒ With some applications, the printer driver settings are not used, and the application's own default settings are applied. ❒ Any settings you make in the following procedure are valid for the current application only. ❒ General users can change - Ricoh Aficio MP C3000 | Printer Reference - Page 79
RPCS - Accessing the Printer Properties Windows 2000 - Accessing the Printer Properties This describes how to launch printer driver's properties. Making Printer Default Settings - The Printer Properties Important ❒ To change the printer default settings including option configuration settings, - Ricoh Aficio MP C3000 | Printer Reference - Page 80
with Windows 2000. manuals provided with the application you use. ❒ Any settings you make in the following procedure are valid for the current application only. ❒ General users can change the properties displayed in the [Print] dialog box of an application. Settings made here are used as defaults - Ricoh Aficio MP C3000 | Printer Reference - Page 81
Windows XP, Windows Server 2003 - Accessing the Printer Properties Making Printer Default Settings - The Printer Properties Important ❒ To change the printer default settings including option configuration settings, log on using an account that has Manage Printers permission. Members of the Admin - Ricoh Aficio MP C3000 | Printer Reference - Page 82
with Windows XP. 2 manuals provided with the application you use. ❒ Any settings you make in the following procedure are valid for the current application only. ❒ General users can change the properties displayed in the [Print] dialog box of an application. Settings made here are used as defaults - Ricoh Aficio MP C3000 | Printer Reference - Page 83
Full Control permission by default. ❒ You cannot change the printer default settings for each user. Settings made in the printer properties dialog box are applied to all users. A On the [Start] menu, point to [Settings], and then click [Printers]. The [Printers] window appears. B Click the icon - Ricoh Aficio MP C3000 | Printer Reference - Page 84
Windows manuals provided with the application you use. ❒ With some applications, the printer driver settings are not used, and the application's own default settings are applied. ❒ Any settings you make in the following procedure are valid for the current application only. ❒ General users can change - Ricoh Aficio MP C3000 | Printer Reference - Page 85
be printed directly. Note ❒ Paper size errors may occur when printing on custom size under certain operating system settings. In this case, launch "Setup.exe" located on the CD-ROM root directory. C Select and then click [Next]. E Follow the instructions on the display to install DeskTopBinder Lite. - Ricoh Aficio MP C3000 | Printer Reference - Page 86
, click [Add] to display [PDF Direct Print Prop- 3 erties]. D Select Driver for This Machine, click [OK], and then click [Next] repeatedly until [Finish] DeskTopBinder Lite enhancement. Using these buttons, you can print Windows files, preview printouts, convert images, and register scanners for - Ricoh Aficio MP C3000 | Printer Reference - Page 87
one of the follow- ing: • Enter the PDF password in the PDF Direct Printing Properties screen • Specify a PDF password by selecting [Change Password] in the [PDF Configuration] menu on the control panel of this machine ❒ If a [Group Password] for the [PDF Configuration] menu is assigned to either - Ricoh Aficio MP C3000 | Printer Reference - Page 88
Change Icon Changes the icon displayed on the tool bar. 3. Printer Displays a list of RPCS drivers that support Color/Black and White Specifies color or black-and-white printing. 14. Resolution Specifies a print resolution. 15. PDF Password If the PDF file is password-protected, enter the password - Ricoh Aficio MP C3000 | Printer Reference - Page 89
; it does not prevent unauthorized use of information. Opening the Unauthorized Copy Control Window 3 A In the RPCS printer driver, open the [Printing Preference] window. B Click [Add/Change Custom Settings...]. C Select the [Unauthorized copy...] check box. D Click [Control Settings...]. The - Ricoh Aficio MP C3000 | Printer Reference - Page 90
set is printed. 2. The document is copied or stored in copiers / multifunction machines which the optional Copy Data Security unit is copying or storing a document protected by gray overprint. ❒ Only the RPCS printer driver is supported. ❒ You cannot partially embed a pattern and text in a document - Ricoh Aficio MP C3000 | Printer Reference - Page 91
to prevent unauthorized copying. 3 ❖ Setting [Mask type:] in the printer driver • Select a pattern from [Mask type:], and then enter text in the [Text:] box. • You can select overprint color from [Black], [Cyan], or [Magenta] in the [Color:] list. Note ❒ You can set only [Text:], but [Mask type - Ricoh Aficio MP C3000 | Printer Reference - Page 92
text you have set is printed palely. 2. The document is copied, scanned, or stored in copiers / multifunction machines. 3. The pattern and text you have set appear clearly. Note ❒ Only the RPCS printer driver is supported. ❒ You cannot partially embed patterns and text strings in a document. ❒ To - Ricoh Aficio MP C3000 | Printer Reference - Page 93
machine. The following types of printing can be selected using the printer driver: Sample Print, Locked Print, Hold Print, and Stored Print. You Print Jobs] on the Printer screen, the Complete List or the List Per User ID screen appears depending on which list type you select from [Initial Print - Ricoh Aficio MP C3000 | Printer Reference - Page 94
have passwords. L [Clear All] Clears all selections. M [Select All Jobs] Selects all files stored in the machine. N Selected: Displays number of the files selected. O [Exit] Returns to the Printer screen. P User ID, Date / Time, and File Name display Displays the time when the instruction to - Ricoh Aficio MP C3000 | Printer Reference - Page 95
ID. F [Print All Jobs] Prints all selected type of files sent by the user ID. G [UPrevious] / [TNext] If the list of files does not fit are used. ❒ If you press [List Per User ID] in the Complete List screen, the screen switches to the List Per User ID screen where [Back] appears at the bottom - Ricoh Aficio MP C3000 | Printer Reference - Page 96
Follow the procedure below to set the initial Print Jobs screen, and to show it. Selecting the Initial Print Job List A Press the {User Tools/Counter} key. B Press [Printer Features]. 3 The Printer Features menu appears C On the [System] tab, press [Initial Print Job List]. D Select either - Ricoh Aficio MP C3000 | Printer Reference - Page 97
section gives instruction about Sample Print file has not been stored properly, check the error log on the display panel. ❒ Even after job. By default, Sample Print jobs are automatically collated by the printer driver. If about the error log on the display panel, see p.112 "Checking the Error Log". - Ricoh Aficio MP C3000 | Printer Reference - Page 98
with the PCL 6 / 5c and the RPCS printer driver. For information about how to print a Sample Print file with the PostScript 3 printer driver, see ❒ Applications with their own drivers, such as PageMaker, do not support this function. 3 ❒ If you are using Mac OS X, you need Mac OS X v10.2 or higher - Ricoh Aficio MP C3000 | Printer Reference - Page 99
If the least number of settings is one set, all selected files will be printed at one set. ❒ When the number of set quantity is changed, the changed quantity is applied to all selected files. ❒ When printing is completed, the stored file will be deleted. ❒ To stop printing after printing has started - Ricoh Aficio MP C3000 | Printer Reference - Page 100
Other Print Operations Deleting Sample Print Files If you are not satisfied with the sample printout, you can delete the Sample Print file, revise it and print it again until the settings are suitable. A Press the {Printer} key to display the Printer screen. B Press [Print Jobs]. A list of the - Ricoh Aficio MP C3000 | Printer Reference - Page 101
to print unless a password is entered on the by the printer driver as default. If a collate error log on the display panel, see p.112 "Checking the Error Log". For details about the [Auto Delete Temporary Print Jobs] and [Auto Delete Stored Print Jobs], see "Printer Features", General Settings Guide - Ricoh Aficio MP C3000 | Printer Reference - Page 102
with the PCL 6/5c and the RPCS printer driver. For information about how to print a Locked Print file with the PostScript 3 printer driver, see ❒ Applications with their own drivers, such as PageMaker, do not support this function. 3 ❒ If you are using Mac OS X, you need Mac OS X v10.2 or higher - Ricoh Aficio MP C3000 | Printer Reference - Page 103
using the number keys, and then press {OK}. The print confirmation screen appears. A confirmation screen will appear if the password is not entered correctly. Press [Exit] to enter the password again. If multiple print files are selected, the machine prints files that correspond to the entered - Ricoh Aficio MP C3000 | Printer Reference - Page 104
, certain print jobs may not be displayed. 3 D Select the file you want to delete, and then press [Delete]. The password screen is displayed. E Enter the password using the number keys, and then press [OK]. The delete confirmation screen appears. A confirmation screen will appear if the - Ricoh Aficio MP C3000 | Printer Reference - Page 105
] and [Auto Delete Stored Print Jobs], see "Printer Features", General Settings Guide. Printing a Hold Print File The following procedure describes how to print a Hold Print file with the PCL 6/5c and the RPCS printer driver. For information about how to print a Hold Print file with the PostScript - Ricoh Aficio MP C3000 | Printer Reference - Page 106
Other Print Operations C Start printing from the application's [Print] dialog box. The Hold Print job is sent to the machine and stored. D On the machine's control panel, press the {Printer} key to display the print- er screen. E Press [Print Jobs]. 3 F Press [Hold Print Job List]. A list of a print - Ricoh Aficio MP C3000 | Printer Reference - Page 107
[Exit] until the Printer screen appears, and then press [Job Reset]. The file will be deleted. Reference For details about setting printer drivers, see the printer driver Help. You 3 can also print or delete a Hold Print file from Web Image Monitor. For de- tails, see Web Image Monitor Help - Ricoh Aficio MP C3000 | Printer Reference - Page 108
are applied first (see "Printer Features", General Settings Guide). ❒ If the application has a collate option, make sure it is not selected before sending a print job. By default, Stored Print jobs are automatically collated by the printer driver. If a collate option is selected from the application - Ricoh Aficio MP C3000 | Printer Reference - Page 109
with the PCL 6/5c and the RPCS printer driver. For information about how to print a Stored Print file with the PostScript 3 printer driver, see drivers, see the relevant Help files. B Click [Details...], and then enter a User ID in the [User ID:] box. You can also set a password. The same password - Ricoh Aficio MP C3000 | Printer Reference - Page 110
to print, and press [Print]. The confirmation screen appears. If you set a password in the printer driver, a password confirmation screen appears. Enter the password. If multiple print files are selected, and some of these require a password, the machine prints files that correspond to the entered - Ricoh Aficio MP C3000 | Printer Reference - Page 111
When the number of set quantity is changed, the changed quantity is applied to all selected files ", General Settings Guide). 3 Reference For details about setting printer drivers, see the printer driver Help. You set the password in the printer driver, enter the password to delete. If multiple - Ricoh Aficio MP C3000 | Printer Reference - Page 112
The Printer screen appears. B On the Printer screen, press [Print Jobs]. A list of user IDs whose files are stored in the machine appears. C Press the user ID whose file you want to print. You cannot select multiple user IDs at the same time. Press [UPrevious] or [TNext] to scroll through the list - Ricoh Aficio MP C3000 | Printer Reference - Page 113
ID Screen 3 The print job list of the selected user ID appears. E Select the desired print jobs. To cancel a selection, press the highlighted print job again. To clear all selections, press [Clear All]. F Press [Print]. - Ricoh Aficio MP C3000 | Printer Reference - Page 114
The Printer screen appears. B On the Printer screen, press [Print Jobs]. 3 A list of user IDs whose files are stored in the machine appears. C Press the user ID whose file you want to print. You cannot select multiple user IDs at the same time. Press [UPrevious] or [TNext] to scroll through the list - Ricoh Aficio MP C3000 | Printer Reference - Page 115
a print job that is not stored under the selected user ID. ❒ If you select Sample Print including multiple files password. If there are multiple passwords, the machine prints only files that correspond to the entered password. ❒ If you select Stored Print files, and some of these require a password - Ricoh Aficio MP C3000 | Printer Reference - Page 116
Form Feed This section gives instructions for operating the machine when there is no tray for the selected paper size or type, or when paper loaded in the machine has run out. Important ❒ The tray cannot be changed if the following functions are set: • Staple 3 • Punch • Duplex Print to a tray - Ricoh Aficio MP C3000 | Printer Reference - Page 117
jobs, press [Resume Printing] ❒ If the machine is shared by multiple computers, be careful not to accidentally cancel someone else's print job. ❒ Under Windows, if the machine is connected to the computer using a parallel cable, sent print jobs may be canceled if [Reset All Jobs] is pressed while - Ricoh Aficio MP C3000 | Printer Reference - Page 118
Other Print Operations Canceling a Print Job This section gives instruction to stop printing from the computer or the display panel. Canceling a Print Job Using the Control Panel A Press the {Printer} key. 3 The Printer screen appears. B - Ricoh Aficio MP C3000 | Printer Reference - Page 119
computer will not be canceled in this case. ❒ Under Windows XP, Windows Server 2003, or Windows NT 4.0, click [Cancel] on the [Document] menu. ❒ Under Windows 95 / 98 / Me / 2000 or Windows NT 4.0, you can also open the print job queue window by double-clicking the machine icon in the [Printers - Ricoh Aficio MP C3000 | Printer Reference - Page 120
not be stored due to printing errors, identify the cause of the errors by checking the error log on the control panel. Important ❒ The most recent 30 errors are stored in the error log. If a new error is added when there are 30 errors already stored, the oldest error is deleted. However, if the - Ricoh Aficio MP C3000 | Printer Reference - Page 121
Monitor Start Web Image Monitor and enter the machine's IP address in the address bar. This displays the top page. For more information, see Network Guide. Note ❒ Up to a maximum of 150 jobs at once can be spool printed. ❒ If Spool Printing is not set, you cannot select [Spooling Job List - Ricoh Aficio MP C3000 | Printer Reference - Page 122
the page numbers for each input tray. Important ❒ This function is available with the PCL 6/5c printer driver only. ❒ If [Document Server] is selected under [Job Type:], User Defined Page cannot be used. ❒ If [User Defined Pages] is selected under [Paper Selection:] on [Paper] tab, [Lay- 3 out - Ricoh Aficio MP C3000 | Printer Reference - Page 123
and printed output may not be as expected. ❒ When setting Staple or Collate in the printer driver, make sure that the Collate check box is cleared in the the printer driver Help. For information about optional finishers, see General Settings Guide. To remove paper misfeeds, see Trouble Shooting. 115 - Ricoh Aficio MP C3000 | Printer Reference - Page 124
are both selected. After setting the staple position, use the printer driver's preview icon to check the position before printing. Reference For paper sizes and maximum numbers of sheets available for stapling, see "Specifications", General Settings Guide. For printing methods, see the printer - Ricoh Aficio MP C3000 | Printer Reference - Page 125
on the software you are using, print settings may not be saved and the printed result may not be as expected. ❒ When setting Staple in the printer driver settings, make sure that a collate option is not selected in the print settings of the application. If a collate option is selected in the - Ricoh Aficio MP C3000 | Printer Reference - Page 126
sheet individually. Reference For information about paper sizes that can be punched, see "Supplementary Informations", Copy/ Document Server Reference. For printing methods, see the printer driver Help. 118 - Ricoh Aficio MP C3000 | Printer Reference - Page 127
to the binding direction. ❒ Be sure to set the punch position the same as the staple position when using it with the staple function. ❒ Be sure to set paper size and orientation in the printer driver when punching. ❒ Depending on the application, print settings may not be enabled and printed output - Ricoh Aficio MP C3000 | Printer Reference - Page 128
be as intended. Note ❒ Set Collate and Rotating collate when using the RPCS printer driver. ❒ Follow the procedure below when using the printer driver other than the RPCS: • Set Collate and Rotating Collate in the printer driver. • If you cannot make Shift Collate even with the optional finisher - Ricoh Aficio MP C3000 | Printer Reference - Page 129
If the following functions are selected, Collate or Shift Collate will be applied even if Rotating Collate is selected: • When combined with staple function. • When combined with punch function. • If jobs containing pages of various sizes are set. • When output tray is specified. • When combined - Ricoh Aficio MP C3000 | Printer Reference - Page 130
Other Print Operations Covers Using this function, you can insert cover and back sheets fed from a different tray to that of the main paper, and print on them. Important ❒ To use this function, Collate must be set. Rotating Collate cannot be set. ❒ The cover sheets should be the same size and - Ricoh Aficio MP C3000 | Printer Reference - Page 131
• Blank • When printing one side Covers AEV018S • When printing both sides 3 AEV033S ❖ Front and Back cover Prints the first and last page of the document as the cover and back cover pages. • Print on one side Prints on one side of the cover sheets only, even when duplex printing is selected. • - Ricoh Aficio MP C3000 | Printer Reference - Page 132
Other Print Operations • Print on both sides Prints on both sides of the cover sheets when duplex printing is selected. • Front cover printed on both sides, back cover page face inside, and the number of pages is odd 3 AEV037S • Front cover printed on one side, back cover page face inside, and - Ricoh Aficio MP C3000 | Printer Reference - Page 133
, if the cover paper is set to the L orientation, the orientation of cover and body will be different. Reference For printing methods, see the printer driver Help. 125 - Ricoh Aficio MP C3000 | Printer Reference - Page 134
Note ❒ This function is only valid with duplex printing. ❒ Up to 20 pages can be specified as the front pages of chapters using the printer driver. ❒ This function can be used together with combine (layout) printing. Reference For printing methods, see the printer - Ricoh Aficio MP C3000 | Printer Reference - Page 135
Blank AJO023S AJO024S Note ❒ Up to 20 pages can be specified as the front pages of chapters using the printer driver. ❒ The slip sheet should be the same size and orientation as the body of the paper. ❒ If "Auto and the slip sheet. Reference For printing methods, see the printer driver Help. 127 - Ricoh Aficio MP C3000 | Printer Reference - Page 136
Other Print Operations Slip Sheet ❖ Inserting a slip sheet between each page • Print 3 • Blank AEV019S AEU023S ❖ Inserting a slip sheet between OHP transparencies • Print • Blank AEV020S AEU024S Note ❒ Collate cannot be set when using slip sheets. ❒ When the duplex printing or cover printing - Ricoh Aficio MP C3000 | Printer Reference - Page 137
can be sent from the digital camera to the machine during one print transaction. If an attempt is made to send more images, an error message is sent to the camera and printing fails. ❒ Since printing conditions are specified on the digital camera, specifiable parameters depend on the particular - Ricoh Aficio MP C3000 | Printer Reference - Page 138
Direct Printing from a Digital Camera (PictBridge) PictBridge Printing Follow the procedure below to start PictBridge printing on this machine. Important ❒ Do not disconnect the USB cable while data is being sent. If you do, printing will fail. ❒ The USB host interface board is supplied with a - Ricoh Aficio MP C3000 | Printer Reference - Page 139
printing. Note ❒ Since printing conditions are specified on the digital camera, specifiable parameters depend on the particular digital camera. For details, see your digital camera's manual. ❒ Some digital cameras require settings for manual PictBridge operation. For details, see your digital camera - Ricoh Aficio MP C3000 | Printer Reference - Page 140
printing 4 • Paper size • Image print size • Multi-Image-Layout • Printing quality • Color matching • Paper type specification • Form printing • Camera memo printing Note ❒ This machine does not support the following settings: • DPOF printing • Margin-less printing ❒ The setting parameters - Ricoh Aficio MP C3000 | Printer Reference - Page 141
What Can Be Done on This Machine Index Printing ❖ A3 (297 × 420) Horizontal images × vertical images (in) 12 × 16 K 16 × 12 L Paper orientation ❖ A4 (210 × 497) Horizontal images × vertical images (in) Paper orientation 8 × 12 K 12 × 8 L 4 ❖ A5 (148 × 210) Horizontal images × - Ricoh Aficio MP C3000 | Printer Reference - Page 142
Direct Printing from a Digital Camera (PictBridge) Trimming Use this function to print only the inside of the trimming area specified on the digital camera. 4 *1 -- Trimming area AGZ007S Date and File Name Printing Use this function to print the date and/or file name under the image. AGZ005S In - Ricoh Aficio MP C3000 | Printer Reference - Page 143
What Can Be Done on This Machine Paper Size Use this function to print on paper with the size specified on the digital camera. Paper size name Actual size 2L (5" × 7") 178 mm × 127 mm (7" × 5") Postcard 148 mm × 100 mm (5.8" × 3.9") 100 mm × 150 mm 150 mm × 100 mm (5.9" × 3.9") 4" × 6" - Ricoh Aficio MP C3000 | Printer Reference - Page 144
× 6 cm • 10 cm × 7 cm • 13 cm × 9 cm • 15 cm × 10 cm • 18 cm × 13 cm • 21 cm × 15 cm • 24 cm × 18 cm Note ❒ An error occurs if the specified size is larger than the actual paper size. 136 - Ricoh Aficio MP C3000 | Printer Reference - Page 145
What Can Be Done on This Machine Multi-Image-Layout Use this function to print multiple images on the specified paper. 4 AGZ002S The number of images that can be printed on one page are as follows: Paper size 2L (5" × 7") Postcard 100 mm × 150 mm 4" × 6" 8" × 10" Letter (81/2" × 11") 11" × 17" A3 - Ricoh Aficio MP C3000 | Printer Reference - Page 146
bit); if you select [Fine], the machine prints at 600 dpi × 600 dpi (4 bit). Color Matching Use this function to optimize colors when printing images. If you select [Default] or [OFF], the machine prioritizes gradation for color matching, if you select [ON], the machine prioritizes saturation. 138 - Ricoh Aficio MP C3000 | Printer Reference - Page 147
panel to set the paper type of the machine correctly. The paper type detected by the digital camera The paper type of the machine Default All type of paper Plain Paper Plain or recycled paper 4 Form Printing Use this function to print images in a predetermined layout format. AGZ009S Camera - Ricoh Aficio MP C3000 | Printer Reference - Page 148
Direct Printing from a Digital Camera (PictBridge) Exiting PictBridge Follow the procedure below to quit the PictBridge mode. Important ❒ Do not disconnect the USB cable while data is being sent to the machine. If you do, printing will fail. A Check the display panel of this machine is displaying - Ricoh Aficio MP C3000 | Printer Reference - Page 149
Other Reference Information Other Reference Information For further details about printing on this machine, see the following: Reference Fore details about paper size, paper type, or tray settings, see General Settings Guide. 4 141 - Ricoh Aficio MP C3000 | Printer Reference - Page 150
Direct Printing from a Digital Camera (PictBridge) 4 142 - Ricoh Aficio MP C3000 | Printer Reference - Page 151
their own drivers, such as PageMaker, do not support this function user ID, using up to eight alphanumeric characters. ❒ You should enter a Password ❒ The Document Server also stores files scanned using the Automatic Docu- ment Feeder stored files, see General Settings Guide. ❒ When using the hard - Ricoh Aficio MP C3000 | Printer Reference - Page 152
Saving and Printing Using the Document Server 5 144 - Ricoh Aficio MP C3000 | Printer Reference - Page 153
setting items used for configuring the model you are using. Reference For details about functions and setting items, see Network Guide, PostScript 3 Supplement and UNIX Supplement. Functions The following functions are available with the machine: • Copy • Printer • Scanner • Fax • Document Server - Ricoh Aficio MP C3000 | Printer Reference - Page 154
Status Menu Input Tray Output Tray Toner Read Read Read User mode Administrator mode Read Read Read 6 • Configuration Menu Function System Version Printer Language Read Read Read Read User mode Administrator mode Read Read Read Read • Counter Menu Copier Printer Fax Send/TX/Total Fax - Ricoh Aficio MP C3000 | Printer Reference - Page 155
• Job List Menu Current/Waiting Jobs Job History Read Read User mode • Printer Menu Spool Printing Job History Error Log Read Read Read User mode • Fax History Menu Transmission Reception LAN-Fax Read Read Read User mode • Document Server Menu Print Job History Fax Remote Send History - Ricoh Aficio MP C3000 | Printer Reference - Page 156
Authentica- None tion Management Program/Change Adminis- None trator LDAP Server None • Printer Menu Basic Settings Tray Parameters (PCL) Tray Parameters (PS) PDF Temporary Password PDF Group Password PDF Fixed Password Read None None Read None None User mode Administrator mode Read/Modify - Ricoh Aficio MP C3000 | Printer Reference - Page 157
Access Control IPP Authentication SSL/TLS ssh Site Certificate Device Certificate None None None None None User mode Read Read User mode User mode Read Read Read Read Read None None None Read Read User mode None None None None None None None List of the Setting Items Administrator mode Read - Ricoh Aficio MP C3000 | Printer Reference - Page 158
The Functions and Settings of the Machine • RC Gate Menu Setup RC Gate Update RC Gate Firmware RC Gate Proxy Server None None None User mode Administrator mode Read/Modify Read/Modify Read/Modify • Webpage Menu Webpage User mode Read/Modify Administrator mode Read/Modify • Extended Feature - Ricoh Aficio MP C3000 | Printer Reference - Page 159
to Print Size: Image Smoothing: Input Tray: Output Tray: Resolution Size: Staple: Toner Saving Type: Paper Selection Punch: Selectable Items Off, On Auto, Photographic, Text, User Setting Off, Open to Left, Open to Top Prompt User, Nearest Size and Scale, Nearest Size and Crop Off, On, Auto - Ricoh Aficio MP C3000 | Printer Reference - Page 160
The Functions and Settings of the Machine 6 152 - Ricoh Aficio MP C3000 | Printer Reference - Page 161
Specifications 600 × 600 dpi 300 × 300 dpi Type 1: • Color: 25 ppm • B&W: 25 ppm Type 2: • Color: 30 ppm • B&W: 30 ppm (A4K,81/2" ×11" K IPv4, IPv6, IPX/SPX, AppleTalk Standard: PCL 6/5c, RPCS Option: PostScript 3, PDF Direct, PictBridge PCL 6/5c: Monotype Imaging 35 Intellifonts, 10 TrueType fonts - Ricoh Aficio MP C3000 | Printer Reference - Page 162
) Specifications • Supported Operating System: Windows Me / 2000 / XP, Windows Server 2003, supported. ❒ When using the USB Interface (Standard) with Mac OS 10.3.3, USB2.0 is supported. ❒ When using the USB Interface (Standard) with Windows Me, install USB Printing Support. Windows Me only supports - Ricoh Aficio MP C3000 | Printer Reference - Page 163
.: IEEE 1394 ❖ Interface: IEEE std 1394-1995 compliant IEEE std 1394a-2000 compliant ❖ Device class: SCSI print (Windows 2000 / XP, Windows Server 2003) IP over 1394 (Windows Me / XP, Windows Server 2003) ❖ Protocol: SBP-2 (SCSI print) TCP/IP (IP over 1394) ❖ Interface connector: IEEE 1394 (6 pin - Ricoh Aficio MP C3000 | Printer Reference - Page 164
spec.: Based on IEEE 802.11b (wireless LAN) ❖ Protocol: TCP/IP, IPX/SPX, AppleTalk Note ❒ SmartDeviceMonitor and Web Image Monitor are supported. ❖ Data transfer speed: Auto select from below speed 1 Mbps, 2 Mbps, 5.5 Mbps, 11 Mbps 7 ❖ Frequency range: • Inch version: 2412 - 2462 MHz (1 - 11 - Ricoh Aficio MP C3000 | Printer Reference - Page 165
Specifications Bluetooth Interface Unit Type 3245 ❖ Supported Profiles: • SPP (Serial Port Profile) • HCRP (Hardcopy Cable Replacement Profile) • BIP (Basic Imaging Profile) ❖ Frequency Range: 2.45 GHz ISM band ❖ Data Transmission Speed: 723 kbps - Ricoh Aficio MP C3000 | Printer Reference - Page 166
control panel, 14 C Canceling a job Windows, 110 Changing the order of jobs, 6 Chaptering, 126 Driver Using USB, 41 Interface, 153 J Job List, 4 Job List screen, 4 L List Per User ID printing all print jobs, 104, 106 printing the desired print job, 104 Locked print deleting, 96 printing, 94 M Manuals - Ricoh Aficio MP C3000 | Printer Reference - Page 167
, RPCS, 71 Windows 95/98/Me printer properties, PCL, 61 printer properties, RPCS, 69 Windows NT 4.0 document defaults, PCL, 67 document defaults, RPCS, 75 printer properties, PCL, 67 printer properties, RPCS, 75 Windows Server 2003 printer properties, PCL, 65 printer properties, RPCS, 73 Windows XP - Ricoh Aficio MP C3000 | Printer Reference - Page 168
160 EN USA B788-7507 - Ricoh Aficio MP C3000 | Printer Reference - Page 169
in accordance with the instructions, may cause harmful user's authority to operate the equipment. Declaration of Conformity Product Name: Printer/Scanner Controller + Copy Machine Model Number: C2525/DSc525/LD425c/Aficio MP C2500 C3030/DSc530/LD430c/Aficio MP C3000 Responsible party: Ricoh - Ricoh Aficio MP C3000 | Printer Reference - Page 170
Operating Instructions Printer Reference EN USA B788-7507
-
 1
1 -
 2
2 -
 3
3 -
 4
4 -
 5
5 -
 6
6 -
 7
7 -
8
-
9
-
10
-
11
-
12
-
13
-
14
-
15
-
16
-
17
-
18
-
19
-
20
-
21
-
22
-
23
-
24
-
25
-
26
-
27
-
28
-
29
-
30
-
31
-
32
-
33
-
34
-
35
-
36
-
37
-
38
-
39
-
40
-
41
-
42
-
43
-
44
-
45
-
46
-
47
-
48
-
49
-
50
-
51
-
52
-
53
-
54
-
55
-
56
-
57
-
58
-
59
-
60
-
61
-
62
-
63
-
64
-
65
-
66
-
67
-
68
-
69
-
70
-
71
-
72
-
73
-
74
-
75
-
76
-
77
-
78
-
79
-
80
-
81
-
82
-
83
-
84
-
85
-
86
-
87
-
88
-
89
-
90
-
91
-
92
-
93
-
94
-
95
-
96
-
97
-
98
-
99
-
100
-
101
-
102
-
103
-
104
-
105
-
106
-
107
-
108
-
109
-
110
-
111
-
112
-
113
-
114
-
115
-
116
-
117
-
118
-
119
-
120
-
121
-
122
-
123
-
124
-
125
-
126
-
127
-
128
-
129
-
130
-
131
-
132
-
133
-
134
-
135
-
136
-
137
-
138
-
139
-
140
-
141
-
142
-
143
-
144
-
145
-
146
-
147
-
148
-
149
-
150
-
151
-
152
-
153
-
154
-
155
-
156
-
157
-
158
-
159
-
160
-
161
-
162
-
163
-
164
-
165
-
166
-
167
-
168
-
169
-
170
 |
 |
Operating Instructions
Printer Reference
Read this manual carefully before you use this machine and keep it handy for future reference. For safe and correct use, be sure to read the
Safety Information in "About This Machine" before using the machine.
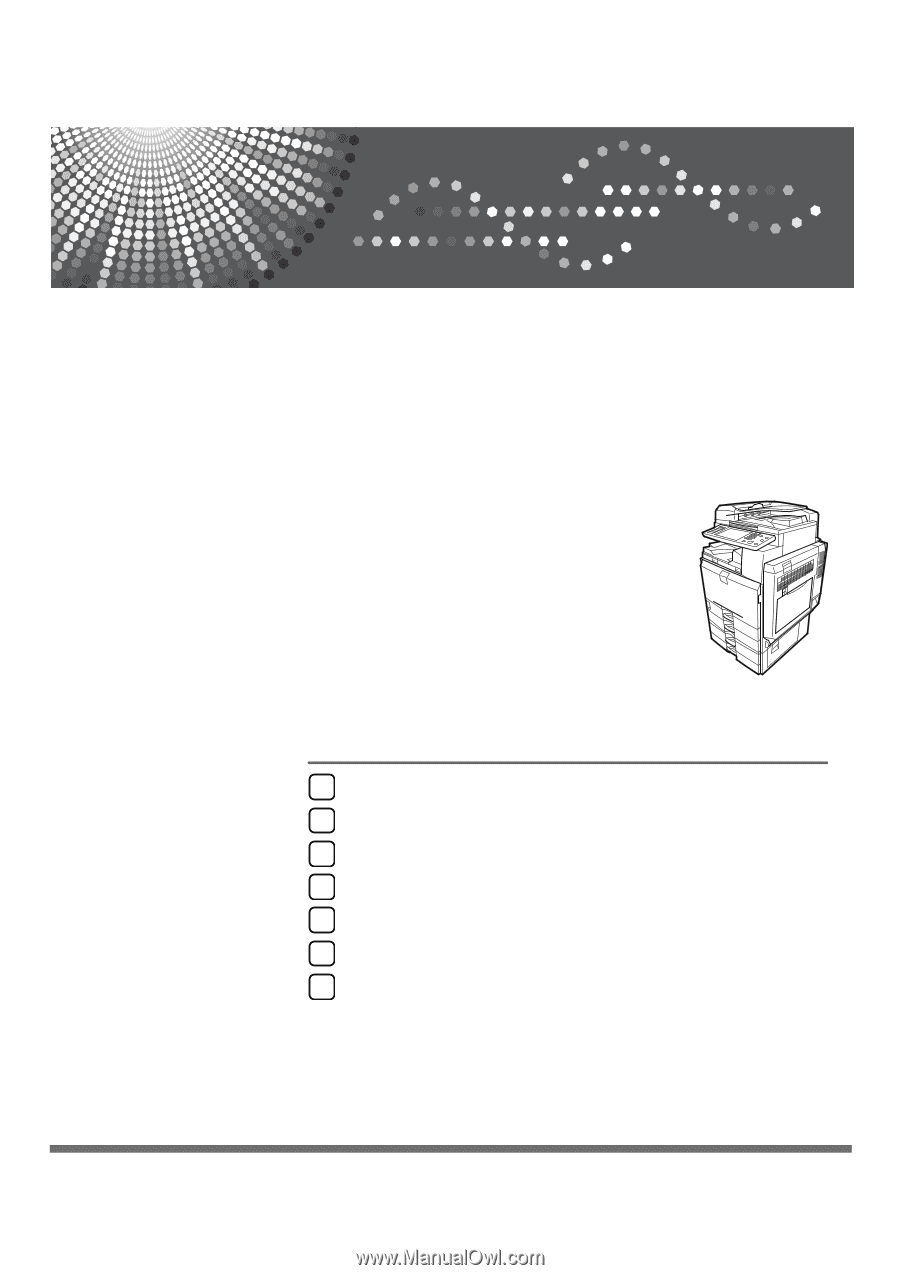
Preparing the Machine
Setting Up the Printer Driver
Other Print Operations
Direct Printing from a Digital Camera (PictBridge)
Saving and Printing Using the Document Server
The Functions and Settings of the Machine
Appendix
1
2
3
4
5
6
7