Ricoh SP 311SFNw User Guide - Page 96
Adjusting Image Density, Specifying Resolution, For details, see Scanner Features Settings.
 |
View all Ricoh SP 311SFNw manuals
Add to My Manuals
Save this manual to your list of manuals |
Page 96 highlights
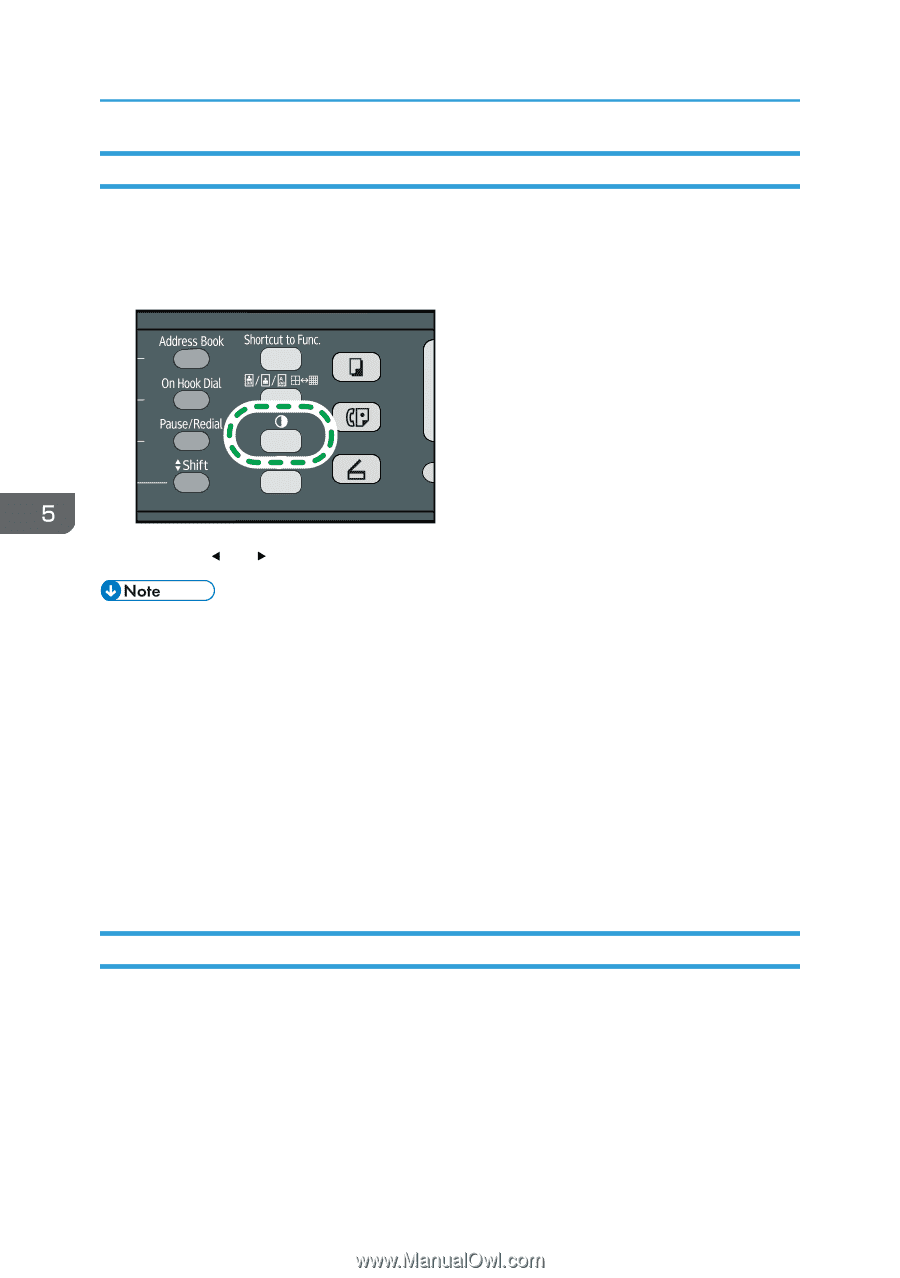
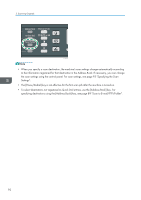
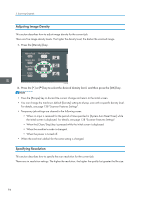
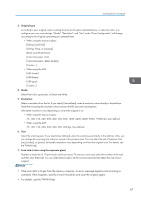
5. Scanning Originals Adjusting Image Density This section describes how to adjust image density for the current job. There are five image density levels. The higher the density level, the darker the scanned image. 1. Press the [Density] key. CVW109 2. Press the [ ] or [ ] key to select the desired density level, and then press the [OK] key. • Press the [Escape] key to discard the current change and return to the initial screen. • You can change the machine's default [Density] setting to always scan with a specific density level. For details, see page 138 "Scanner Features Settings". • Temporary job settings are cleared in the following cases: • When no input is received for the period of time specified in [System Auto Reset Timer] while the initial screen is displayed. For details, see page 138 "Scanner Features Settings". • When the [Clear/Stop] key is pressed while the initial screen is displayed. • When the machine's mode is changed. • When the power is turned off. • When the machine's default for the same setting is changed. Specifying Resolution This section describes how to specify the scan resolution for the current job. There are six resolution settings. The higher the resolution, the higher the quality but greater the file size. 94
-
 1
1 -
2
-
3
-
4
-
5
-
6
-
7
-
8
-
9
-
10
-
11
-
12
-
13
-
14
-
15
-
16
-
17
-
18
-
19
-
20
-
21
-
22
-
23
-
24
-
25
-
26
-
27
-
28
-
29
-
30
-
31
-
32
-
33
-
34
-
35
-
36
-
37
-
38
-
39
-
40
-
41
-
42
-
43
-
44
-
45
-
46
-
47
-
48
-
49
-
50
-
51
-
52
-
53
-
54
-
55
-
56
-
57
-
58
-
59
-
60
-
61
-
62
-
63
-
64
-
65
-
66
-
67
-
68
-
69
-
70
-
71
-
72
-
73
-
74
-
75
-
76
-
77
-
78
-
79
-
80
-
81
-
82
-
83
-
84
-
85
-
86
-
87
-
88
-
89
-
90
-
 91
91 -
 92
92 -
 93
93 -
 94
94 -
 95
95 -
 96
96 -
 97
97 -
 98
98 -
 99
99 -
 100
100 -
 101
101 -
102
-
103
-
104
-
105
-
106
-
107
-
108
-
109
-
110
-
111
-
112
-
113
-
114
-
115
-
116
-
117
-
118
-
119
-
120
-
121
-
122
-
123
-
124
-
125
-
126
-
127
-
128
-
129
-
130
-
131
-
132
-
133
-
134
-
135
-
136
-
137
-
138
-
139
-
140
-
141
-
142
-
143
-
144
-
145
-
146
-
147
-
148
-
149
-
150
-
151
-
152
-
153
-
154
-
155
-
156
-
157
-
158
-
159
-
160
-
161
-
162
-
163
-
164
-
165
-
166
-
167
-
168
-
169
-
170
-
171
-
172
-
173
-
174
-
175
-
176
-
177
-
178
-
179
-
180
-
181
-
182
-
183
-
184
-
185
-
186
-
187
-
188
-
189
-
190
-
191
-
192
-
193
-
194
-
195
-
196
-
197
-
198
-
199
-
200
-
201
-
202
-
203
-
204
-
205
-
206
-
207
-
208
-
209
-
210
-
211
-
212
-
213
-
214
-
215
-
216
-
217
-
218
-
219
-
220
-
221
-
222
-
223
-
224
-
225
-
226
-
227
-
228
-
229
-
230
-
231
-
232
-
233
-
234
-
235
-
236
-
237
-
238
-
239
-
240
-
241
-
242
-
243
-
244
-
245
-
246
-
247
-
248
-
249
-
250
-
251
-
252
-
253
-
254
-
255
-
256
-
257
-
258
-
259
-
260
-
261
-
262
-
263
-
264
-
265
-
266
-
267
-
268
-
269
-
270
-
271
-
272
 |
 |