Ridgid OL50145MWD Operation Manual - Page 15
Maintenance
 |
View all Ridgid OL50145MWD manuals
Add to My Manuals
Save this manual to your list of manuals |
Page 15 highlights
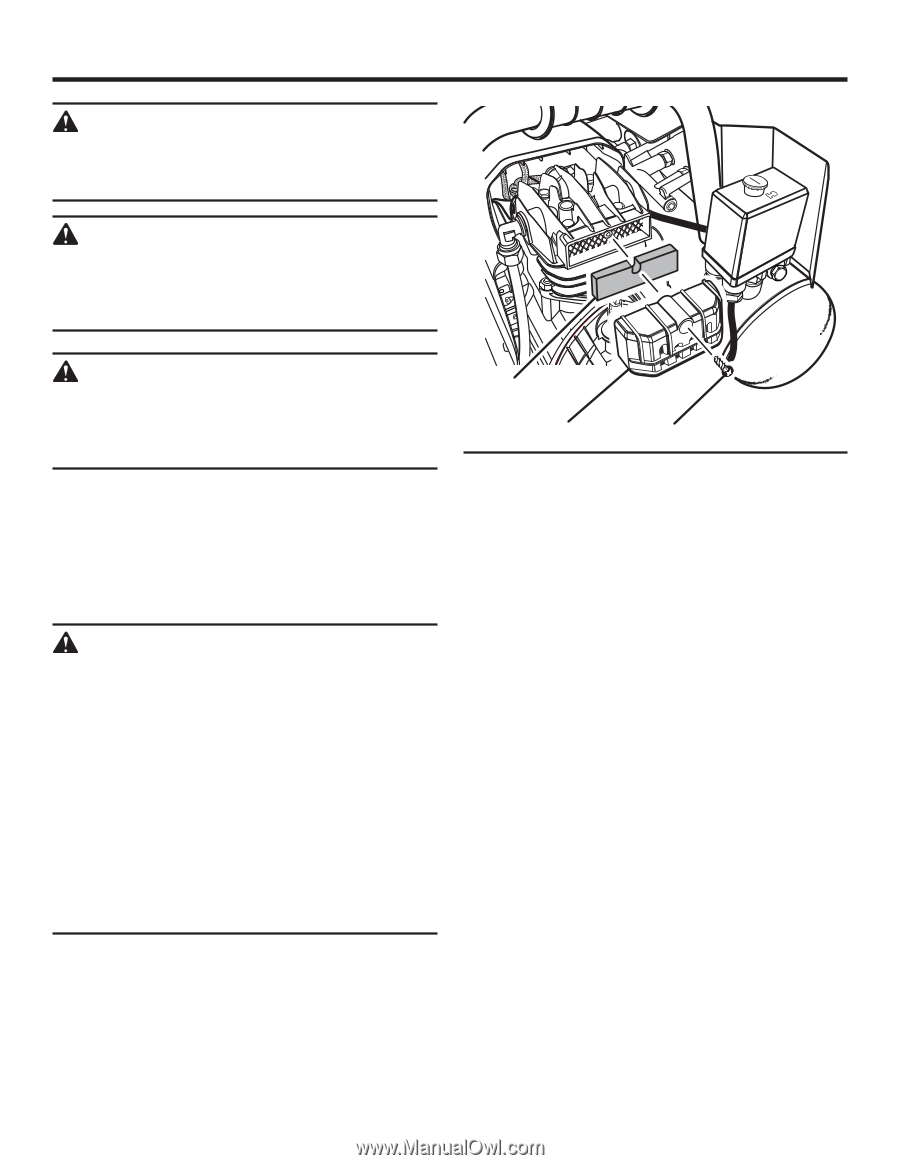
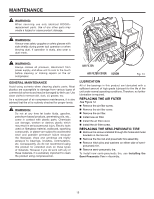
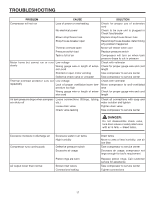
MAINTENANCE WARNING: When servicing use only identical RIDGID® replacement parts. Use of any other parts may create a hazard or cause product damage. WARNING: Always wear safety goggles or safety glasses with side shields during power tool operation or when blowing dust. If operation is dusty, also wear a dust mask. ON OFF I O ON WARNING: Always release all pressure, disconnect from power supply, and allow unit to cool to the touch before cleaning or making repairs on the air compressor. GENERAL MAINTENANCE Avoid using solvents when cleaning plastic parts. Most plastics are susceptible to damage from various types of commercial solvents and may be damaged by their use. Use clean cloths to remove dirt, dust, oil, grease, etc. As a routine part of air compressor maintenance, it is also advised that the oil is routinely checked for proper levels. WARNING: Do not at any time let brake fluids, gasoline, petroleum-based products, penetrating oils, etc., come in contact with plastic parts. Chemicals can damage, weaken or destroy plastic which may result in serious personal injury. Electric tools used on fiberglass material, wallboard, spackling compounds, or plaster are subject to accelerated wear and possible premature failure because the fiberglass chips and grindings are highly abrasive to bearings, brushes, commutators, etc. Consequently, we do not recommend using this product for extended work on these types of materials. However, if you do work with any of these materials, it is extremely important to clean the product using compressed air. AIR FILTER AIR FILTER cover screw Fig. 14 LUBRICATION All of the bearings in this product are lubricated with a sufficient amount of high grade lubricant for the life of the unit under normal operating conditions. Therefore, no further lubrication is required. replacing THE AIR FILTER See Figure 14. Remove the air filter screw. Remove the air filter cover. Remove the air filter. Install new air filter. Install the air filter cover. Install the air filter screw. replacing THE SEMI-PNEUMATIC TIRE Remove the screws installed through the holes and metal brackets in the tire rod. Remove the tire rod and pneumatic tire assembly. Remove hitch pins and washers on either side of semi- pneumatic tire. Remove semi-pneumatic tire. To install new semi-pneumatic tire, see Installing the Semi-Pneumatic Tire in Assembly. 15
-
 1
1 -
2
-
3
-
4
-
5
-
6
-
7
-
8
-
9
-
 10
10 -
 11
11 -
 12
12 -
 13
13 -
 14
14 -
 15
15 -
 16
16 -
 17
17 -
 18
18 -
 19
19 -
 20
20
 |
 |