Ryobi RE180PL1G Operation Manual - Page 18
Adjustments, Operation
 |
View all Ryobi RE180PL1G manuals
Add to My Manuals
Save this manual to your list of manuals |
Page 18 highlights
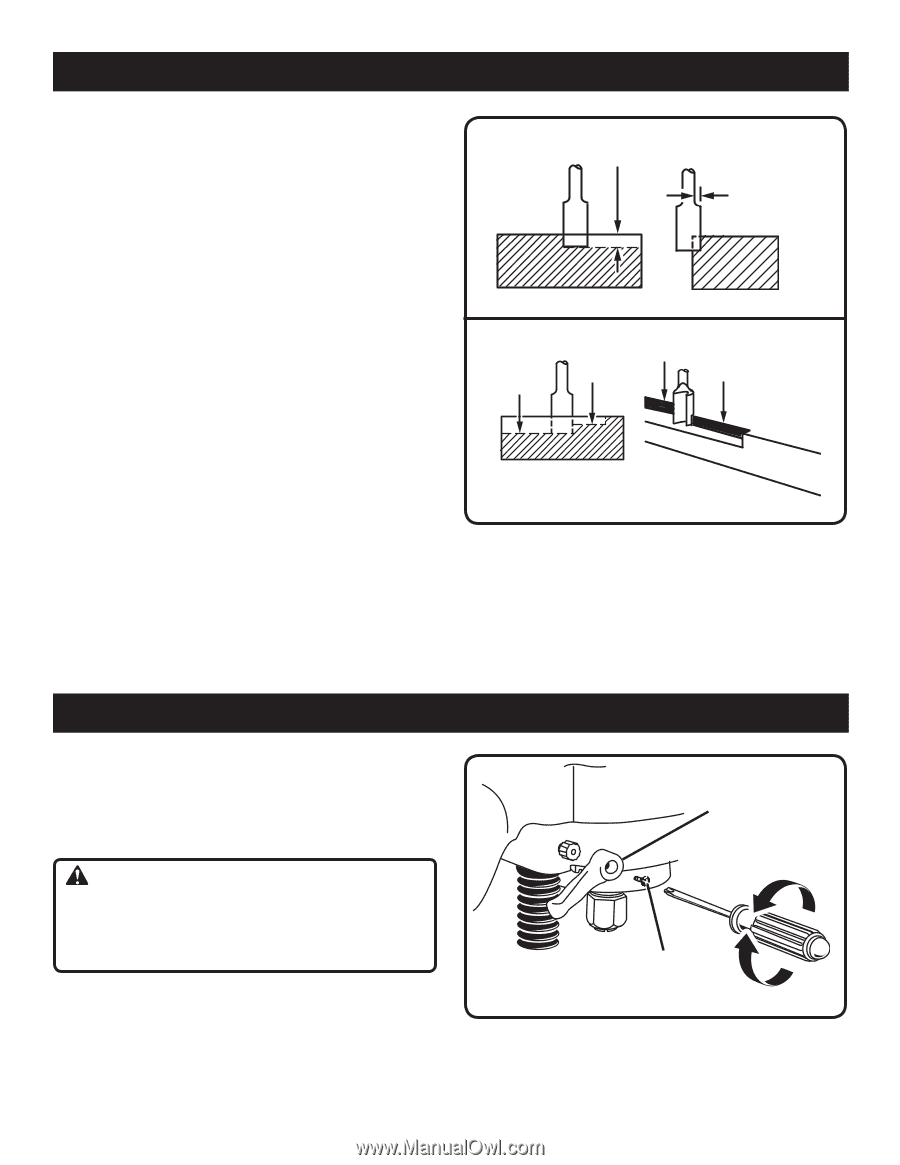
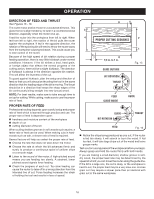
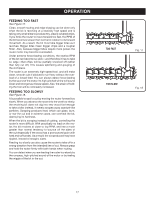
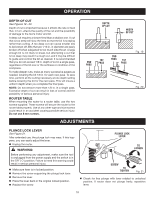
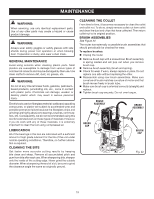
OPERATION DEPTH OF CUT See Figures 19 - 20. Depth of cut is important because it affects the rate of feed that, in turn, affects the quality of the cut and the possibility of damage to the tool's motor and bit. A deep cut requires a slower feed than a shallow one. A cut that is too deep will slow the feed so that the bit is scraping rather than cutting. A too deep cut can cause smaller bits to be broken off. Bits that are 1/16 in. in diameter are easily broken off when subjected to too much side thrust. A large enough bit is not likely to break, but attempting a cut that is too deep may result in a rough cut, and it may be difficult to guide and control the bit as desired. It is recommended that you do not exceed 1/8 in. depth of cut in a single pass, regardless of the bit size or the softness or condition of the workpiece. To make deeper cuts, make as many successive passes as needed, lowering the bit 1/8 in. for each new pass. To save time, perform all the cutting necessary at one depth setting before lowering the bit for the next pass. This will insure a uniform depth when you complete the final pass. NOTE: Do not remove more than 1/8 in. in a single pass. Excessive depth of cut can result in loss of control and the possibility of serious personal injury. ROUTER TABLE When mounting the router to a router table, use the two screws supplied. These screws will secure the router to the router table properly. Use of any other type and size screws could result in an accident causing possible serious injury. Do not use 8 mm screws. DEPTH OF CUT WIDTH OF CUT 2ND PASS 1ST PASS 2ND PASS 1ST PASS Fig. 19 Fig. 20 ADJUSTMENTS PLUNGE LOCK LEVER See Figure 21. After extended use, the plunge lock may wear. If this happens, you can easily adjust the lever. Unplug the router. WARNING: Before performing any adjustment, make sure the tool is unplugged from the power supply and the switch is in the OFF ( O ) position. Failure to heed this warning could result in serious personal injury. Make sure lever is in locked position. Remove the screw supporting the plunge lock lever. Remove the lever. Place the lever back in the original locked position. Replace the screw. PLUNGE LOCK LEVER TO LOOSEN SCREW TO TIGHTEN Fig. 21 Check for free plunge with lever rotated to unlocked position. If router does not plunge freely, reposition lever. 18
-
 1
1 -
2
-
3
-
4
-
5
-
6
-
7
-
8
-
9
-
10
-
11
-
12
-
 13
13 -
 14
14 -
 15
15 -
 16
16 -
 17
17 -
 18
18 -
 19
19 -
 20
20
 |
 |