Samsung CLX-9350ND Installation Guide - Page 24
Installing the accessory box
 |
View all Samsung CLX-9350ND manuals
Add to My Manuals
Save this manual to your list of manuals |
Page 24 highlights
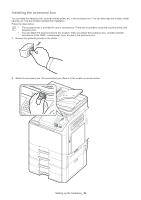
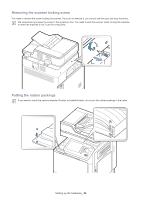
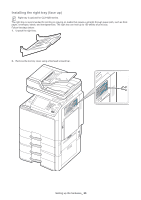
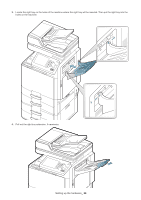
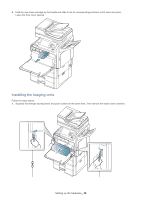
Installing the accessory box You can keep the cleaning cloth, scanner locking screw, etc. in the accessory box. You can also keep the screws, rubber packing, etc. that are left after optional item installation. Follow the steps below: • The accessory box is provided for user's convenience. There are no problems using the machine without the accessory box. • You can attach the accessory box to any location. When you attach the accessory box, consider possible disturbance of the DADF, control panel, trays, etc due to the accessory box. 1. Remove the protecting sheet on the sticker. 2. Attach the accessory box. We recommend you attach it to the location as shown below. Setting up the hardware_ 23
-
 1
1 -
2
-
3
-
4
-
5
-
6
-
7
-
8
-
9
-
10
-
11
-
12
-
13
-
14
-
15
-
16
-
17
-
18
-
 19
19 -
 20
20 -
 21
21 -
 22
22 -
 23
23 -
 24
24 -
 25
25 -
 26
26 -
 27
27 -
 28
28 -
 29
29 -
30
-
31
-
32
-
33
-
34
-
35
-
36
-
37
-
38
-
39
-
40
-
41
-
42
-
43
-
44
-
45
-
46
-
47
-
48
-
49
-
50
-
51
-
52
-
53
-
54
-
55
-
56
-
57
-
58
-
59
-
60
-
61
-
62
-
63
-
64
-
65
-
66
-
67
-
68
-
69
 |
 |
Setting up the hardware
_ 23
Installing the accessory box
You can keep the cleaning cloth, scanner locking screw, etc. in the accessory box. You can also keep the screws, rubber
packing, etc. that are left after optional item installation.
Follow the steps below:
•
The accessory box is provided for user’s convenience. There are no problems using the machine without the
accessory box.
•
You can attach the accessory box to any location. When you attach the accessory box, consider possible
disturbance of the DADF, control panel, trays, etc due to the accessory box.
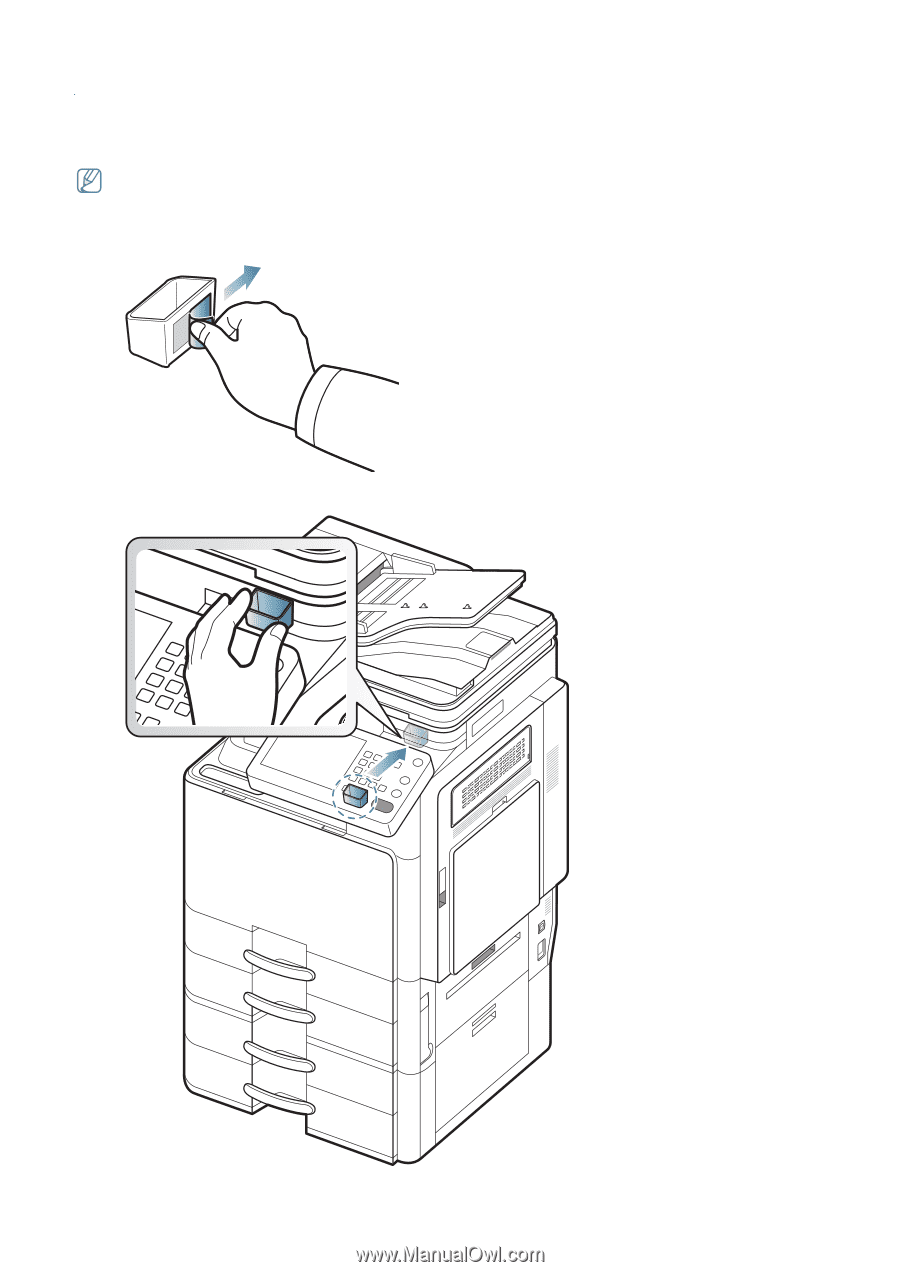
1.
Remove the protecting sheet on the sticker.
2.
Attach the accessory box. We recommend you attach it to the location as shown below.