Samsung DV300F User Manual Ver.1.1 (English) - Page 47
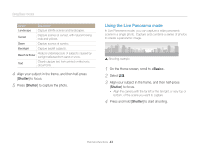
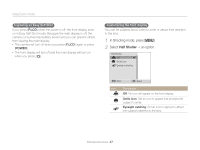
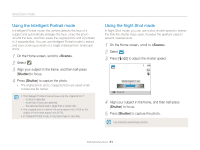
Using the Self Shot mode, On the Home screen, scroll to, Select, Half-press, to focus., Press
 |
View all Samsung DV300F manuals
Add to My Manuals
Save this manual to your list of manuals |
Page 47 highlights
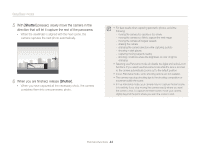
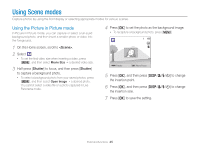
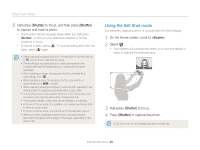
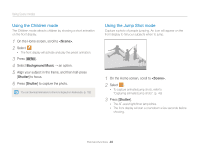
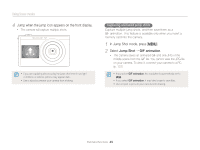
Using Scene modes 8 Half-press [Shutter] to focus, and then press [Shutter] to capture and insert a photo. • The insertion window appears larger when you half-press [Shutter], so that you can determine whether or not the subject is in focus. • To record a video, press [c]. To stop recording and insert the video, press [c] again. • When capturing background photos, the resolution is automatically set to and all photos captured are saved. • The final Picture-in-picture photos or videos are saved as one combined file and the inserted photos or videos are not saved separately. • When inserting an image, the resolution for the combined file is automatically set to . • When inserting a video, the resolution for the combined file is automatically set to or smaller. • When capturing a background photo, a vertical photo captured in the vertical position is displayed horizontally without auto rotate. • The maximum size of the insertion window is 1/4 of the screen, and the aspect ratio stays the same when changing the size. • The maximum length of video that can be inserted is 20 minutes. • In Picture in Picture mode, the available zoom range may be less than in other shooting modes. • In Picture in Picture mode, you cannot set the Sound Alive options. • When you select a background photo from your saved photos, black bars may appear at the edges of the image, depending on the aspect ratio. Using the Self Shot mode Conveniently capture photos of yourself with the front display. 1 On the Home screen, scroll to . 2 Select . • Your camera will automatically detect your face and display a frame to indicate the detected face. 3 Half-press [Shutter] to focus. 4 Press [Shutter] to capture the photo. In Self Shot mode, the front display will activate automatically. Extended functions 46
-
 1
1 -
2
-
3
-
4
-
5
-
6
-
7
-
8
-
9
-
10
-
11
-
12
-
13
-
14
-
15
-
16
-
17
-
18
-
19
-
20
-
21
-
22
-
23
-
24
-
25
-
26
-
27
-
28
-
29
-
30
-
31
-
32
-
33
-
34
-
35
-
36
-
37
-
38
-
39
-
40
-
41
-
 42
42 -
 43
43 -
 44
44 -
 45
45 -
 46
46 -
 47
47 -
 48
48 -
 49
49 -
 50
50 -
 51
51 -
 52
52 -
53
-
54
-
55
-
56
-
57
-
58
-
59
-
60
-
61
-
62
-
63
-
64
-
65
-
66
-
67
-
68
-
69
-
70
-
71
-
72
-
73
-
74
-
75
-
76
-
77
-
78
-
79
-
80
-
81
-
82
-
83
-
84
-
85
-
86
-
87
-
88
-
89
-
90
-
91
-
92
-
93
-
94
-
95
-
96
-
97
-
98
-
99
-
100
-
101
-
102
-
103
-
104
-
105
-
106
-
107
-
108
-
109
-
110
-
111
-
112
-
113
-
114
-
115
-
116
-
117
-
118
-
119
-
120
-
121
-
122
-
123
-
124
-
125
-
126
-
127
-
128
-
129
-
130
-
131
-
132
-
133
-
134
-
135
-
136
-
137
-
138
-
139
-
140
-
141
-
142
-
143
-
144
-
145
-
146
-
147
-
148
-
149
-
150
-
151
-
152
-
153
-
154
-
155
-
156
-
157
-
158
-
159
-
160
-
161
-
162
-
163
-
164
-
165
-
166
-
167
-
168
 |
 |