Samsung DVD P241 User Manual (ENGLISH) - Page 6
Description-Front Panel, SETUP, Rear Panel, Front Panel Controls - manual
 |
UPC - 036725602410
View all Samsung DVD P241 manuals
Add to My Manuals
Save this manual to your list of manuals |
Page 6 highlights
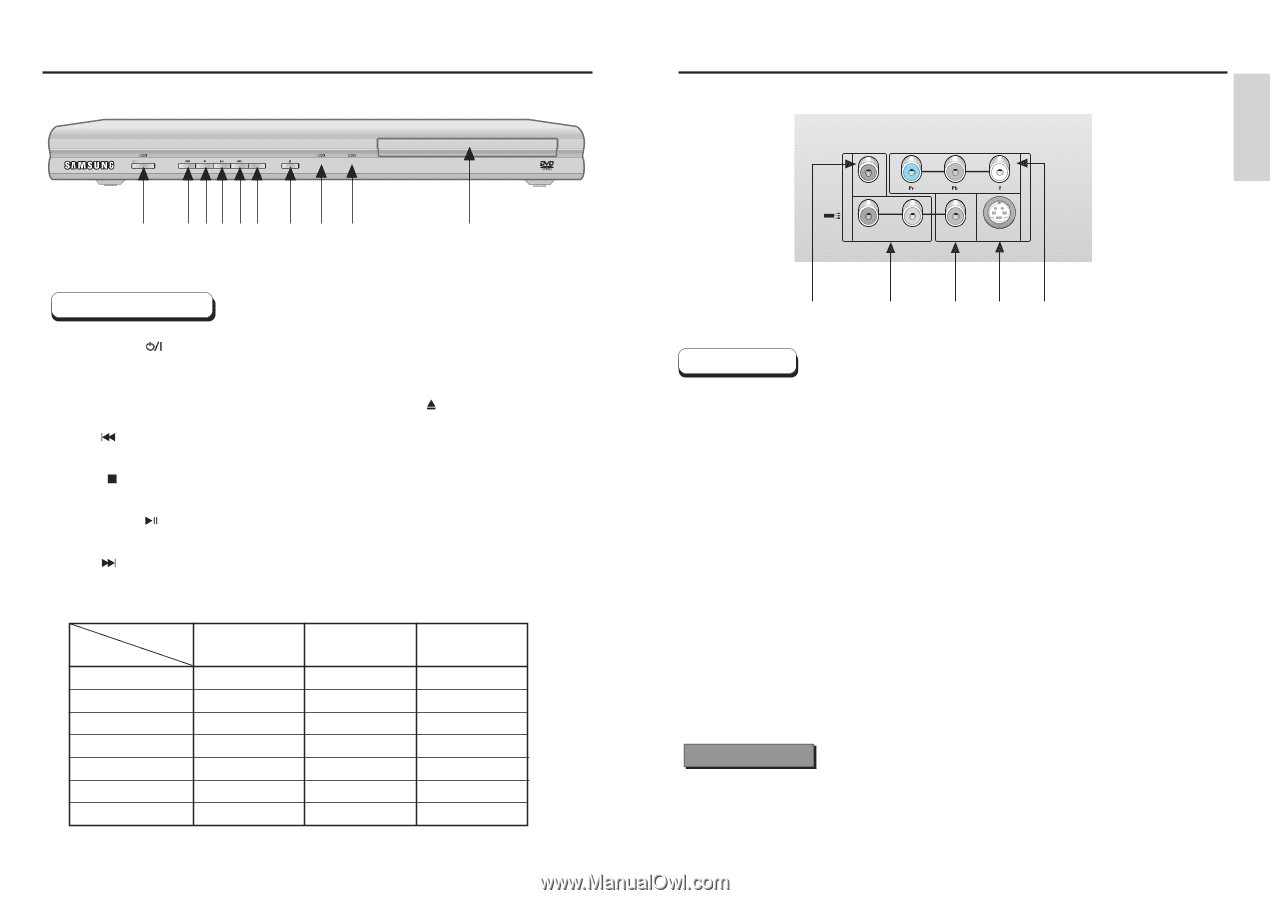
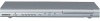
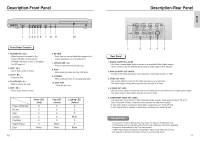
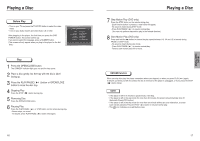
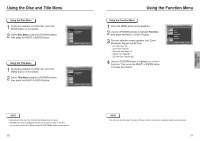
Description-Front Panel STANDBY/ON EZ VIEW PLAY LOADING 1 2 34 5 6 7 8 9 10 Front Panel Controls 1. STANDBY/ON ( ) • When the player is plugged in, the Power LED lights. If you press the STANDBY/ON button to turn on the player, the LED goes out. 2. SKIP ( ) • Use to skip a scene or music. 3. STOP ( ) • Stops disc play. 4. PLAY/PAUSE ( ) • Begin or pause disc play. 5. SKIP ( ) • Use to skip a scene or music. Power off/Standby No disc Stop Loading Play/Skip Search/Pause Error Power LED (Red) O X X X X X Blinks 10 6. EZ VIEW • Easy View can convert Letter Box images to full screen viewing on your conventional TV. 7. OPEN/CLOSE ( ) • Press to open and close the disc tray. 8. PLAY • When playing the disc, the Play LED lights. 9. LOADING • When loading the disc, the Loading LED lights. 10. DISC TRAY • Place the disc here. Play LED (Green) X X X X O Blinks Blinks Loading LED (Yellow) X O O Blinks X X Blinks Description-Rear Panel A U COAXIAL D I TV O R - AUDIO - L VIDEO V I D E O S-VIDEO 1 2 34 5 Rear Panel 1. DIGITAL AUDIO OUT JACKS • Use either a coaxial digital cable to connect to a compatible Dolby Digital receiver. Use to connect to an A/V Amplifier that contains a Dolby Digital or DTS decoder. 2. ANALOG AUDIO OUT JACKS • Connect to the Audio input jacks of your television, audio/video receiver, or VCR. 3. VIDEO OUT JACK • Use a video cable to connect to the Video input jack on your television. • The Video Output in Setup Menu must be set to the 525i or S-Video. 4. S-VIDEO OUT JACK • Use the S-Video cable to connect this jack to the S-Video jack on your television for a higher picture quality. • The Video Output in Setup Menu must be set to the S-Video. 5. COMPONENT VIDEO OUT JACKS • Use these jacks if you have a TV with Component Video in jacks. These jacks provide Pr, Pb and Y video. Along with S-Video, Component Video provides the best picture quality. • If 525p Video Output is selected in Setup Menu, progressive scan mode will work. • If 525i Video Output is selected in Setup Menu, interlaced scan mode will work. Important Note • Consult your TV User's Manual to find out if your TV supports Progressive Scan. If Progressive Scan is supported, follow the TV User's Manual's instructions regarding Progressive Scan settings in the TV's menu system. • If 525P Video Output is selected in Setup Menu, Video and S-Video will not work. • See page 44 to get more information on how to use the setup menu. 11 SETUP
-
 1
1 -
 2
2 -
 3
3 -
 4
4 -
 5
5 -
 6
6 -
 7
7 -
 8
8 -
 9
9 -
 10
10 -
 11
11 -
 12
12 -
13
-
14
-
15
-
16
-
17
-
18
-
19
-
20
-
21
-
22
-
23
-
24
-
25
 |
 |