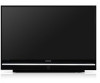
Samsung HL-T6756W Quick Guide (easy Manual) (ver.1.0) (English) - Page 8
Viewing the Connection Panel, POWER, Remote Control Sensor, Indicator Lights, SOURCE, ENTER - fan
 |
View all Samsung HL-T6756W manuals
Add to My Manuals
Save this manual to your list of manuals |
Page 8 highlights
1 POWER Press to turn the TV on and off. 2 Remote Control Sensor Aim the remote control towards this spot on the TV. 3 Indicator Lights Blinks and turns off when the power is on and lights up in stand-by mode. 4 SOURCE Toggles between all the available input sources (TV, AV1, AV2, AV3, S-Video1, S-Video2, S-Video3, Component1, Component2, PC, HDMI1, or HDMI2/DVI). 5 MENU Press to see an on-screen menu of your TV's features. 6 + VOL - Press to increase or decrease the volume. In the on-screen menu, use the + VOL - buttons as you would use the ◄ and ► buttons on the remote control. 7 CH Press to change channels. In the on-screen menu, use the CH buttons as you would use the ▲ and ▼ buttons on the remote control. 8 (ENTER) Press to confirm a selection. ➢ ● You can use the channel selection buttons to switch on the TV when it is in standby mode depending on the model. ● When using the on-screen menu the volume adjustment and channel selection buttons have the same function as the buttons on the remote control. ● If the remote control no longer works or you have lost it, you can use controls on the panel of the TV. Indicator Light Key ( : On, : Blinking, : Off) STAND BY/TEMP TIMER LAMP Standby state. Indication The picture will automatically appear in about 15 seconds. Auto Timer ON/OFF has been set and the set will automatically be turned on in about 15 seconds. A cooling fan inside the set is not operating normally. Lamp cover on the rear of the set is not properly shut. Check if the ventilation hole on the rear of the set is blocked, because if the inner temperature is too high, the power will shut off. Lamp may be defective. Please contact a certified technician. ➢ ● It takes about 30 seconds for the TV to warm up, so normal brightness may not appear immediately. ● The TV has a fan to keep the inside lamp from overheating. You'll occasionally hear it working. Viewing the Connection Panel Side Panel Jacks Use the right side panel jacks to connect a component that is used only occasionally (a camcorder or video game, for example). The product color and shape may vary depending on the model. 1 S-VIDEO Connect an S-Video signal from an S-VHS VCR or DVD player. 2 VIDEO Connect the video signal from a camcorder or video game. 3 AUDIO (L/R) Connect the audio signal from a camcorder or video game. English - 8 Continued...
-
 1
1 -
2
-
 3
3 -
 4
4 -
 5
5 -
 6
6 -
 7
7 -
 8
8 -
 9
9 -
 10
10 -
 11
11 -
 12
12 -
 13
13 -
14
-
15
-
16
-
17
-
18
-
19
-
20
-
21
-
22
-
23
-
24
-
25
-
26
-
27
-
28
-
29
-
30
-
31
-
32
-
33
-
34
-
35
-
36
-
37
-
38
-
39
-
40
-
41
-
42
-
43
-
44
-
45
-
46
-
47
-
48
-
49
-
50
-
51
-
52
-
53
-
54
-
55
-
56
-
57
-
58
-
59
-
60
-
61
-
62
-
63
-
64
-
65
-
66
-
67
-
68
-
69
-
70
-
71
-
72
-
73
-
74
-
75
-
76
-
77
-
78
-
79
-
80
-
81
-
82
-
83
-
84
-
85
-
86
-
87
-
88
-
89
-
90
-
91
-
92
-
93
-
94
-
95
-
96
-
97
-
98
-
99
-
100
-
101
-
102
-
103
-
104
-
105
-
106
-
107
-
108
-
109
-
110
-
111
-
112
-
113
-
114
-
115
-
116
-
117
-
118
-
119
-
120
-
121
-
122
-
123
-
124
-
125
-
126
-
127
-
128
-
129
-
130
-
131
-
132
-
133
-
134
-
135
-
136
-
137
-
138
-
139
-
140
-
141
-
142
-
143
-
144
 |
 |
