Samsung HPT4254 User Manual (ENGLISH) - Page 27
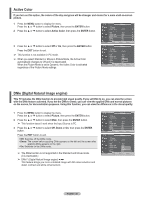
Digital Noise Reduction
 |
UPC - 036725242517
View all Samsung HPT4254 manuals
Add to My Manuals
Save this manual to your list of manuals |
Page 27 highlights
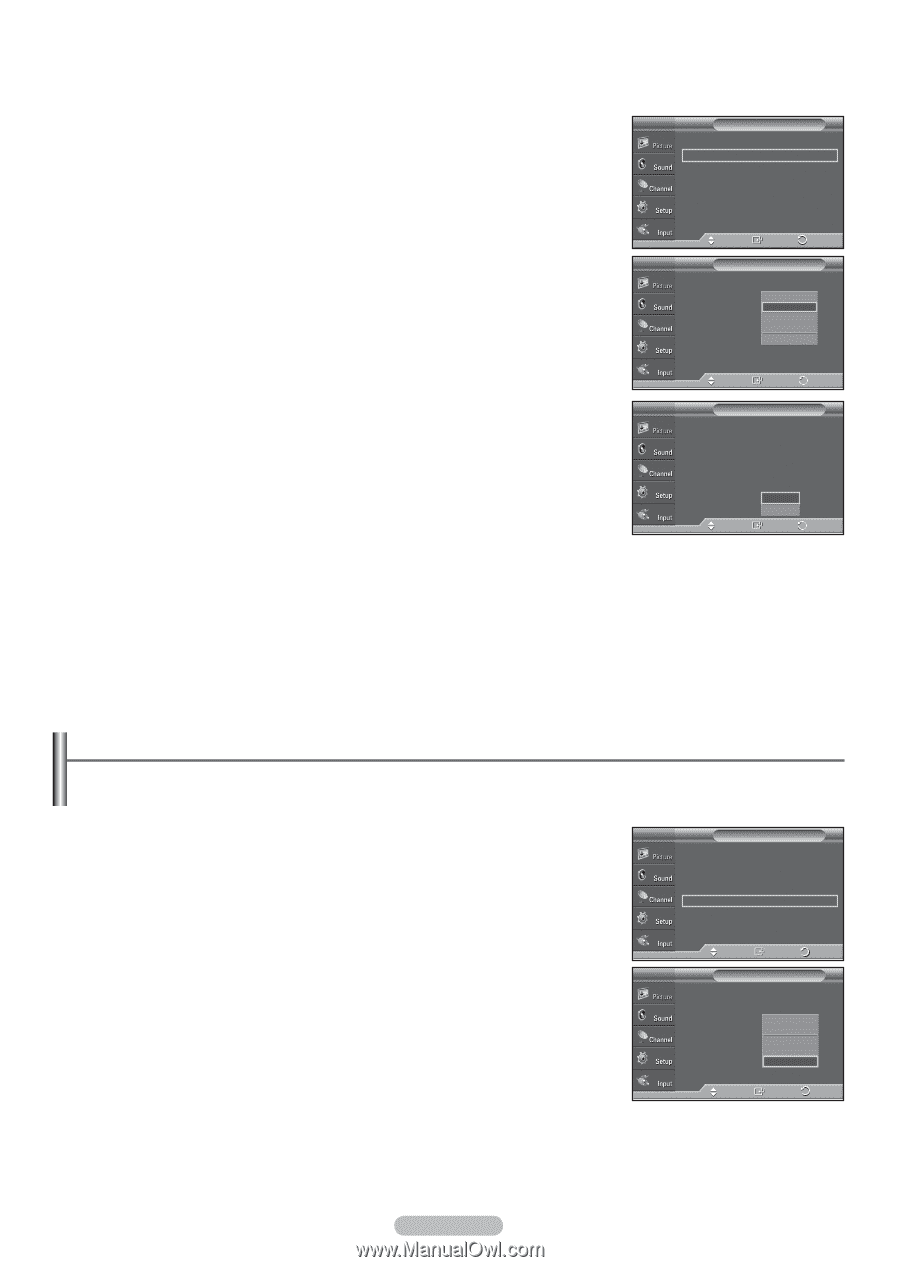
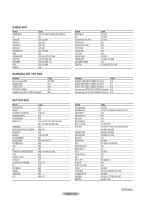
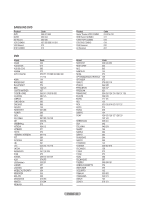
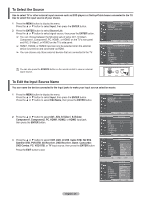
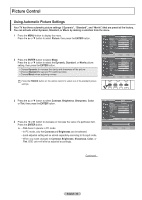
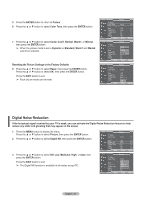
5 Press the ENTER button to return to Picture. 6 Press the ▲ or ▼ button to select Color Tone, then press the ENTER button. 7 Press the ▲ or ▼ button to select Cool2, Cool1, Normal, Warm1, or Warm2, then press the ENTER button. ➢ When the picture mode is set to Dynamic or Standard, Warm1 and Warm2 cannot be selected. Resetting the Picture Settings to the Factory Defaults 8 Press the ▲ or ▼ button to select Reset, then press the ENTER button. Press the ▲ or ▼ button to select OK, then press the ENTER button. Press the EXIT button to exit. ➢ Each picture mode can be reset. T V Picture ▲ More Color Tone : Cool1 Detailed Settings Size : 16:9 Digital NR : Auto Active Color : On DNIe : On Reset : OK Move Enter Return T V Picture ▲ More Color Tone : CCooooll12 Detailed Settings Cool1 Size Digital NR Active Color : 1N6o:9rmal : AWuatorm1 : OWnarm2 DNIe : On Reset : OK Move Enter Return T V Picture ▲ More Color Tone : Cool1 Detailed Settings Size : 16:9 Digital NR : Auto Active Color : On DNIe : OCnancle Reset : OK Move Enter Return Digital Noise Reduction If the broadcast signal received by your TV is weak, you can activate the Digital Noise Reduction feature to help reduce any static and ghosting that may appear on the screen. 1 Press the MENU button to display the menu. Press the ▲ or ▼ button to select Picture, then press the ENTER button. 2 Press the ▲ or ▼ button to select Digital NR, then press the ENTER button. 3 Press the ▲ or ▼ button to select Off, Low, Mediunm, High, or Auto, then press the ENTER button. Press the EXIT button to exit. ➢ The Digital NR function is available in all modes except PC. T V Picture ▲ More Color Tone : Cool1 Detailed Settings Size : 16:9 Digital NR : Auto Active Color : On DNIe : On Reset : OK Move Enter Return T V Picture ▲ More Color Tone : Cool1 Detailed Settings Off Size : 1L6o:9w Digital NR : AMuetodium Active Color DNIe : OHnigh : OAnuto Reset : OK Move Enter Return English - 27
-
 1
1 -
2
-
3
-
4
-
5
-
6
-
7
-
8
-
9
-
10
-
11
-
12
-
13
-
14
-
15
-
16
-
17
-
18
-
19
-
20
-
21
-
 22
22 -
 23
23 -
 24
24 -
 25
25 -
 26
26 -
 27
27 -
 28
28 -
 29
29 -
 30
30 -
 31
31 -
 32
32 -
33
-
34
-
35
-
36
-
37
-
38
-
39
-
40
-
41
-
42
-
43
-
44
-
45
-
46
-
47
-
48
-
49
-
50
-
51
-
52
-
53
-
54
-
55
-
56
-
57
-
58
-
59
-
60
-
61
-
62
-
63
-
64
-
65
-
66
-
67
-
68
-
69
-
70
-
71
-
72
-
73
-
74
-
75
-
76
-
77
-
78
-
79
-
80
-
81
-
82
-
83
-
84
-
85
-
86
-
87
-
88
-
89
-
90
-
91
-
92
-
93
-
94
-
95
-
96
-
97
-
98
-
99
-
100
-
101
-
102
-
103
-
104
-
105
-
106
-
107
-
108
-
109
-
110
-
111
-
112
-
113
-
114
-
115
-
116
-
117
-
118
-
119
-
120
-
121
-
122
-
123
-
124
-
125
-
126
-
127
-
128
-
129
-
130
-
131
-
132
-
133
-
134
-
135
-
136
-
137
-
138
-
139
-
140
-
141
-
142
-
143
-
144
 |
 |