Samsung LN-P267W User Manual (user Manual) (ver.1.0) (English) - Page 30
Adding and Erasing Channels (Manual Method), Labeling Channels, Alternate method
 |
View all Samsung LN-P267W manuals
Add to My Manuals
Save this manual to your list of manuals |
Page 30 highlights
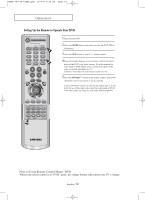
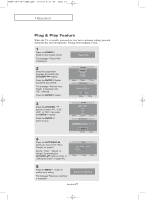
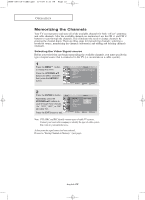
BN68-00751A-01ENG.qxd 8/7/04 6:31 PM Page 24 O P E R AT I O N Adding and Erasing Channels (Manual Method) 1 Use the number buttons to directly select the channel to Add or Delete. Press the MENU button to display the menu. Press the UP/DOWN buttons to select "Channel", then press the ENTER button. Press the UP/DOWN buttons to select "Add/Delete". Press the ENTER button. Press the ENTER to select "Add" or "Delete" (Pressing the ENTER button toggles between the two). Press the EXIT button to exit. Alternate method: Use the number buttons to directly select the channel that will be added or erased. Press the "ADD/DEL" button. Repeatedly pressing the ENTER button will alternate between "Add" and "Delete". Press the EXIT button to exit. You can view any channel (including an erased channel) by using the number buttons on the remote control. Labeling Channels 1 Press the MENU display the menu. button to Press the UP/DOWN buttons to select "Channel", then press the ENTER button. Press the UP/DOWN buttons to select "Name", then press the ENTER button. 2 Press the UP/DOWN buttons to select a channel. You can assign a name to a channel. Press the LEFT/RIGHT buttons to move to "Labeling" and use the UP/DOWN buttons to assign a name. Repeat this procedure to enter up to four characters. Press the EXIT button to exit. The characters available: - Letters of the alphabet (A~Z) - Numbers (0~9) - Special characters (space, -, *) English-24
-
 1
1 -
2
-
3
-
4
-
5
-
6
-
7
-
8
-
9
-
10
-
11
-
12
-
13
-
14
-
15
-
16
-
17
-
18
-
19
-
20
-
21
-
22
-
23
-
24
-
 25
25 -
 26
26 -
 27
27 -
 28
28 -
 29
29 -
 30
30 -
 31
31 -
 32
32 -
 33
33 -
 34
34 -
 35
35 -
36
-
37
-
38
-
39
-
40
-
41
-
42
-
43
-
44
-
45
-
46
-
47
-
48
-
49
-
50
-
51
-
52
-
53
-
54
-
55
-
56
-
57
-
58
-
59
-
60
-
61
-
62
-
63
-
64
-
65
-
66
-
67
-
68
-
69
-
70
-
71
-
72
-
73
-
74
-
75
-
76
-
77
-
78
-
79
 |
 |
