Samsung ML-2855ND-TAA User Guide - Page 35
Basic setup, Altitude adjustment, Changing the display language, Setting job timeout, Using Power
 |
UPC - 635753625585
View all Samsung ML-2855ND-TAA manuals
Add to My Manuals
Save this manual to your list of manuals |
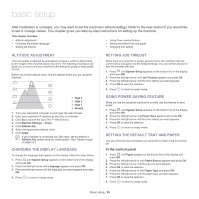
Page 35 highlights
basic setup 4. After installation is complete, you may want to set the machine's default settings. Refer to the next section if you would like to set or change values. This chapter gives you step-by-step instructions for setting up the machine. This chapter includes: • Altitude adjustment • Changing the display language • Setting job timeout • Using Power saving feature • Setting the default tray and paper • Changing font setting ALTITUDE ADJUSTMENT The print quality is affected by atmospheric pressure, which is determined by the height of the machine above sea level. The following information will guide you on how to set your machine to the best print quality or best quality of print. Before you set the altitude value, find the altitude where you are using the machine. 1 High 3 2 High 2 3 High 1 0 4 Normal 1. Turn your networked computer on and open the web browser. 2. Enter your machine's IP address as the URL in a browser. 3. Click Go to access the SyncThru™ Web Service. 4. Click Machine Settings > Setup. 5. Click Altitude Adj. 6. Select the appropriate altitude value. 7. Click Apply. If your machine is connected via USB cable, set the altitude in Altitude Adj. option using the control panel. (See "System setup" on page 54.) CHANGING THE DISPLAY LANGUAGE To change the language that appears on the display, follow the steps below: 1. Press until System Setup appears on the bottom line of the display and press OK. 2. Press the left/right arrow until Language appears and press OK. 3. Press the left/right arrow until the language you want appears and press OK. 4. Press to return to ready mode. SETTING JOB TIMEOUT When there is no input for a certain period of time, the machine exits the current menu and goes in to the default settings. You can set the amount of time the machine will wait. 1. Press until System Setup appears on the bottom line of the display and press OK. 2. Press the left/right arrow until Job Timeout appears and press OK. 3. Press the left/right arrow until the time setting you want appears. 4. Press OK to save the selection. 5. Press to return to ready mode. USING POWER SAVING FEATURE When you are not using the machine for a while, use this feature to save power. 1. Press until System Setup appears on the bottom line of the display and press OK. 2. Press the left/right arrow until Power Save appears and press OK. 3. Press the left/right arrow until the time setting you want appears. 4. Press OK to save the selection. 5. Press to return to ready mode. SETTING THE DEFAULT TRAY AND PAPER You can select the tray and paper you would like to keep using for printing job. In the control panel 1. Press until Paper appears on the bottom line of the display and press OK. 2. Press the left/right arrow to until Paper Source appears and press OK. 3. Press the left/right arrow until the tray you want appears. 4. Press OK to save the selection. 5. Press the left/right arrow to until Paper Type and press OK. 6. Press the left/right arrow until the paper type you want appears. 7. Press OK to save the selection. 8. Press to return to ready mode. Basic setup_ 35
-
 1
1 -
2
-
3
-
4
-
5
-
6
-
7
-
8
-
9
-
10
-
11
-
12
-
13
-
14
-
15
-
16
-
17
-
18
-
19
-
20
-
21
-
22
-
23
-
24
-
25
-
26
-
27
-
28
-
29
-
 30
30 -
 31
31 -
 32
32 -
 33
33 -
 34
34 -
 35
35 -
 36
36 -
 37
37 -
 38
38 -
 39
39 -
 40
40 -
41
-
42
-
43
-
44
-
45
-
46
-
47
-
48
-
49
-
50
-
51
-
52
-
53
-
54
-
55
-
56
-
57
-
58
-
59
-
60
-
61
-
62
-
63
-
64
-
65
-
66
-
67
-
68
-
69
-
70
-
71
-
72
-
73
-
74
-
75
-
76
-
77
-
78
-
79
-
80
-
81
-
82
-
83
-
84
-
85
-
86
-
87
-
88
-
89
-
90
-
91
 |
 |
