Samsung NX60T8711SS/AA Installation Guide - Page 3
Before you begin, About this manual, Important note to the installer
 |
View all Samsung NX60T8711SS/AA manuals
Add to My Manuals
Save this manual to your list of manuals |
Page 3 highlights
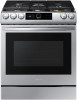
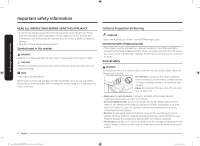
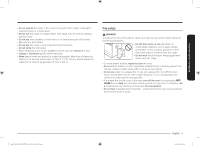
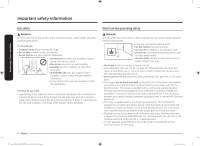
Before you begin Contents Before you begin Important safety information Gas range components What's in the box Installation requirements Location requirements To avoid breakage Gas requirements Special gas requirements (gas models sold in massachusetts) Electrical requirements Installation instructions Installing your gas range Step 1. Unpack the range Step 2. Connect the range to gas supply Step 3. Convert to lp gas (optional) Step 4. Install the anti-tip device Step 5. Plug in and place Step 6. Level the range Step 7. Assemble the surface burners Step 8. Check the ignition of surface burners Step 9. Final installation checklist Adjusting the oven burner air adjustment shutters Before you begin 3 About this manual READ THESE INSTRUCTIONS COMPLETELY AND CAREFULLY. 4 Important note to the installer 11 • Read all instructions contained in these installation instructions before installing the range. 11 • Remove all packing materials from the oven compartments before connecting the 13 electric and gas supply to the range. • Observe all governing codes and ordinances. 13 • Be sure to leave these instructions with the consumer. 15 • Installation of this appliance requires basic mechanical skills. 16 • Proper installation is the responsibility of the installer. 17 • Product failure due to improper installation is not covered under the Warranty. 17 Important note to the consumer 19 Keep these instructions with your user manual for future reference. 19 • As when using any appliance generating heat, there are certain safety 19 precautions you should follow. 19 • Be sure your range is installed and grounded properly by a qualified installer or 20 service technician. • Make sure the wall coverings around the range can withstand the heat generated 21 by the range. 21 • Cabinet storage space above the surface burners should be a minimum of 30 in 22 (76.2 cm). 22 23 Important note to the servicer 24 The electrical diagram is in an envelope attached to the back of the range. 24 Install_NX60T9700_BEST_BETTER_AA_DG68-01243A-00_EN.indd 3 English 3 2020-03-26 6:41:17
-
 1
1 -
 2
2 -
 3
3 -
 4
4 -
 5
5 -
 6
6 -
 7
7 -
 8
8 -
 9
9 -
10
-
11
-
12
-
13
-
14
-
15
-
16
-
17
-
18
-
19
-
20
-
21
-
22
-
23
-
24
-
25
-
26
-
27
-
28
-
29
-
30
-
31
-
32
-
33
-
34
-
35
-
36
-
37
-
38
-
39
-
40
-
41
-
42
-
43
-
44
-
45
-
46
-
47
-
48
-
49
-
50
-
51
-
52
-
53
-
54
-
55
-
56
-
57
-
58
-
59
-
60
-
61
-
62
-
63
-
64
-
65
-
66
-
67
-
68
-
69
-
70
-
71
-
72
-
73
-
74
-
75
-
76
-
77
-
78
-
79
-
80
-
81
-
82
-
83
-
84
 |
 |
