Samsung RF23M8070SR/AA User Manual - Page 17
Door bins, Water tank Auto Water Fill - filter
 |
View all Samsung RF23M8070SR/AA manuals
Add to My Manuals
Save this manual to your list of manuals |
Page 17 highlights
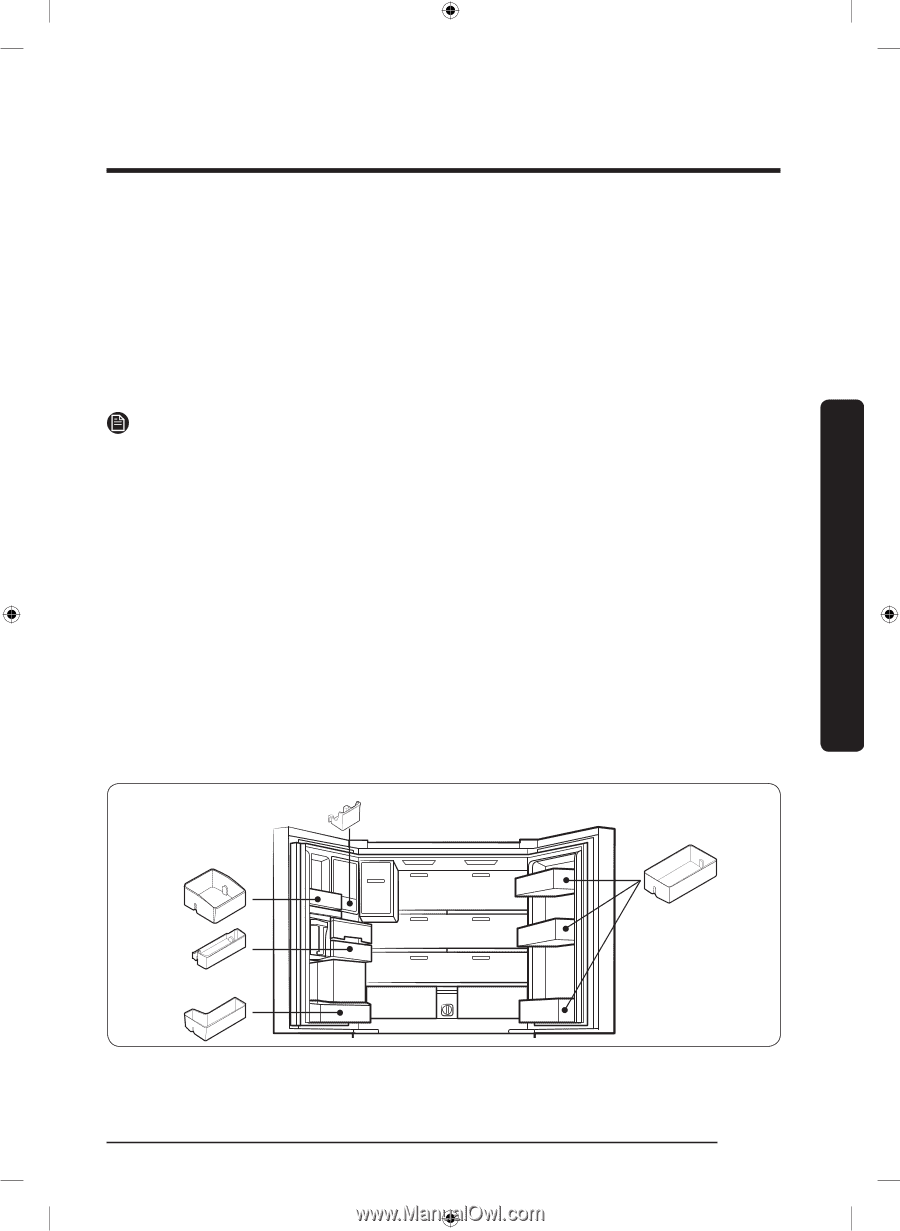
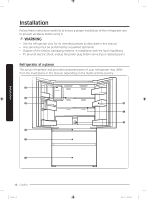
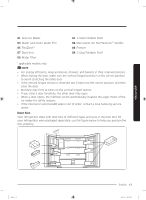
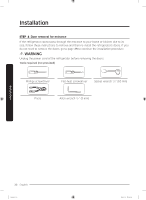
01 Auto Ice Maker 03 Water tank (Auto Water Fill) 05 FlexZone™ 07 Door bins 09 Water filter 02 1-Step Foldable Shelf 04 Main panel (on the FlexZone™ handle) 06 Freezer 08 2-Step Foldable Shelf * applicable models only NOTE • For energy efficiency, keep all shelves, drawers, and baskets in their original positions. • When closing the door, make sure the vertical hinged section is in the correct position to avoid scratching the other door. • If the vertical hinged section is reversed, put it back into the correct position, and then close the door. • Moisture may form at times on the vertical hinged section. • If you close a door forcefully, the other door may open. • When a door opens, the interlock switch automatically disables the auger motor of the ice maker for safety reasons. • If the internal or external LED lamp is out of order, contact a local Samsung service center. Door bins Your refrigerator ships with door bins of different types and sizes. If the door bins for your refrigerator were packaged separately, use the figure below to help you position the bins properly. Installation Untitled-3 17 English 17 2020-04-07 PM 3:29:34
-
 1
1 -
2
-
3
-
4
-
5
-
6
-
7
-
8
-
9
-
10
-
11
-
 12
12 -
 13
13 -
 14
14 -
 15
15 -
 16
16 -
 17
17 -
 18
18 -
 19
19 -
 20
20 -
 21
21 -
 22
22 -
23
-
24
-
25
-
26
-
27
-
28
-
29
-
30
-
31
-
32
-
33
-
34
-
35
-
36
-
37
-
38
-
39
-
40
-
41
-
42
-
43
-
44
-
45
-
46
-
47
-
48
-
49
-
50
-
51
-
52
-
53
-
54
-
55
-
56
-
57
-
58
-
59
-
60
-
61
-
62
-
63
-
64
-
65
-
66
-
67
-
68
-
69
-
70
-
71
-
72
-
73
-
74
-
75
-
76
-
77
-
78
-
79
-
80
-
81
-
82
-
83
-
84
-
85
-
86
-
87
-
88
-
89
-
90
-
91
-
92
-
93
-
94
-
95
-
96
-
97
-
98
-
99
-
100
-
101
-
102
-
103
-
104
-
105
-
106
-
107
-
108
-
109
-
110
-
111
-
112
-
113
-
114
-
115
-
116
-
117
-
118
-
119
-
120
-
121
-
122
-
123
-
124
-
125
-
126
-
127
-
128
-
129
-
130
-
131
-
132
-
133
-
134
-
135
-
136
-
137
-
138
-
139
-
140
-
141
-
142
-
143
-
144
-
145
-
146
-
147
-
148
-
149
-
150
-
151
-
152
-
153
-
154
-
155
-
156
-
157
-
158
-
159
-
160
-
161
-
162
-
163
-
164
-
165
-
166
-
167
-
168
-
169
-
170
-
171
-
172
-
173
-
174
-
175
-
176
-
177
-
178
-
179
-
180
-
181
-
182
-
183
-
184
-
185
-
186
-
187
-
188
-
189
-
190
-
191
-
192
-
193
-
194
-
195
-
196
-
197
-
198
-
199
-
200
-
201
-
202
-
203
-
204
-
205
-
206
-
207
-
208
-
209
-
210
-
211
-
212
-
213
-
214
-
215
-
216
-
217
-
218
-
219
-
220
-
221
-
222
-
223
-
224
-
225
-
226
-
227
-
228
-
229
-
230
-
231
-
232
-
233
-
234
-
235
-
236
-
237
-
238
-
239
-
240
 |
 |