Samsung S19B420BW User Manual Ver.1.0 (English) - Page 22
Installation
 |
View all Samsung S19B420BW manuals
Add to My Manuals
Save this manual to your list of manuals |
Page 22 highlights
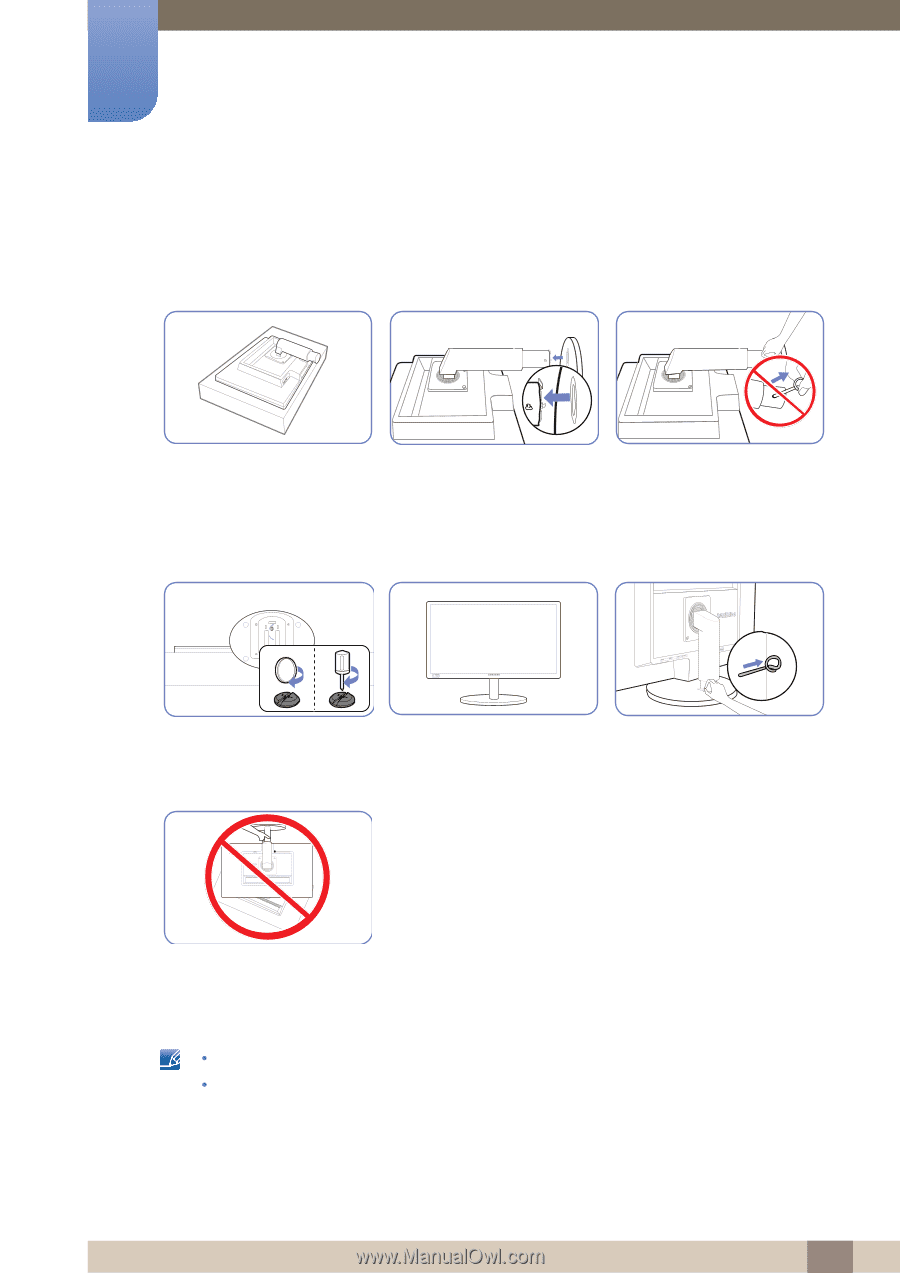
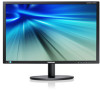
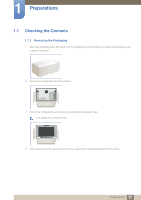
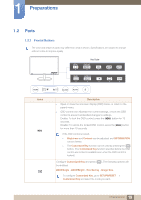
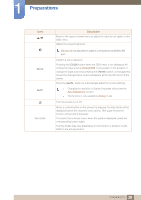
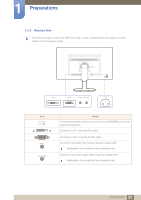
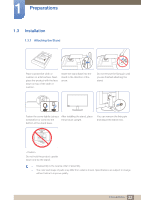
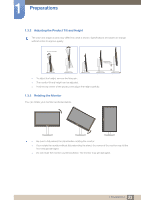
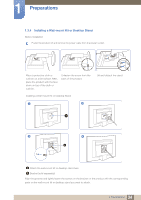
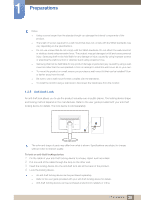
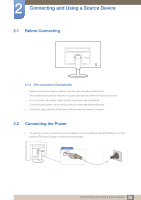
1 Preparations 1.3 Installation 1.3.1 Attaching the Stand Place a protective cloth or cushion on a flat surface. Next, place the product with the face down on top of the cloth or cushion. Insert the stand base into the stand in the direction of the arrow. Do not remove the fixing pin until you are finished attaching the stand. LOCK RELEASE Fasten the screw tightly (using a screwdriver or coin) into the bottom of the stand base. After installing the stand, place the product upright. You can remove the fixing pin and adjust the stand now. DVI IN RGB IN AUDIO IN AUDIO OUT POWER - Caution Do not hold the product upside down only by the stand. z Disassembly is the reverse order of assembly. z The color and shape of parts may differ from what is shown. Specifications are subject to change without notice to improve quality. 22 1 Preparations
-
 1
1 -
2
-
3
-
4
-
5
-
6
-
7
-
8
-
9
-
10
-
11
-
12
-
13
-
14
-
15
-
16
-
 17
17 -
 18
18 -
 19
19 -
 20
20 -
 21
21 -
 22
22 -
 23
23 -
 24
24 -
 25
25 -
 26
26 -
 27
27 -
28
-
29
-
30
-
31
-
32
-
33
-
34
-
35
-
36
-
37
-
38
-
39
-
40
-
41
-
42
-
43
-
44
-
45
-
46
-
47
-
48
-
49
-
50
-
51
-
52
-
53
-
54
-
55
-
56
-
57
-
58
-
59
-
60
-
61
-
62
-
63
-
64
-
65
-
66
-
67
-
68
-
69
-
70
-
71
-
72
-
73
-
74
-
75
-
76
-
77
-
78
-
79
-
80
-
81
-
82
-
83
-
84
-
85
-
86
-
87
-
88
-
89
-
90
-
91
-
92
-
93
-
94
 |
 |