Samsung SCH-R311 User Manual (user Manual) (ver.f3) (English) - Page 114
NAM Selection, System Select, Set Time, The Preferred Roaming List PRL is used to acquire
 |
View all Samsung SCH-R311 manuals
Add to My Manuals
Save this manual to your list of manuals |
Page 114 highlights
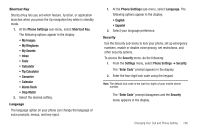
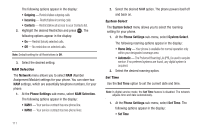
The following options appear in the display: • Outgoing - Restrict/allow outgoing calls. • Incoming - Restrict/allow incoming calls. • Contacts - Restrict/allow all access to your Contacts list. 2. Highlight the desired Restriction and press . The following options appear in the display: • On - Restrict (block) selected calls. • Off - No restriction on selected calls. Note: Default setting for all Restrictions is Off. 3. Select the desired setting. NAM Selection The Network menu allows you to select NAM (Number Assignment Module) settings for your phone. You can store two NAM settings, which are essentially telephone numbers, for your phone. 1. At the Phone Settings sub-menu, select NAM Selection. The following options appear in the display: • NAM1 - Your service contract has one phone line. • NAM2 - Your service contract has two phone lines. 111 2. Select the desired NAM option. The phone powers itself off and back on. System Select The System Select menu allows you to select the roaming setting for your phone. 1. At the Phone Settings sub-menu, select System Select. The following roaming options appear in the display: • Home Only - Your phone is available for normal operation only within your designated coverage area. • Automatic - The Preferred Roaming List (PRL) is used to acquire service. If no preferred systems are found, any digital system is acquired. 2. Select the desired roaming option. Set Time Use the Set Time option to set the current date and time. Note: In digital service mode, the Set Time feature is disabled. The network adjusts time and date automatically. 1. At the Phone Settings sub-menu, select Set Time. The following options appear in the display: • Set Time
-
 1
1 -
2
-
3
-
4
-
5
-
6
-
7
-
8
-
9
-
10
-
11
-
12
-
13
-
14
-
15
-
16
-
17
-
18
-
19
-
20
-
21
-
22
-
23
-
24
-
25
-
26
-
27
-
28
-
29
-
30
-
31
-
32
-
33
-
34
-
35
-
36
-
37
-
38
-
39
-
40
-
41
-
42
-
43
-
44
-
45
-
46
-
47
-
48
-
49
-
50
-
51
-
52
-
53
-
54
-
55
-
56
-
57
-
58
-
59
-
60
-
61
-
62
-
63
-
64
-
65
-
66
-
67
-
68
-
69
-
70
-
71
-
72
-
73
-
74
-
75
-
76
-
77
-
78
-
79
-
80
-
81
-
82
-
83
-
84
-
85
-
86
-
87
-
88
-
89
-
90
-
91
-
92
-
93
-
94
-
95
-
96
-
97
-
98
-
99
-
100
-
101
-
102
-
103
-
104
-
105
-
106
-
107
-
108
-
 109
109 -
 110
110 -
 111
111 -
 112
112 -
 113
113 -
 114
114 -
 115
115 -
 116
116 -
 117
117 -
 118
118 -
 119
119 -
120
-
121
-
122
-
123
-
124
-
125
-
126
-
127
-
128
-
129
-
130
-
131
-
132
-
133
-
134
-
135
-
136
-
137
-
138
-
139
-
140
-
141
-
142
-
143
-
144
-
145
-
146
-
147
-
148
-
149
-
150
-
151
-
152
-
153
-
154
-
155
 |
 |