Samsung SMT-190DN User Manual - Page 10
Language, E. SETUP MENU, Default, System ID, Change the system id. Factory default is '1,
 |
UPC - 036725120174
View all Samsung SMT-190DN manuals
Add to My Manuals
Save this manual to your list of manuals |
Page 10 highlights
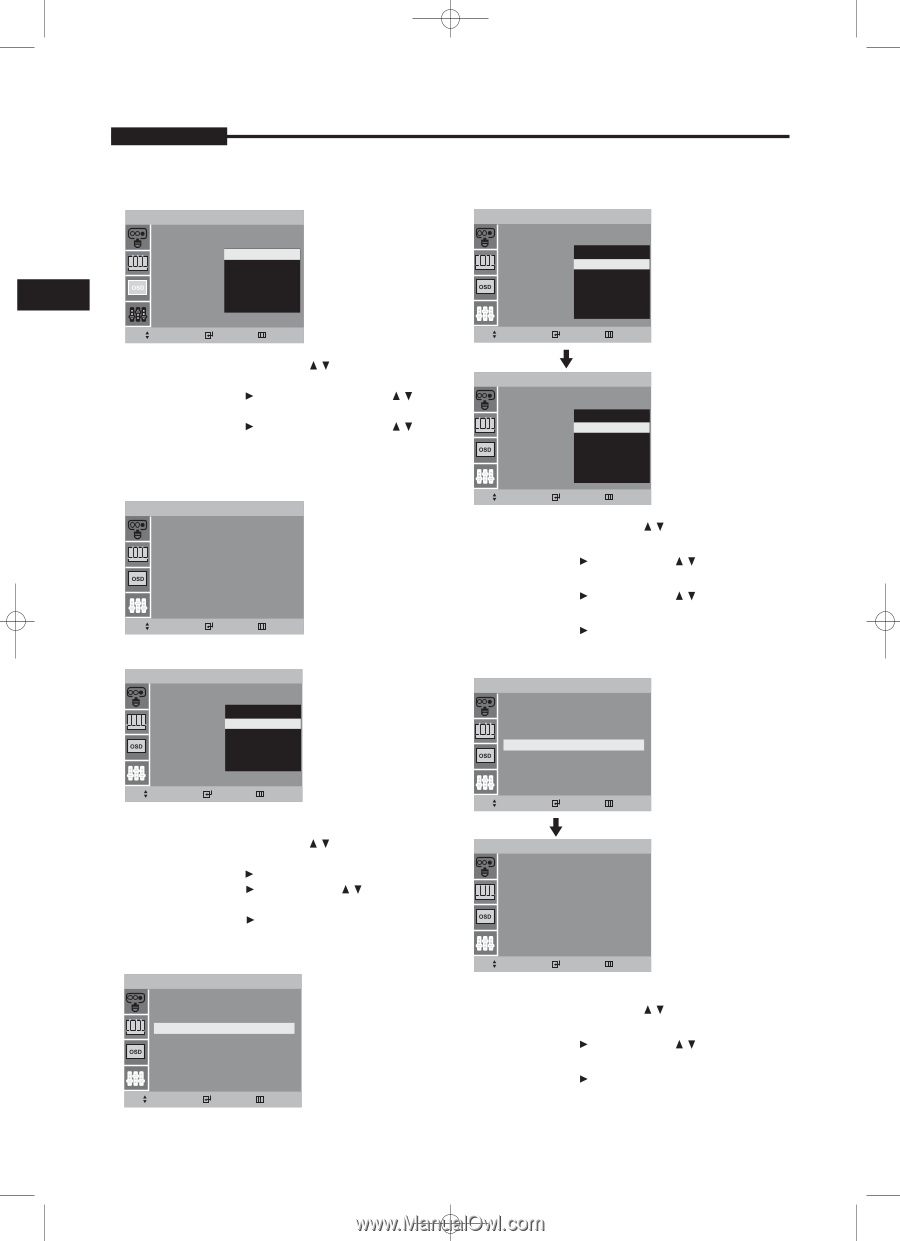
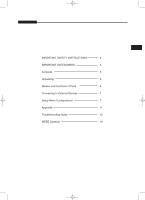
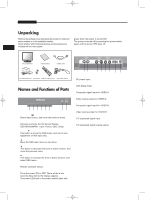
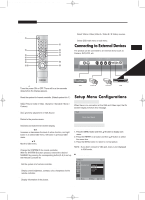
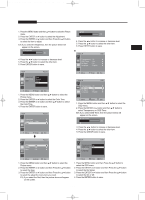
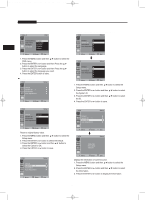
SMT-171/SMT-190-ENG 12/8/05 9:40 AM Page 10 USER'S MANUAL Language Video A OSD Change the system id. (Factory default is '1') VGA Setup Transparency : 0E0nglish √ OSD Timer : 1F0rSançaise √ No Signal : ODneutsch √ E Language : EEnsgplaisñhol √ Italiano Default 0 √ System ID : 1 √ Information 2 √ Auto Adjustment 3 √ 4 † Move Enter Exit 1. Press the MENU button and then ›/‚ button to select the OSD menu. 2. Press the ENTER or Š button and then Press the ›/‚ button to select the Language. 3. Press the ENTER or Š button and then Press the ›/‚ button to select the language you need. 4. Press the ENTER button to save. E. SETUP MENU VGA Setup Default √ System ID : 1 √ Information √ Auto Adjustment √ Move Default VGA Enter Exit Setup Move VGA Enter P Exit Setup Default ... √ System ID : 5 √ Information 6 √ Auto Adjustment 7 √ 8 9 Move Enter Exit 1. Press the MENU button and then ›/‚ button to select the Setup menu. 2. Press the ENTER or Š button and then ›/‚ button to select the System ID. 3. Press the ENTER or Š button and then ›/‚ button to select the ID. 4. Press the ENTER or Š button to save. Information VGA Setup Default Cancel √ System ID : Ok √ Information √ Auto Adjustment √ Default √ System ID : 1 √ Information √ Auto Adjustment √ Move Enter Exit Reset to original factory value. 1. Press the MENU button and then ›/‚ button to select the Setup menu. 2. Press the ENTER or Š button to select the Default. 3. Press the ENTER or Š button and then ›/‚ button to select the Cancel or Ok. 4. Press the ENTER or Š button to save. System ID VGA Setup Default √ System ID : 1 √ Information √ Auto Adjustment √ Move Enter Exit Move VGA Enter P Exit Setup 1024x768 H:31.4KHz V:60.0hz Move Enter Exit Display the information of current source. 1. Press the MENU button and then ›/‚ button to select the Setup menu. 2. Press the ENTER or Š button and then ›/‚ button to select the Information. 3. Press the ENTER or Š button to display the information. - 10 -
-
 1
1 -
2
-
3
-
4
-
 5
5 -
 6
6 -
 7
7 -
 8
8 -
 9
9 -
 10
10 -
 11
11 -
 12
12 -
 13
13 -
 14
14 -
 15
15 -
16
-
17
-
18
-
19
-
20
-
21
-
22
-
23
-
24
-
25
 |
 |