Samsung SPH-M520 User Manual (user Manual) (ver.f7) (English) - Page 131
Printing Pictures Using PictBridge
 |
View all Samsung SPH-M520 manuals
Add to My Manuals
Save this manual to your list of manuals |
Page 131 highlights
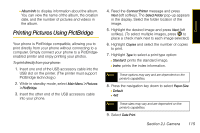
Ⅲ Album Info to display information about the album. You can view the name of the album, the creation date, and the number of pictures and videos in the album. Printing Pictures Using PictBridge Your phone is PictBridge compatible, allowing you to print directly from your phone without connecting to a computer. Simply connect your phone to a PictBridgeenabled printer and enjoy printing your photos. To print directly from your phone: 1. Insert one end of the USB accessory cable into the USB slot on the printer. (The printer must support PictBridge technology.) 2. While in standby mode, select Main Menu > Pictures > PictBridge. 3. Insert the other end of the USB accessory cable into your phone. 4. Read the Connect Printer message and press Next (left softkey). The Select Folder pop-up appears in the display. Select the folder location of the image. 5. Highlight the desired image and press Next (left softkey). (To select multiple images, press to place a check mark next to each image selected.) 6. Highlight Copies and select the number of copies to print. 7. Highlight Type to select a print type option: Ⅲ Standard: prints the standard image. Ⅲ Index: prints the index information. Note These options may vary and are dependent on the printer's capabilities. 8. Press the navigation key down to select Paper Size: Ⅲ Default Ⅲ 4x6 Note These sizes may vary and are dependent on the printer's capabilities. 9. Select Date Print. Section 2J. Camera 115 Camera
-
 1
1 -
2
-
3
-
4
-
5
-
6
-
7
-
8
-
9
-
10
-
11
-
12
-
13
-
14
-
15
-
16
-
17
-
18
-
19
-
20
-
21
-
22
-
23
-
24
-
25
-
26
-
27
-
28
-
29
-
30
-
31
-
32
-
33
-
34
-
35
-
36
-
37
-
38
-
39
-
40
-
41
-
42
-
43
-
44
-
45
-
46
-
47
-
48
-
49
-
50
-
51
-
52
-
53
-
54
-
55
-
56
-
57
-
58
-
59
-
60
-
61
-
62
-
63
-
64
-
65
-
66
-
67
-
68
-
69
-
70
-
71
-
72
-
73
-
74
-
75
-
76
-
77
-
78
-
79
-
80
-
81
-
82
-
83
-
84
-
85
-
86
-
87
-
88
-
89
-
90
-
91
-
92
-
93
-
94
-
95
-
96
-
97
-
98
-
99
-
100
-
101
-
102
-
103
-
104
-
105
-
106
-
107
-
108
-
109
-
110
-
111
-
112
-
113
-
114
-
115
-
116
-
117
-
118
-
119
-
120
-
121
-
122
-
123
-
124
-
125
-
 126
126 -
 127
127 -
 128
128 -
 129
129 -
 130
130 -
 131
131 -
 132
132 -
 133
133 -
 134
134 -
 135
135 -
 136
136 -
137
-
138
-
139
-
140
-
141
-
142
-
143
-
144
-
145
-
146
-
147
-
148
-
149
-
150
-
151
-
152
-
153
-
154
-
155
-
156
-
157
-
158
-
159
-
160
-
161
-
162
-
163
-
164
-
165
-
166
-
167
-
168
-
169
-
170
-
171
-
172
-
173
-
174
-
175
-
176
-
177
-
178
-
179
-
180
-
181
-
182
-
183
-
184
-
185
-
186
-
187
-
188
-
189
-
190
-
191
-
192
-
193
-
194
-
195
-
196
-
197
-
198
-
199
 |
 |
