Samsung WF405ATPASU/AA User Manual Ver.1.0 (English, French, Spanish) - Page 18
Calibration mode
 |
View all Samsung WF405ATPASU/AA manuals
Add to My Manuals
Save this manual to your list of manuals |
Page 18 highlights
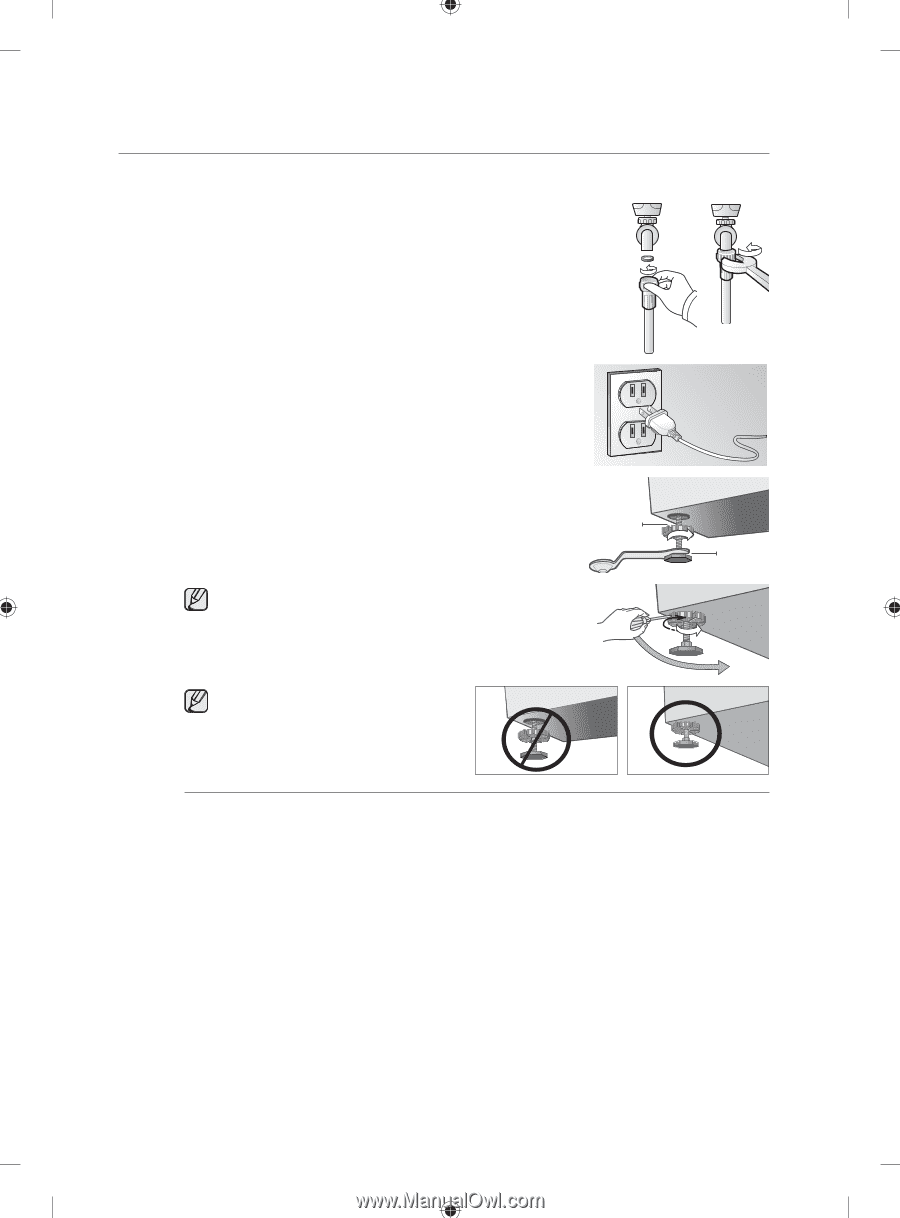
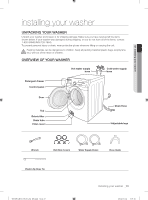
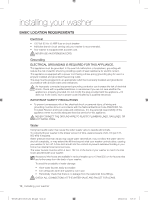
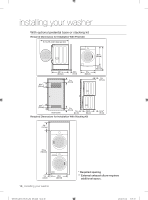
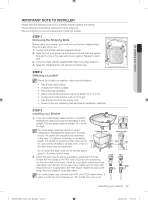
installing your washer 3. Turn on the "HOT" and "COLD "water supply and check the water Cold printed Hot printed valve and the water supply connections for leaks. 4. Plug the power cord into a 3-Prong, well grounded 120 volt 60 Hz approved electrical outlet protected by a 15-amp fuse or comparable circuit breaker. Your washer is grounded through the third prong of the power cord when plugged into a three-prong grounded receptacle. 5. Slide your washer into position. 6. Level your washer by turning the leveling legs in or out as necessary by hand or by using the wrench included with your washer. When your washer is level, tighten the locking nuts using the wrench or (-) flathead screwdriver. Locking Nut Your washer must be leveled on all four sides. A carpenter's level should be used on all four corners of your washer. We recommend you recheck your washer after a dozen or so washes to make sure it's sitll level. Avoid damage to the legs. Do not move the washer unless the Locking-nuts are fastened to the bottom of the washer. Levelling Leg STEP 4 Calibration mode Your Samsung washing machine automatically detects the weight of the laundry. For more accurate weight detection, please run Calibration Mode after the installation. To run Calibration Mode, follow these steps: 1. Turn on the washer. 2. Press the Temp button and Delay Start button simultaneously for at least 3 seconds. 3. Remove any contents in the tub and close the door. 4. Press the Start/Pause button. 5. The drum rotates clockwise and counterclockwise for approximately 3 minutes. 6. When Calibration Mode is finished, the "En/End" appears on the display and the washing machine turns off automatically. The washing machine is now ready for use. 18_ Installing your washer WF405ATPA-03145A-02_EN.indd Sec2:18 2012-03-12 3:07:19
-
 1
1 -
2
-
3
-
4
-
5
-
6
-
7
-
8
-
9
-
10
-
11
-
12
-
 13
13 -
 14
14 -
 15
15 -
 16
16 -
 17
17 -
 18
18 -
 19
19 -
 20
20 -
 21
21 -
 22
22 -
 23
23 -
24
-
25
-
26
-
27
-
28
-
29
-
30
-
31
-
32
-
33
-
34
-
35
-
36
-
37
-
38
-
39
-
40
-
41
-
42
-
43
-
44
-
45
-
46
-
47
-
48
-
49
-
50
-
51
-
52
-
53
-
54
-
55
-
56
-
57
-
58
-
59
-
60
-
61
-
62
-
63
-
64
-
65
-
66
-
67
-
68
-
69
-
70
-
71
-
72
-
73
-
74
-
75
-
76
-
77
-
78
-
79
-
80
-
81
-
82
-
83
-
84
-
85
-
86
-
87
-
88
-
89
-
90
-
91
-
92
-
93
-
94
-
95
-
96
-
97
-
98
-
99
-
100
-
101
-
102
-
103
-
104
-
105
-
106
-
107
-
108
-
109
-
110
-
111
-
112
-
113
-
114
-
115
-
116
-
117
-
118
-
119
-
120
-
121
-
122
-
123
-
124
-
125
-
126
-
127
-
128
-
129
-
130
-
131
-
132
 |
 |