Schwinn 430 Elliptical Assembly Manual - Page 14
Step 5 Install Console
 |
View all Schwinn 430 Elliptical manuals
Add to My Manuals
Save this manual to your list of manuals |
Page 14 highlights
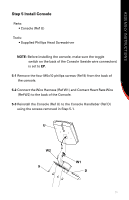
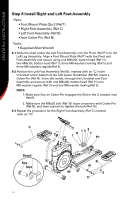
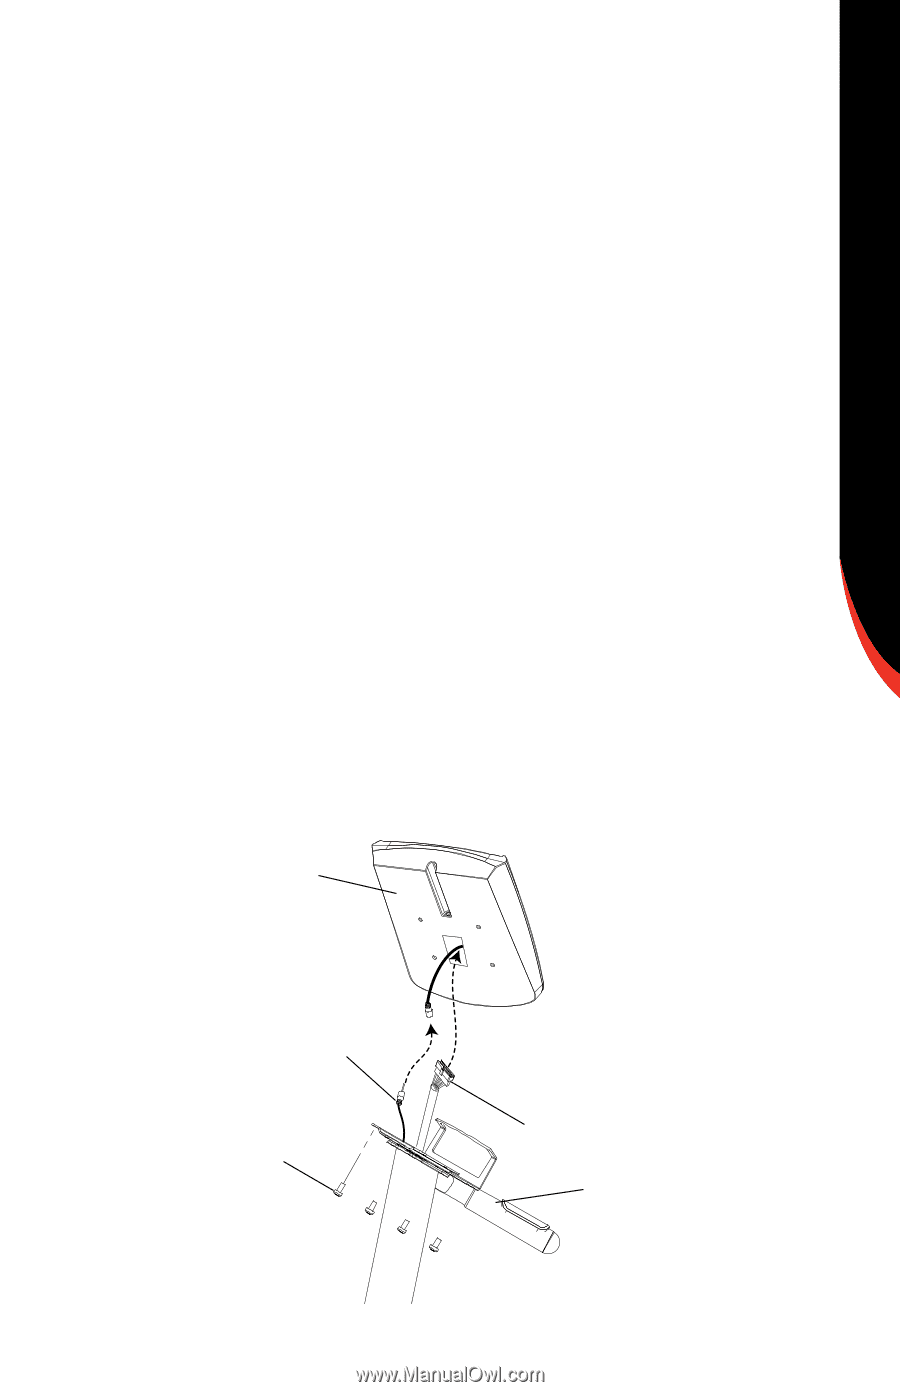
ASSEMBLY INSTRUCTIONS Step 5 Install Console Parts: • Console (Ref U) Tools Supplied Phillips Head Screwdriver NOTE: Before installing the console, make sure the toggle switch on the back of the Console (beside wire connectors) is set to EP. 5-1 Remove the four M5x10 phillps screws (Ref 9) from the back of the console. 5-2 Connect the Wire Harness (Ref W1) and Contact Heart Rate Wire (Ref W2) to the back of the Console. 5-3 Reinstall the Console (Ref U) to the Console Handlebar (Ref D) using the screws removed in Step 5-1. U W2 9 W1 D 11
-
 1
1 -
2
-
3
-
4
-
5
-
6
-
7
-
8
-
 9
9 -
 10
10 -
 11
11 -
 12
12 -
 13
13 -
 14
14 -
 15
15 -
 16
16 -
 17
17 -
 18
18 -
 19
19 -
20
-
21
 |
 |
11
ASSEMBLY INSTRUCTIONS
Step 5 Install Console
Parts:
•
Console (Ref U)
Tools:
• Supplied Phillips Head Screwdriver
NOTE:
Before installing the console, make sure the toggle
switch on the back of the Console (beside wire connectors)
is set to
EP
.
5-1
Remove
the four M5x10 phillps screws (Ref 9) from the back of
the console.
5-2
Connect the Wire Harness (Ref W1) and Contact Heart Rate Wire
(Ref W2) to the back of the Console.
5-3
Reinstall the Console (Ref U) to the Console Handlebar (Ref D)
using the screws removed in Step 5-1.
U
W1
W2
D
9