Seagate 3.5-inch Pushbutton Backup External Hard Drive Quick Start Guide - Page 6
For both dual-interface and USB-only kits - software
 |
View all Seagate 3.5-inch Pushbutton Backup External Hard Drive manuals
Add to My Manuals
Save this manual to your list of manuals |
Page 6 highlights
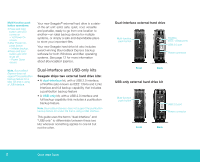
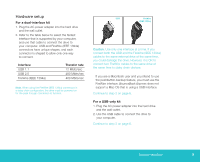
For both dual-interface and USB-only kits 3. Press and hold the button on the front of the drive until LED lights, to turn on power to the drive. 4. Turn on the power to your computer. 5. See page 7 for Windows OS information, or page 9 for Macintosh OS information, including installing drivers, reformatting and partitioning, and dismounting your drive. 6. See page 12 to install and configure BounceBack Express software to allow backups. Note. For dual-interface kits, you must install and configure BounceBack Express software to enable the pushbutton-backup feature on your drive. You don't need to follow this hardware setup sequence. Hardware setup steps 1 through 4 are a good way to connect your new drive to your computer, but you don't always need to follow this sequence. For example, if you want to attach your drive after your computer has already booted, you can simply connect the interface cable, turn on power to the drive, and your OS automatically detects and mounts the drive. This is known as hot-plugging. In a hot-plug situation, it's a good idea to connect all power and interface cables to your drive, and to place the drive where you want it to remain, before you turn it on. This helps ensure that you won't need to move your drive after it's running. 6 Quick Start Guide
-
 1
1 -
 2
2 -
 3
3 -
 4
4 -
 5
5 -
 6
6 -
 7
7 -
 8
8 -
 9
9 -
 10
10 -
 11
11 -
 12
12 -
13
-
14
-
15
-
16
-
17
-
18
-
19
-
20
-
21
 |
 |
