Sennheiser HDV 820 HDV 820 Instruction manual - Page 9
Putting the HDV 820 into, operation - headphone amplifier
 |
View all Sennheiser HDV 820 manuals
Add to My Manuals
Save this manual to your list of manuals |
Page 9 highlights
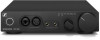
Putting the HDV 820 into operation Putting the HDV 820 into operation Setting up the headphone amplifier CAUTION Risk of staining of furniture surfaces! Varnish or furniture polish may degrade the feet of the product, which could stain your furniture. ▷ Do not place the product on delicate surfaces; if necessary, use a non-slip pad under the product. ▷ Place the headphone amplifier on a flat, horizontal surface. ▷ Ensure circulating ventilation. The headphone amplifier gener- ates heat which is dissipated through the housing. Connecting the headphone amplifier to audio sources You can connect several audio sources to the headphone amplifier and switch between these connected sources using the Input selection rotary switch. ▷ Switch your audio sources off before connecting the headphone amplifier. ▷ Select a suitable high-quality connection cable for your audio source. For an optimal listening experience, Sennheiser recommends using cables with a length of 3 m. ▷ To connect the headphone amplifier to your audio source, refer to the connection diagram suitable for your audio source (see the following chapters): Connection possibility of the audio source (OUT) A USB (USB) Connection cable USB 2.0 certified cable with Type A and Type B connector Page 10 B Optical (OPT) Optical cable 10 DIGITAL ANALOG C Coaxial (COAX) Coaxial cable (75 Ω) 10 Stereo audio cable D RCA (UNBAL) with 2 RCA connectors 11 at each end E XLR-3 (BAL) 2 balanced XLR-3 cables 12 HDV 820 | 9
-
 1
1 -
2
-
3
-
 4
4 -
 5
5 -
 6
6 -
 7
7 -
 8
8 -
 9
9 -
 10
10 -
 11
11 -
 12
12 -
 13
13 -
 14
14 -
15
-
16
-
17
-
18
-
19
-
20
-
21
-
22
-
23
-
24
-
25
-
26
-
27
-
28
-
29
 |
 |
