Sharp AL1215 AL1215|AL1530|AL1540|AL1551 Operation Manual
Sharp AL1215 - B/W Laser - Copier Manual
 |
UPC - 074000074477
View all Sharp AL1215 manuals
Add to My Manuals
Save this manual to your list of manuals |
Sharp AL1215 manual content summary:
- Sharp AL1215 | AL1215|AL1530|AL1540|AL1551 Operation Manual - Page 1
AL-1530CS AL-1540CS AL-1551CS DIGITAL LASER COPIER DIGITAL MULTIFUNCTIONAL SYSTEM OPERATION MANUAL AL-1215/AL-1530CS AL-1540CS Page INTRODUCTION 4 SETTING UP THE UNIT 7 LOADING PAPER 14 INSTALLING THE SOFTWARE 19 MAKING COPIES 46 SPECIAL FUNCTIONS 52 MAINTENANCE 57 TROUBLESHOOTING - Sharp AL1215 | AL1215|AL1530|AL1540|AL1551 Operation Manual - Page 2
City Telephone City Telephone To obtain service, or to obtain product literature, accessories, or supplies, please call or 1-(630)378-3590 in the USA 905-568-7140 in Canada. For customer assistance, please visit http://www.sharp-usa.com (for USA) or http://www.sharp.ca (for Canada) on the World - Sharp AL1215 | AL1215|AL1530|AL1540|AL1551 Operation Manual - Page 3
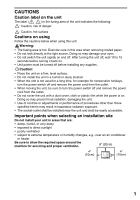
following: : Caution, risk of danger : Caution, hot surface Cautions on using Follow the cautions below when using this unit. Warning: • The fusing area is hot. Exercise care in this area when removing misfed paper. • Do not look directly at the light source. Doing so may damage your eyes. • Do - Sharp AL1215 | AL1215|AL1530|AL1540|AL1551 Operation Manual - Page 4
before use. • If they are exposed to direct sunlight, smudges on copies may result. Do not touch the surface (green portion) of the drum cartridge. • Doing so will damage the surface of the cartridge, causing smudges on copies. Trademark acknowledgements • Microsoft and Windows are trademarks - Sharp AL1215 | AL1215|AL1530|AL1540|AL1551 Operation Manual - Page 5
20 TROUBLESHOOTING 61 INSTALLING THE SOFTWARE .. 21 STATUS INDICATORS 62 INDICATORS ON THE OPERATION PANEL 31 USING THE PRINTER MODE..... 32 MISFEED REMOVAL 63 9 APPENDIX 7 USING THE SCANNER MODE... 34 HOW TO USE THE ONLINE MANUAL 43 USING OTHER INSTALLED DRIVERS 44 CONNECTING - Sharp AL1215 | AL1215|AL1530|AL1540|AL1551 Operation Manual - Page 6
scanner driver and how to adjust the settings for the Button Manager. Troubleshooting Provides instructions on how to solve driver or software problems. Conventions used in this manual and online manual • This operation manual explains the operation of the AL-1215, AL-1530CS, AL1540CS, and AL-1551CS - Sharp AL1215 | AL1215|AL1530|AL1540|AL1551 Operation Manual - Page 7
1215/1530CS/ 1540CS) 5 8 6 9 7 10 11 Multi-bypass 12 tray (AL-1551CS) TD cartridge Drum cartridge 7 3 1 Original table 2 Operation panel 3 Front cover 4 Paper tray 5 Side cover 6 Side cover open button 7 Bypass paper guides 8 Paper output tray 5 13 14 15 9 Paper output tray extension - Sharp AL1215 | AL1215|AL1530|AL1540|AL1551 Operation Manual - Page 8
Displays the specified copy quantity, zoom copy ratio, user program code, and error code. 10 SCANNER key and indicator (p.31, p.39) (AL-1530CS/AL-1540CS/AL-1551CS) 11 ONLINE key and indicator (AL-1530CS/AL-1540CS/AL-1551CS) Lights up when the unit is used as a printer and scanner. For description of - Sharp AL1215 | AL1215|AL1530|AL1540|AL1551 Operation Manual - Page 9
6 Install the software.*2 (p.19) 7 Connect the interface cable*2 (p.45) and turn on the unit. (p.12) 8 Now, you can copy (p.46), print (p.33), or scan (p.34) your document. *1 The multi-bypass tray is only included with the AL-1551CS. *2 If you are only using the unit for copying, skip this step - Sharp AL1215 | AL1215|AL1530|AL1540|AL1551 Operation Manual - Page 10
our Technical Assistance Department at 1-(630)378-3590 in the USA or 905-568-7140 in Canada. Operation manual AL-1530CS/ AL-1540CS/ AL-1551CS Software CD-ROM Drum cartridge (installed in unit) TD cartridge PREPARING THE UNIT FOR INSTALLATION 1 Be sure to hold the handles on both sides of the unit - Sharp AL1215 | AL1215|AL1530|AL1540|AL1551 Operation Manual - Page 11
AL-1540CS AL-1540CS/AL-1551CS AL-1215/AL-1530CS AL-1540CS/AL-1551CS 3 Release the scan head locking switch. The scan head locking switch is under the original table. If the switch is locked ( ), the unit will not operate. Unlock the switch ( ) as shown below. Grasp here and turn in the direction - Sharp AL1215 | AL1215|AL1530|AL1540|AL1551 Operation Manual - Page 12
INSTALLING THE TD CARTRIDGE 1 Open the multi-bypass tray (AL-1551CS, p.17), and then open the side cover cover to open the cover. Protective pins 4 Remove the TD cartridge from the bag. Remove the protective paper. Hold the cartridge on both sides and shake it horizontally four or five times. Hold - Sharp AL1215 | AL1215|AL1530|AL1540|AL1551 Operation Manual - Page 13
5 Gently insert the TD cartridge until it locks in place while pushing the lock release button. 6 Close the front cover and then the side cover by pressing the 2 round projections - Sharp AL1215 | AL1215|AL1530|AL1540|AL1551 Operation Manual - Page 14
mode once the set time has elapsed without any unit operation. The settings of the power save modes can be modified. See "USER PROGRAMS" (p.55). • The unit will return to the initial settings a preset amount of time after the end of copy or scanner job. The preset amount of time (auto clear time - Sharp AL1215 | AL1215|AL1530|AL1540|AL1551 Operation Manual - Page 15
scanner job is finished, or when the clear ( ) key is pressed twice. The initial settings of the operation panel are shown below. 2 "0" is displayed in the display. When copying is begun in this state, the settings in the following table are used. Copy quantity Exposure adjustment Zoom AL-1551CS - Sharp AL1215 | AL1215|AL1530|AL1540|AL1551 Operation Manual - Page 16
into the tray. PAPER For best results, use only paper recommended by SHARP. Type of paper feeding Type of media Size use non-standard envelopes, and envelopes that have metal clasps, plastic snappers, string closures, windows, linings, self-adhesive, patches or synthetic materials. Do not use - Sharp AL1215 | AL1215|AL1530|AL1540|AL1551 Operation Manual - Page 17
pressure plate lock. Rotate the pressure plate lock in the direction of the arrow to remove it while pressing down the pressure guides on the paper tray to the copy paper width and length. Squeeze the lever of paper guide A and slide the guide to match with the width of the paper. Move paper guide - Sharp AL1215 | AL1215|AL1530|AL1540|AL1551 Operation Manual - Page 18
unit. • After loading paper, to cancel the blinking without restarting copying, press the clear ( ) key. The in the display guide, and check if the guide is not set too narrow causing the paper to bend. Loading paper in these ways will result in document skew or a paper jam. • When not using - Sharp AL1215 | AL1215|AL1530|AL1540|AL1551 Operation Manual - Page 19
paper) The multi-bypass tray (AL-1551CS) or the single bypass (AL-1215/AL-1530CS/AL- 1540CS) can be used to feed standard paper, transparency film or media, this may cause smudges on the edges of the copies. 3 The multi-bypass tray (AL-1551CS) 1 Open the multi-bypass tray and extend the tray. To - Sharp AL1215 | AL1215|AL1530|AL1540|AL1551 Operation Manual - Page 20
" (p.46)". For information on the print settings, see the online manual or the Help file for the printer driver, and then begin printing from the single bypass. 2 Set the paper guides to the paper width. Insert a single sheet of copy or print paper (print face down) into the feed slot of the single - Sharp AL1215 | AL1215|AL1530|AL1540|AL1551 Operation Manual - Page 21
series software. SOFTWARE FOR THE SHARP PERSONAL MFP SERIES The supplied CD-ROM includes software for this unit. MFP driver Scanner driver Permits you to operate scanning function of this unit with TWAIN-compliant and WIA-compliant application. Printer driver 4 Enables you to use the printer - Sharp AL1215 | AL1215|AL1530|AL1540|AL1551 Operation Manual - Page 22
The following table shows the drivers and software that can be installed for each version of Windows and interface connection method. MFP Driver Printer driver/ Print Status Scanner driver Window Button Manager Sharpdesk Users of Windows 98/Me/2000/XP who will use the USB interface connection - Sharp AL1215 | AL1215|AL1530|AL1540|AL1551 Operation Manual - Page 23
is configured for right hand operation. • To print or scan, the MFP must be in the online state. • The scanner feature only works when using a USB interface cable. • If any error message appears, solve the problem following the instructions on the screen. After your problem is solved, the installing - Sharp AL1215 | AL1215|AL1530|AL1540|AL1551 Operation Manual - Page 24
are displayed, click the "Back" button to select appropriate packages again. 6 Copying files for MFP driver installation (This step will start if it was selected in step 4). 1 After confirming the message in the "Welcome" window, click the "Next" button. 2 A dialog box appears asking you to verify - Sharp AL1215 | AL1215|AL1530|AL1540|AL1551 Operation Manual - Page 25
driver or Cancel to quit the installation. The setup program will start to copy the files. If the following screen appears while the files are being copied information." window, and then click the "Next" button. 3 When a message appears that lets you specify the location for the software to be - Sharp AL1215 | AL1215|AL1530|AL1540|AL1551 Operation Manual - Page 26
. If you are using Windows XP with the parallel interface, go to step 12. 11 Begin installation of the scanner driver. 1 "SHARP AL-xxxx" (where xxxx is the model name of your MFP) will appear in the "Found New Hardware Wizard" dialog box. Select "Install the software automatically (Recommended)" and - Sharp AL1215 | AL1215|AL1530|AL1540|AL1551 Operation Manual - Page 27
Windows use and click the "Next" button. (Normally, the correct language is selected automatically.) 4 4 Select the software packages to be installed, and then click the "Next" button. The software the appropriate driver software packages to be installed. 5 Review the software packages to be - Sharp AL1215 | AL1215|AL1530|AL1540|AL1551 Operation Manual - Page 28
click "Yes" in Windows 2000. 4 The following screen appears when all of the files for the USB interface connection have been copied. If you are not using a parallel interface cable for connection to the MFP, please click the "No" button. 5 When the "The MFP driver installation is complete." dialog - Sharp AL1215 | AL1215|AL1530|AL1540|AL1551 Operation Manual - Page 29
, click the "Next" button. 4 When the "Select Program Folder" window appears, click the "Next" button. The setup program will start to copy the files. If the dialog box asking "If you have TIF files saved using Photoshop or Imaging for Windows you should hit Skip" appears, answer the question to - Sharp AL1215 | AL1215|AL1530|AL1540|AL1551 Operation Manual - Page 30
Found", or "Found New Hardware Wizard" messages appear during the software installation, be sure to click the "Cancel" button. 3 Double Windows 95/NT 4.0, "Button Manager" does not appear. In Windows 98/Me/2000, do not select the "Button Manager" checkbox. because this is not supported when using - Sharp AL1215 | AL1215|AL1530|AL1540|AL1551 Operation Manual - Page 31
the displayed model number that is the same as the MFP's model name. If they are not the same, the driver will not be installed correctly. 4 5 Establish the printer settings and click the "Next" button. Select "LPT1" for the port to be used. If "LPT1" does not appear, it is likely that another - Sharp AL1215 | AL1215|AL1530|AL1540|AL1551 Operation Manual - Page 32
"Select Program Folder" window appears, click the "Next" button. The setup program will start to copy the files. If the dialog box asking "If you have TIF files saved using Photoshop or Imaging for Windows you should hit Skip cable. (p.45) You have completed the installation of all the software. 30 - Sharp AL1215 | AL1215|AL1530|AL1540|AL1551 Operation Manual - Page 33
INDICATORS ON THE OPERATION PANEL The ONLINE indicator and the start ( ) indicator indicate the state of the printer or scanner. SCANNER indicator ONLINE indicator Start indicator Power save indicator Start indicator On: Indicates the unit is ready for copying or scanning is being performed. - Sharp AL1215 | AL1215|AL1530|AL1540|AL1551 Operation Manual - Page 34
2000, select "Settings" and click "Printers". 3 Click the "SHARP AL-xxxx" (where xxxx is the model name of your unit) printer driver icon and from the "File" menu select "Properties". On windows NT 4.0, select "Document Defaults" to open the printer driver setup screen. 4 Click "Printing Preferences - Sharp AL1215 | AL1215|AL1530|AL1540|AL1551 Operation Manual - Page 35
, and print quality, and then click the "Print" button to start printing. On Windows 95/98/Me/NT 4.0, click the "OK" button to start printing. 4 For details on print settings, see the online manual or the help file for the printer driver. • If copying is being performed when printing is started - Sharp AL1215 | AL1215|AL1530|AL1540|AL1551 Operation Manual - Page 36
driver and WIA driver. Setup that is required in Windows to use the Button Manager is explained in the following. Windows XP 1 Click the "start" button, select "Control Panel" and click "Printers and Other Hardware", and then click "Scanners and Cameras" in the start menu. Right click the "SHARP AL - Sharp AL1215 | AL1215|AL1530|AL1540|AL1551 Operation Manual - Page 37
98/Me/2000 To scan directly into an application using the Button Manager on Windows 98, Windows Me and Windows 2000. Set the Event Manager properties to send only to Button Manager as shown below. 1 Click the "Start" button, select "Control Panel" from "Settings", and open "Scanners and Cameras" in - Sharp AL1215 | AL1215|AL1530|AL1540|AL1551 Operation Manual - Page 38
Box After you have completed the Button Manager settings in Windows, configure the scan settings in Button Manager. To configure the color at 75 dpi to Sharpdesk using the operation panel "SC1" SCANNER ( ) key selection. This dialog shows the SC1 event set to go directly to Button Manager. With the - Sharp AL1215 | AL1215|AL1530|AL1540|AL1551 Operation Manual - Page 39
made on the AL-xxxx (where xxxx is the model name of your unit) operation panel (SC1, SC2, SC3, SC4, SC5, SC6). This will scan directly into your application from the device. Scanner ALxxxx (where xxxx is the model name of your unit) SCANNER key pressed. Event Manager Windows OS Button Manager - Sharp AL1215 | AL1215|AL1530|AL1540|AL1551 Operation Manual - Page 40
All About The Windows Event Manager and scanner events in Windows 98, Windows Me, Windows 2000 and Windows XP. Windows Platforms provide a mechanism for software to handle external events for a scanner device like the SHARP AL-xxxx (where xxxx is the model name of your unit) series products. This - Sharp AL1215 | AL1215|AL1530|AL1540|AL1551 Operation Manual - Page 41
copy job. • If the SCANNER ( ) key is pressed during a print job, the scan job will be stored. • When scanning an original that has been placed in the SPF/RSPF, only one original can be placed unless you are using Sharpdesk. 1 Press the SCANNER mail program in the Windows OS you are using) Fax (if a - Sharp AL1215 | AL1215|AL1530|AL1540|AL1551 Operation Manual - Page 42
Follow the steps below to open the scanner driver setup screen. As an example, this instruction is given using Sharpdesk as an image capture application. • Scanning is not possible during a copy and print job. • The method for starting the scanner driver differs depending on the type of application - Sharp AL1215 | AL1215|AL1530|AL1540|AL1551 Operation Manual - Page 43
3 Select "SHARP Personal MFP series", and click the "Select" button. Click here If you use more than one scanning device, select the scanner you want to use through the application. The method for accessing the "Select Scanner" option, depends upon the application. For more information, see the - Sharp AL1215 | AL1215|AL1530|AL1540|AL1551 Operation Manual - Page 44
menu. Click the "SHARP AL-xxxx" (where xxxx is the model name of your unit) icon and click "Get picture" in "Imaging Tasks". 3 The "Scanner and Camera Wizard" appears. Click "Next" and establish the basic settings for scanning. For information on the settings, see the Windows XP help file. After - Sharp AL1215 | AL1215|AL1530|AL1540|AL1551 Operation Manual - Page 45
HOW TO USE THE ONLINE MANUAL The online manual provides detailed instructions for operating the unit as the printer or scanner and a list of methods for dealing with printing or scanner problems. To access the online manual, your computer must have Acrobat Reader 5.0 or a later version. If it is not - Sharp AL1215 | AL1215|AL1530|AL1540|AL1551 Operation Manual - Page 46
may not be performed properly. To use another GDI printer or a Windows Printing System printer, you must change the port setting of the printer driver using the following procedure. If another printer does not operate properly when the SHARP Personal MFP series printer driver is set to "FILE" as - Sharp AL1215 | AL1215|AL1530|AL1540|AL1551 Operation Manual - Page 47
interface cable. The scanner function cannot be used if the unit is connected with a parallel cable. • USB is available with a PC/AT compatible computer that was originally equipped with USB and had Windows 98, Windows Me, Windows 2000 Professional, Windows XP Professional or Windows XP Home Edition - Sharp AL1215 | AL1215|AL1530|AL1540|AL1551 Operation Manual - Page 48
contrast settings, see page 49. To enlarge or reduce the copy, see page 51. AL-1551CS model To print on both sides of the paper, see page 52. To change the tray used, see page 53. 4 Start copying. Press the start ( ) key. If you are using the single bypass Do not press the start ( ) key. Insert - Sharp AL1215 | AL1215|AL1530|AL1540|AL1551 Operation Manual - Page 49
is in progress, the print job will begin when the copy job is completed. • The scanning function cannot be used while a copy job is in progress. About interrupt copying If you press the start ( ) key to begin a copy job while a print job using the paper tray or multi-bypass tray is in progress, the - Sharp AL1215 | AL1215|AL1530|AL1540|AL1551 Operation Manual - Page 50
on the operation panel will copying using the SPF/RSPF, press the clear ( ) key. • Copying using one-sided to one-sided mode (AL-1551CS): Ensure that no indicator is lit among the original to copy indicators. 1 Make sure that no original is left on the original table. 2 Adjust the original guides - Sharp AL1215 | AL1215|AL1530|AL1540|AL1551 Operation Manual - Page 51
most originals in the automatic exposure mode. To adjust the copy density manually or to copy photographs, the exposure level can be adjusted in five steps manually. The copy resolution used for AUTO and MANUAL ( changed. (p.55) ) mode can be 5 1 Press the exposure mode selector key to select - Sharp AL1215 | AL1215|AL1530|AL1540|AL1551 Operation Manual - Page 52
change it again by this procedure. The automatic exposure level can be adjusted to suit your copying needs. This level is set for copying from the original table and copying from the SPF/RSPF respectively. 1 When adjusting the automatic exposure level for copying from the SPF/RSPF, place an original - Sharp AL1215 | AL1215|AL1530|AL1540|AL1551 Operation Manual - Page 53
increments. 1 Set the original and check the paper size. 2 Use the copy ratio selector key and/or ZOOM ( , ) keys to select the desired copy ratio. • To verify a zoom setting without changing the zoom ratio, press and hold down the copy ratio display (%) key. When the key is released, the display - Sharp AL1215 | AL1215|AL1530|AL1540|AL1551 Operation Manual - Page 54
needed. ABOUT THE SPECIAL FUNCTIONS OF AL-1551CS Two sided copying When copying from the RSPF, two-side originals can be copied automatically without having to manually turn them over. Automatic two-sided copying can also be performed without using the RSPF. When copying from one-sided originals to - Sharp AL1215 | AL1215|AL1530|AL1540|AL1551 Operation Manual - Page 55
RSPF in step 3 on page 48. A B C 3 Select the copy settings. See "SET THE COPY QUANTITY" (p.49), "EXPOSURE ADJUSTMENT/PHOTO COPYING" (p.49), and "REDUCTION/ENLARGEMENT/ZOOM" (p.51). Using the original table If you are using the original table, copying is only possible in one sided to two-sided - Sharp AL1215 | AL1215|AL1530|AL1540|AL1551 Operation Manual - Page 56
Stream feeding mode (page 55) For description of the stream feeding mode, see "Stream feeding mode" (p.48). Resolution of AUTO & MANUAL mode (page 55) You can set the copy resolution used for AUTO and MANUAL ( mode. ) exposure TONER SAVE MODE 1 Press the exposure mode selector key to select the - Sharp AL1215 | AL1215|AL1530|AL1540|AL1551 Operation Manual - Page 57
. The toner save mode is now active. To return to the standard mode, repeat the procedure but use the dark ( ) key to select exposure level alarm indicators ( , , ) blink and " " appears in the display. 2 Use the left copy quantity ( ) key to select a user program number (1: auto clear time, 2: - Sharp AL1215 | AL1215|AL1530|AL1540|AL1551 Operation Manual - Page 58
) key. The unit will return to step 2. 6 Press the light ( ) or dark ( ) key to return to the normal copy mode. DISPLAYING TOTAL NUMBER OF COPIES Use the following procedure to display the total number of copies. Press and hold down the clear ( ) key for approximately 5 seconds. The total number of - Sharp AL1215 | AL1215|AL1530|AL1540|AL1551 Operation Manual - Page 59
chapter describes how to replace the TD cartridge and drum cartridge and how to clean the unit. Be sure to use only genuine SHARP parts and supplies. TD CARTRIDGE REPLACEMENT The TD cartridge replacement required ( ) indicator will light up when toner is needed. For more information on purchasing - Sharp AL1215 | AL1215|AL1530|AL1540|AL1551 Operation Manual - Page 60
begins to blink, the unit will stop operating until the cartridge is replaced. Replace the drum cartridge at this time. Do not remove the protective cover on the drum portion (black paper) of a new drum cartridge before use. The cover protects the drum against external light. 1 Remove the TD - Sharp AL1215 | AL1215|AL1530|AL1540|AL1551 Operation Manual - Page 61
and the back side of the original cover/SPF/ RSPF Stains on the glass, SPF/RSPF scanning window (AL-1540CS/AL-1551CS), cover or SPF/RSPF roller will also be copied. Wipe the glass,SPF/RSPF scanning window, cover and SPF/RSPF roller with a soft, clean cloth. If necessary, dampen the cloth with - Sharp AL1215 | AL1215|AL1530|AL1540|AL1551 Operation Manual - Page 62
Transfer charger If copies start becoming streaky or blotchy, the transfer charger may be dirty. Clean the charger using the following procedure. 1 Turn the power switch off. (p.13) 2 Ensure that the multi-bypass tray is open (AL-1551CS) and then open the side cover while pressing the side cover - Sharp AL1215 | AL1215|AL1530|AL1540|AL1551 Operation Manual - Page 63
manual or the Help file for the printer/scanner driver. TROUBLESHOOTING If any problem occurs, check the list below before contacting our Technical Assistance Department. Problem Possible cause Solution Page Unit plugged in? Plug the unit into a grounded outlet. 12 Unit does not operate - Sharp AL1215 | AL1215|AL1530|AL1540|AL1551 Operation Manual - Page 64
the operation panel or the following alphanumeric codes appear in the display, solve the problem immediately referring to both the table below and the relevant page. Be sure to use only genuine SHARP parts and supplies. Indication Cause and remedy Page Steadily Replacement of drum cartridge will - Sharp AL1215 | AL1215|AL1530|AL1540|AL1551 Operation Manual - Page 65
misfeed. If a misfeed occurs when using the SPF/RSPF, a number may this number will disappear when copying is resumed or the clear AL-1551CS)" (p.17). To open the side cover, see "INSTALLING THE TD CARTRIDGE" (p.10). 2 Check the misfeed location. Remove the misfed paper following the instructions - Sharp AL1215 | AL1215|AL1530|AL1540|AL1551 Operation Manual - Page 66
(green portion) of the drum cartridge when removing the misfed paper. Doing so may damage the drum and cause smudges on copies. • If the paper has been fed through the multi-bypass tray, do not remove the misfed paper through the multi-bypass tray. Toner on the paper may stain the paper transport - Sharp AL1215 | AL1215|AL1530|AL1540|AL1551 Operation Manual - Page 67
drum (green portion) of the drum cartridge when removing the misfed paper. Doing so may cause smudges on copies. • Do not remove the misfed paper from above the fusing unit. Unfixed toner THE TD CARTRIDGE" (p.10). 3 Rotate the feeding roller in the direction of the arrow and gently remove the misfed - Sharp AL1215 | AL1215|AL1530|AL1540|AL1551 Operation Manual - Page 68
order, the covers may be damaged. D: Misfeed in the lower paper feed area (AL-1551CS) 1 Open the lower side cover (under the multi-bypass tray) and remove tray, (B) in the exit area or (C) under the feeding roller. Remove the misfed original following the instructions for each location. (A) Open - Sharp AL1215 | AL1215|AL1530|AL1540|AL1551 Operation Manual - Page 69
misfed original from the exit area. If the misfed original cannot be easily removed, proceed to (C). Roller rotating knob (AL-1551CS) With the RSPF, (C) If the original does not move easily into the exit area, remove it in the direction of the arrow while rotating the knob. 8 A to resume copying. 67 - Sharp AL1215 | AL1215|AL1530|AL1540|AL1551 Operation Manual - Page 70
speed Print speed Continuous copying/printing First-copy/print time (Approximately) Copy ratio Exposure system Original table SPF/RSPF Fusing system Development system Light source Scanner Resolution Copier Printer AL-1215 AL-1530CS AL-1540CS AL-1551CS Digital laser copier desk-top type - Sharp AL1215 | AL1215|AL1530|AL1540|AL1551 Operation Manual - Page 71
in totals. *4 The trailing edge of the second (Two-sided copy mode). *5 Data transmission time is not included. (Only for printer) *6 Not includes TD and drum cartridges. As a part of our policy of continuous improvement, SHARP reserves the right to make design and specification changes for product - Sharp AL1215 | AL1215|AL1530|AL1540|AL1551 Operation Manual - Page 72
best copying results, be sure to use only SHARP Genuine Supplies which are designed, engineered, and tested to maximize the life and performance of SHARP copiers. Look for the Genuine Supplies label on the toner package. Supply list Supply TD cartridge Drum cartridge Part number AL-110TD AL-100DR - Sharp AL1215 | AL1215|AL1530|AL1540|AL1551 Operation Manual - Page 73
STORING THE UNIT Moving instructions When moving the unit, follow the procedure below. When moving this unit, be sure to remove the TD cartridge in advance. 1 and dry, 9 • at a stable temperature, • not exposed to direct sunlight Store paper in the wrapper and lying flat. • Paper stored out - Sharp AL1215 | AL1215|AL1530|AL1540|AL1551 Operation Manual - Page 74
How to use the online manual 43 I Indicators on the operation panel ...... 31 Initial settings of operation panel....... 13 Installing the software 19, 21 Installing the TD cartridge 10 Interface - Parallel interface 45 - USB interface 45 Interface cable 70 Interrupt copying 47 Introduction - Sharp AL1215 | AL1215|AL1530|AL1540|AL1551 Operation Manual - Page 75
66 - Transport area 65 Moving instructions 71 Multi-bypass tray 17 N Name - Operation panel 6 - Part names 5 O ONLINE indicator 6, 31 ONLINE key 6, 31 Online manual 4, 43 Opening the printer driver 32 Opening the scanner driver 40 Operation panel 5, 6 Original placement - Original table - Sharp AL1215 | AL1215|AL1530|AL1540|AL1551 Operation Manual - Page 76
65 Replacing the drum cartridge 58 Replacing the TD cartridge 57 Scanning - Button Manager 34 - Scanner and Camera Wizard ....... 42 - SHARP TWAIN 40 Selecting the tray 53 Setting the copy quality - AUTO 50 - MANUAL 49 - PHOTO 49 Setting the copy quantity 49 Setting the toner save mode 54 - Sharp AL1215 | AL1215|AL1530|AL1540|AL1551 Operation Manual - Page 77
own the disk on which the Software is recorded but SHARP and/or SHARP'S Licensors retain title to the Software and related documentation. This License allows you to use the Software on one or more computers connected to a single printer and make one copy of the Software in machine-readable form for - Sharp AL1215 | AL1215|AL1530|AL1540|AL1551 Operation Manual - Page 78
REQUIREMENTS, OR THAT THE OPERATION OF THE SOFTWARE WILL BE UNINTERRUPTED OR ERROR-FREE, OR THAT DEFECTS IN THE SOFTWARE WILL BE CORRECTED. FURTHERMORE, SHARP DOES NOT WARRANT OR MAKE ANY REPRESENTATIONS REGARDING THE USE OR THE RESULTS OF THE USE OF THE SOFTWARE OR RELATED DOCUMENTATION IN TERMS - Sharp AL1215 | AL1215|AL1530|AL1540|AL1551 Operation Manual - Page 79
Jul. 31, 2002 Data Issued: Jun. 1, 1998 MSDS NO. F-00831 1. PRODUCT AND COMPANY IDENTIFICATION Product Name : AL-100TD / DM-150TD / AL-110TD / AL-110DC (Black Toner) Supplier Identification : Sharp Corporation 22-22 Nagaike-cho, Abeno-ku, Osaka, Japan Local suppliers are listed below. Please - Sharp AL1215 | AL1215|AL1530|AL1540|AL1551 Operation Manual - Page 80
and Effects of the Products Human Health Effects :There are no anticipated carcinogenic effects from exposure based on animal tests performed using toner. When used as intended according to instructions, studies do not indicate any symptoms of fibrosis will occur. Environmental Effects :No data - Sharp AL1215 | AL1215|AL1530|AL1540|AL1551 Operation Manual - Page 81
:Not required under intended use. Eye Protection :Not required under intended use. Skin Protection :Not required under intended use. Other Protective equipment :Use of a dust mask and goggles are recommended when handling a large quantity of toner or during long term exposure, as with any non - Sharp AL1215 | AL1215|AL1530|AL1540|AL1551 Operation Manual - Page 82
1998 MSDS NO. F-00831 :In a study in rats of chronic inhalation exposure to a typical toner, a mild to moderate degree of lung fibrosis was observed in 92% of proper use in handling of this product under normal conditions. However, all materials may present unknown hazards and should be used with - Sharp AL1215 | AL1215|AL1530|AL1540|AL1551 Operation Manual - Page 83
.31, 2002 Data Issued: Jun. 1, 1998 MSDS NO. F-30831 1. PRODUCT AND COMPANY IDENTIFICATION Product Name : AL-100TD / DM-150TD / AL-110TD / AL-110DC (Black Developer) Supplier Identification : Sharp Corporation 22-22 Nagaike-cho, Abeno-ku, Osaka, Japan Local suppliers are listed below. Please - Sharp AL1215 | AL1215|AL1530|AL1540|AL1551 Operation Manual - Page 84
and Effects of the Products Human Health Effects :There are no anticipated carcinogenic effects from exposure based on animal tests performed using toner. When used as intended according to instructions, studies do not indicate any symptoms of fibrosis will occur. Environmental Effects :No data - Sharp AL1215 | AL1215|AL1530|AL1540|AL1551 Operation Manual - Page 85
show any association between carbon black and lung tumors. Moreover, a two-year cancer bioassay using a typical toner preparation containing carbon black demonstrated no association between toner exposure and tumor development in rats. Chronic Effect :In a study in rats of chronic inhalation - Sharp AL1215 | AL1215|AL1530|AL1540|AL1551 Operation Manual - Page 86
S.Takenaka, and R.Mermelstein (1991) Pulmonary Response to Toner upon Chronic Inhalation Exposure in Rats. Fundamental and Applied Toxicology 17, pp the proper use in handling of this product under normal conditions. However, all materials may present unknown hazards and should be used with caution - Sharp AL1215 | AL1215|AL1530|AL1540|AL1551 Operation Manual - Page 87
that may cause undesired operation. Model Number: AL- 12PK (Printer/Scanner Expansion Kit) Responsible Party: SHARP ELECTRONICS CORPORATION Sharp Plaza, Mahwah, New Jersey 07430-2135 TEL: 1-800-BE-SHARP AL-12PK Tested To Comply With FCC Standards FOR HOME OR OFFICE USE This product utilizes tin - Sharp AL1215 | AL1215|AL1530|AL1540|AL1551 Operation Manual - Page 88
SHARP ELECTRONICS CORPORATION Sharp Plaza, Mahwah, New Jersey 07430-2135. www.sharp-usa.com SHARP ELECTRONICS OF CANADA LTD. 335 Britannia Road East, Mississauga, Ontario, L4Z 1W9 SHARP CORPORATION Printed on Recycled Paper PRINTED IN CHINA 2003A KS 2 TINSE0738QSZ4
-
 1
1 -
 2
2 -
 3
3 -
 4
4 -
 5
5 -
 6
6 -
 7
7 -
8
-
9
-
10
-
11
-
12
-
13
-
14
-
15
-
16
-
17
-
18
-
19
-
20
-
21
-
22
-
23
-
24
-
25
-
26
-
27
-
28
-
29
-
30
-
31
-
32
-
33
-
34
-
35
-
36
-
37
-
38
-
39
-
40
-
41
-
42
-
43
-
44
-
45
-
46
-
47
-
48
-
49
-
50
-
51
-
52
-
53
-
54
-
55
-
56
-
57
-
58
-
59
-
60
-
61
-
62
-
63
-
64
-
65
-
66
-
67
-
68
-
69
-
70
-
71
-
72
-
73
-
74
-
75
-
76
-
77
-
78
-
79
-
80
-
81
-
82
-
83
-
84
-
85
-
86
-
87
-
88
 |
 |

DIGITAL LASER COPIER
DIGITAL MULTIFUNCTIONAL
SYSTEM
OPERATION MANUAL
Page
INTRODUCTION
SETTING UP THE UNIT
LOADING PAPER
MAKING COPIES
SPECIAL FUNCTIONS
MAINTENANCE
TROUBLESHOOTING
THE UNIT
4
7
14
46
52
57
61
68
INSTALLING THE
SOFTWARE
19
APPENDIX
AL-1215
AL-1530CS
AL-1540CS
AL-1551CS
MODEL
AL-1551CS
AL-1540CS
AL-1215/AL-1530CS