Sharp CD-BA300 CDBA300 Operation Manual
Sharp CD-BA300 Manual
 |
View all Sharp CD-BA300 manuals
Add to My Manuals
Save this manual to your list of manuals |
Sharp CD-BA300 manual content summary:
- Sharp CD-BA300 | CDBA300 Operation Manual - Page 1
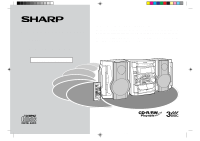
SYSTEM MODEL CD-BA300 Thank you for purchasing this SHARP product. To obtain the best performance from this product, please read this manual carefully. It will guide you in operating your SHARP product. CD-BA300 Mini Component System consisting of CD-BA300 (main unit) and CP-BA300 (speaker system - Sharp CD-BA300 | CDBA300 Operation Manual - Page 2
Instruction - Special Notes - Special Notes CAUTION: TO REDUCE THE RISK OF ELECTRIC SHOCK, DO NOT REMOVE COVER (OR BACK). NO USER-SERVICEABLE PARTS INSIDE. REFER SERVICING TO QUALIFIED SERVICE RECORDS For your assistance in reporting this unit in case of loss or theft, please record below the model - Sharp CD-BA300 | CDBA300 Operation Manual - Page 3
, be sure the antenna system is grounded so as to provide some protection against voltage surges and built-up static charges. Section 810 of the National Electrical Code, ANSI/NFPA No. 70-1984, provides information with respect to proper grounding of the mast and supporting structure, grounding of - Sharp CD-BA300 | CDBA300 Operation Manual - Page 4
Tape (TAPE 1 or TAPE 2 22 s Tape Recording Recording from the Radio 23 Recording from a CD (CDs 24 Dubbing from Tape to Tape 25 s Advanced Features Timer and Sleep Operation 26, 27 Enhancing Your System 28 s References Troubleshooting Chart 29, 30 Maintenance 30 Specifications 31 - Sharp CD-BA300 | CDBA300 Operation Manual - Page 5
given volume setting depends on speaker efficiency, location and various other low temperatures. q If your system does not work properly, disconnect maximum enjoyment from your CD collection and player. q electric shock. Refer internal service to your local SHARP service facility. q This unit should - Sharp CD-BA300 | CDBA300 Operation Manual - Page 6
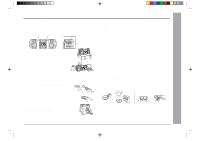
26 27 6 s Description of remote control (See page 8) *BA300_P04_09 Demo Mode Button 13, 14 09. Disc Tray Open/Close Button 16 10. Disc Number Select Buttons 16, 19, 24 11. Disc Skip Button 16, 18 12. Tuning and Time Up Button 15, 20 13. CD Record Pause Button 23, 24, 25 27. CD Fast Reverse, - Sharp CD-BA300 | CDBA300 Operation Manual - Page 7
12. Sleep Indicator 13. FM Stereo Mode Indicator 14. FM Stereo Receiving Indicator 15. Timer Recording Indicator 16. Timer Play Indicator s Rear panel Reference page 01. FM/AM Loop Antenna Jack 10, 11 1 02. Video/Auxiliary (Audio Signal) Input Jacks 28 03. Speaker Terminals 10, 11 2 04 - Sharp CD-BA300 | CDBA300 Operation Manual - Page 8
Remote control Reference page 01. Remote Control Transmitter 12 02. Disc Number Select Buttons 16, 19, 24 03. CD Pause Button 17 04. CD Memory Button 19 05. CD Fast Reverse Button 17 06. CD 09. Equalizer Mode Select Button 14 10. Tape 2 Record Pause Button 23, 24, 25 11. CD Button 16, - Sharp CD-BA300 | CDBA300 Operation Manual - Page 9
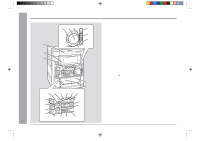
04. Woofer 05. Speaker Wire for SUBWOOFER Terminals 06. Speaker Wire for MAIN Terminals *BA300_P04_09 9 Speaker grilles are removable: Make sure nothing comes into contact with the speaker diaphragms when you remove the speaker grilles. Placing the speaker system: Left speaker 5 The left and - Sharp CD-BA300 | CDBA300 Operation Manual - Page 10
System Connections AM loop antenna FM antenna Preparation for Use - System Connections - Right speaker Left speaker VCR, DVD, etc. not supplied AC outlet (AC 120 V, 60 Hz) 10 *BA300_P10_12 10 00.11.16, 2:48 PM - Sharp CD-BA300 | CDBA300 Operation Manual - Page 11
red wire to the SUBWOOFER(+) terminal. Right speaker Left speaker s FM/AM loop antenna connection Connect the FM/AM loop antenna to the ANTENNA jack. Position the FM antenna wire and rotate the AM loop antenna for optimum reception. Place the AM loop antenna on a shelf, or attach it to a stand or - Sharp CD-BA300 | CDBA300 Operation Manual - Page 12
the batteries incorrectly may cause the unit to malfunction. Notes concerning use: q Replace the batteries if the operating distance is reduced or if the operation be- comes erratic. q Periodically clean the transmitter on the remote control and the sensor on the unit with a soft cloth. q Exposing - Sharp CD-BA300 | CDBA300 Operation Manual - Page 13
unit is in the power stand-by mode (demonstration mode), press the XBASS/DEMO button. The demonstration mode will be canceled and the display will disappear. To return to the demonstration mode: When the unit is in the power stand-by mode, press the X-BASS/DEMO button again. Note: When the power is - Sharp CD-BA300 | CDBA300 Operation Manual - Page 14
the volume will decrease. Remote control operation: Press the mode, press the X-BASS/DEMO (X-BASS) button. X-BASS indicator s Equalizer When the EQUALIZER (EQUALIZER MODE) button is pressed, the current mode setting will be displayed. To change to a different mode, press the EQUALIZER (EQUALIZER MODE - Sharp CD-BA300 | CDBA300 Operation Manual - Page 15
24-hour display) will be skipped. To change the 12-hour or 24-hour display: 1. Clear all the programmed contents. [Refer to step 3 under "If trouble occurs" on page 30 for details.] 2. Perform "Setting the Clock" from the beginning. 15 *BA300_P13_15 15 00.11.16, 2:49 PM - Sharp CD-BA300 | CDBA300 Operation Manual - Page 16
Listening to a CD (CDs) This system can play audio CD-R and CD-RW discs just as CD discs, but cannot perform recording. 1 Press the ON/STAND-BY button to turn the power on. 2 Press the CD button. 3 Press the 7 OPEN/CLOSE button to open the disc tray. 4 Place the CD(s) on the disc tray, label side - Sharp CD-BA300 | CDBA300 Operation Manual - Page 17
a single disc only. q The 3 / 5 or 2 / 4 button on the remote control allows you to locate the beginning of a track. s To locate the desired portion stand-by mode and then turn the power on again. q If TV or radio interference occurs during CD operation, move the unit away from the TV or radio. q If - Sharp CD-BA300 | CDBA300 Operation Manual - Page 18
Play You can play a disc starting with the desired track. 1 While in the stop mode, press one of the s 1 - s 3 buttons or DISC SKIP button to automatically. Press the RANDOM button on the remote control to begin random play. To stop playback: Press the s (CD s) button. Notes: q When the DISC - Sharp CD-BA300 | CDBA300 Operation Manual - Page 19
number To clear the programmed selections: While in the stop mode, press the CLEAR button on the remote control. Each time the button is pressed, one track will the ON/STAND-BY button to enter the stand-by mode or change the function from CD to another, the programmed selections will not be cleared - Sharp CD-BA300 | CDBA300 Operation Manual - Page 20
: Press the TUNER (BAND) button so that the "ST" indicator lights up. q "j" will appear when an FM broadcast is in stereo. FM stereo mode indicator FM stereo receiving indicator q If the FM reception is weak, press the TUNER (BAND) button so that the "ST" indi- cator goes out. The reception - Sharp CD-BA300 | CDBA300 Operation Manual - Page 21
memory 1. Press the ON/STAND-BY button to enter the stand-by mode. 2. Press the ON/STAND-BY button while holding down the TUNER (BAND) button and X-BASS/DEMO button until "TUNER CL" appears. Note: The backup function protects the memorized stations for a few hours should there be a power failure or - Sharp CD-BA300 | CDBA300 Operation Manual - Page 22
TAPE (1 V 2) button to select the cassette you want to listen to. 5 Press the 0/R button to start playback. When playback is performed using the remote control, press the TAPE 1 or TAPE 2 0 button. To stop playback: Press the s (TAPE s) button. Fast forward/rewind: (TAPE 2 only) 1. Press the s (TAPE - Sharp CD-BA300 | CDBA300 Operation Manual - Page 23
, move the AM loop antenna. Erase-prevention tab of cassette tapes: q When recording on a cassette tape, make sure that the erase-prevention tabs are not removed. Cassettes have removable tabs that prevent accidental recording or erasing. Tab for side B q To protect the recorded sound, remove the - Sharp CD-BA300 | CDBA300 Operation Manual - Page 24
19). 2. Press the REC PAUSE I6 (I6) button. 3. Press the 0/R (TAPE 2 0) button. To stop recording: Press the s (CD s) button. The CD and tape will stop. Note: When the end of the tape is reached while recording, the CD player will display the track number which was being played at that time, and - Sharp CD-BA300 | CDBA300 Operation Manual - Page 25
the TAPE (1 V 2) button until "TAPE 1" appears in the display. 4 Press the REC PAUSE I6 (I6) button. Recording will be paused. 5 Press the 0 / R button on the main unit or the TAPE 2 0 button on the remote control to start dubbing. To stop dubbing: Press the s (TAPE s) button. TAPE 1 and TAPE 2 will - Sharp CD-BA300 | CDBA300 Operation Manual - Page 26
Operation Timer playback: The unit turns on and plays the desired source (CD, tuner, tape) at the preset time. Timer recording: The unit turns on and starts recording from the tuner at the preset time. Sleep operation: The radio, compact disc and cassette tape can all be turned off automatically - Sharp CD-BA300 | CDBA300 Operation Manual - Page 27
recording will start. The volume will increase gradually until it reaches the volume you were listening at before your system enters the timer stand-by mode. 9 In timer playback: If you select CD by mode automatically. (Another unit will not be turned on or turned off.) s Listening to the Radio (See - Sharp CD-BA300 | CDBA300 Operation Manual - Page 28
Red RCA cord (not supplied) Advanced Features - Enhancing Your System - 28 BA300_P26_28 28 s Listening to the playback sounds from hum interference, place this unit away from a television. s To record on a tape 1 Insert a cassette in the TAPE 2 speakers automatically. Adjust the volume using the VOLUME control. - Sharp CD-BA300 | CDBA300 Operation Manual - Page 29
? s Tuner Symptom q Radio makes unusual noise consecutively. Possible cause q Is the unit placed near the TV or computer? q Is the FM/AM loop antenna placed properly? Move the AC power cord away from the antenna if located near. s Cassette deck Symptom q Cannot record. q Cannot record tracks with - Sharp CD-BA300 | CDBA300 Operation Manual - Page 30
use, the deck's heads and capstans may become magnetized, causing poor sound. Demagnetize these parts once every 30 hours of playing/recording time by using a commercial tape head demagnetizer. Read the demagnetizer's instructions carefully before use. q In order to ensure proper operation of the - Sharp CD-BA300 | CDBA300 Operation Manual - Page 31
- Specifications As part of our policy of continuous improvement, SHARP reserves the right to ) 50 dB (TAPE 2, recording/playback) 0.25 % (WRMS) s Speaker Type Maximum input power (Total) Rated input power (Total) Impedance Dimensions Weight 3-way type speaker system 2" (5 cm) Tweeter - Sharp CD-BA300 | CDBA300 Operation Manual - Page 32
WHICH VARY FROM STATE TO STATE. Model Specific Section Your Product Model Number & Description: CD-BA300 Mini Component System (Be sure to have this information available when you need service for your Product.) Warranty Period for this Product: One (1) year parts and labor from the date of
-
 1
1 -
 2
2 -
 3
3 -
 4
4 -
 5
5 -
 6
6 -
 7
7 -
8
-
9
-
10
-
11
-
12
-
13
-
14
-
15
-
16
-
17
-
18
-
19
-
20
-
21
-
22
-
23
-
24
-
25
-
26
-
27
-
28
-
29
-
30
-
31
-
32
 |
 |
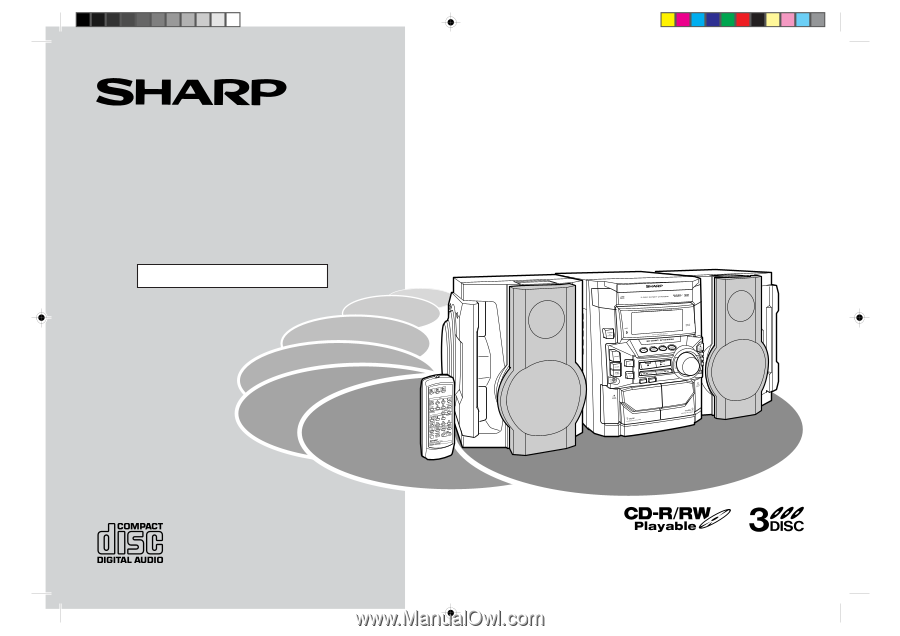
Thank you for purchasing this SHARP product.
To obtain the best performance from this product, please read this
manual carefully. It will guide you in operating your SHARP product.
CD-BA300 Mini Component System consisting of CD-BA300 (main
unit) and CP-BA300 (speaker system).
MINI COMPONENT SYSTEM
MODEL
CD-BA300
OPERATION MANUAL
*BA300_P01
00.11.16, 2:46 PM
2