Sharp DV-SR45U Operation Manual
Sharp DV-SR45U Manual
 |
UPC - 074000354449
View all Sharp DV-SR45U manuals
Add to My Manuals
Save this manual to your list of manuals |
Sharp DV-SR45U manual content summary:
- Sharp DV-SR45U | Operation Manual - Page 1
Getting started Recording DVD RECORDER DV-SR45U OPERATION MANUAL Please read this Operation Manual carefully before using your DVD Round Coaxial cable • Audio/Video cables (9HSWPZ0901TM003) (9HSWX1E56B5-001) • Operation Manual (9HS1VMN20185) Operation Manual • Quick Use Guide (9HS1VMN20228 - Sharp DV-SR45U | Operation Manual - Page 2
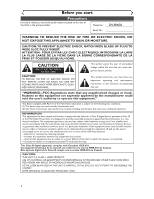
Model No.: Serial No.: DV-SR45U WARNING: TO REDUCE THE SERVICING TO QUALIFIED SERVICE PERSONNEL. This symbol warns the user of uninsulated voltage within the unit that can cause dangerous electric shocks. This symbol alerts the user that there are important operating and maintenance instructions - Sharp DV-SR45U | Operation Manual - Page 3
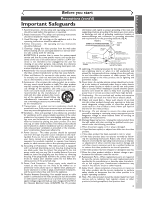
- All operating and use instructions should be followed. 5. Cleaning - Unplug this video product from the wall outlet before cleaning. Do not use liquid cleaners or aerosol cleaners. Use a damp cloth for cleaning. EXCEPTION: A product that is meant for uninterrupted service and, that for some - Sharp DV-SR45U | Operation Manual - Page 4
and contact the retailer or service centre approved by SHARP immediately. • Do not remove or near heat sources. Copy Protection This Unit supports Macrovision copy protection. On DVD discs that include In case of 525 progressive scan picture problems, it is recommended that the user switch - Sharp DV-SR45U | Operation Manual - Page 5
this unit still does not perform properly although you refer to the relevant sections and to Troubleshooting on pages 92-95, the laser optical pickup unit may be dirty. Consult a Sharp Authorized Service Center for inspection and cleaning of the laser optical pickup unit. DISC HANDLING ¡Handle the - Sharp DV-SR45U | Operation Manual - Page 6
cable box or satellite box . . . .14 When connecting to a cable box or satellite box with only a few scrambled channels 14 When connecting to a cable 21 Manual Clock DVD play 41 Guide to displays 41 Troubleshooting 92 Language code 95 Glossary 96 Specifications 97 Service Information (For the U.S 97 - Sharp DV-SR45U | Operation Manual - Page 7
scanning, the progressive scan system provides less flickering and images in higher resolution than that of traditional television signals. Symbol in this operation manual Many functions of this DVD recorder are depending on the disc type or the recording mode. To specify for what disc type or - Sharp DV-SR45U | Operation Manual - Page 8
tray Place a disc when open. 9. Display Refer to "Front Panel Display Guide" on page 12. 10. Remote control sensor Receive signals from your remote connect external equipment with a standard equipment with a standard video cable. video cable. 4. S-VIDEO OUTPUT jack 10. AUDIO INPUT jacks(LINE1 - Sharp DV-SR45U | Operation Manual - Page 9
Before you start Before you start Connections Getting started Recording Playing discs Functional overview (cont'd) Remote Control 1 2 3 4 65 7 8 9* 10 11* 13 12 14 15 POWER DISPLAY OPEN/CLOSE TIMER PROG. A .@/: 1 CH REC MONITOR GHI 4 PQRS 7 REC MODE CLEAR REC PAUSE F ABC 2 JKL 5 TUV - Sharp DV-SR45U | Operation Manual - Page 10
with governmental regulations or environmental public instruction's rules that apply in your country R 3 DEF STOP FWD PLAYMLEINSUT OPEN/CLOSE Guide to Displays on screen menu This unit uses the format mode. NOTE: In some descriptions on this manual, only one disc type is indicated as an example - Sharp DV-SR45U | Operation Manual - Page 11
Before you start Connections Getting started Recording Before you start Functional overview (cont'd) SETUP/DISC/CD menu Press SETUP button to display the setup main menu, then choose either of SETUP/DISC/CD by { / B button. Then, press ENTER button to display each menu. These menus provide entries - Sharp DV-SR45U | Operation Manual - Page 12
Before you start Functional overview (cont'd) Front Panel Display Guide 4 2 1 3 6 7 1. Current status of the DVD recorder : Appears when disc playback is paused. : Appears when playing a disc. : Appears when the timer programming has been set and - Sharp DV-SR45U | Operation Manual - Page 13
IN Y PB/CB Playing discs PR/CR Editing Changing the SETUP menu Audio cable (supplied) DVD Recorder 1 OUTPUT R AUDIO L R DIGITAL AUDIO OUTPUT PCM OUT Note • Connect this unit directly to the TV. If the A/V cables are connected to a VCR, pictures may be distorted due to the copy - Sharp DV-SR45U | Operation Manual - Page 14
, we recommend using this setup. With this setup: • You can record any unscrambled channel by selecting the channel on the cable box or satellite box. Be sure that the cable box or satellite box is turned on. • You cannot record one channel while watching another channel. AUDIO IN VIDEO (Back - Sharp DV-SR45U | Operation Manual - Page 15
devices should be turned off. • Refer to the operation manual accompanying external devices for more information. Method 1 Stereo system jack COAXIAL Audio cable (supplied) DVD Recorder R AUDIO OUT R 1 AUDIO or AUDIO 2 OUTPUT L OUTPUT L Audio Coaxial Digital cable (commercially available) - Sharp DV-SR45U | Operation Manual - Page 16
Yes Yes No No Yes Yes Yes Yes No No Note: For details of the above functions and implied restrictions, see the explanations inside the manual. 16 Format the disc Insert the disc in the recorder.Then, format the disc from SETUP menu.Video format (Video mode) or Video recording format - Sharp DV-SR45U | Operation Manual - Page 17
Playlist without changing the original recordings. Playlist does not take up much disc space. What "Original" or "Playlist" is for? Throughout this manual, you will find Original and Playlist to refer to the actual content and the edited version. • Original content refers to what's actually recorded - Sharp DV-SR45U | Operation Manual - Page 18
ENTER button. Channel Preset menu will appear. Setup > Channel Preset Auto Preset Manual Preset TV Audio Select Stereo 3 Press SETUP button to display SETUP/DISC menu control. Notes for using the Number buttons: • When selecting cable channels which are higher than 99, enter channel numbers as a - Sharp DV-SR45U | Operation Manual - Page 19
Playback Setting 3 Select "Channel" using K / L / { / B buttons, then press ENTER button. Channel Preset menu will appear. Setup > Channel Preset Auto Preset Manual Preset TV Audio Select Stereo 6 Select "Add" or "Delete" using K / L buttons, then press ENTER button. The channel number will be - Sharp DV-SR45U | Operation Manual - Page 20
Playback Setting 3 Select "Channel" using K / L / { / B buttons, then press ENTER button. Channel Preset menu will appear. Setup > Channel Preset Auto Preset Manual Preset TV Audio Select Stereo 6 Press SETUP button to exit. Notes on TV channel audio • When you record a TV program available - Sharp DV-SR45U | Operation Manual - Page 21
) is available in your area, follow Auto Clock Setting below. If not, follow Manual Clock Setting on pages 22-23. Auto Clock Setting Make sure • The antenna/Cable TV connec- tions are correct. • If this unit is connected to a Cable Box or Satellite Box, select the local PBS station on them to set - Sharp DV-SR45U | Operation Manual - Page 22
Getting started Setting the clock (cont'd) Manual Clock Setting 1 Press SETUP button to display SETUP/DISC menu. SETUP/DISC menu will appear. Screen: Setup Menu 2 Select "SETUP" using { / is a power failure or this unit has been unplugged for more than 30 seconds when you set the clock manually. - Sharp DV-SR45U | Operation Manual - Page 23
MENU/LIST K REPEAT ENTER { B 7 ZOOM RETURN L When "Auto Clock Setting" is selected to "Auto" or "Manual", change it to "OFF" as following steps. Repeat steps (1) to (3) in "Manual Clock Setting". 4 Select "Auto Clock Setting" using K / L buttons, then press ENTER button. Option window will - Sharp DV-SR45U | Operation Manual - Page 24
Getting started Setting the clock (cont'd) Setting the daylight sav- ing time 4 When Daylight Saving Time is ON, the DVD recorder clock will automatically move forward one hour on the first Sunday in April and move back one hour on the last Sunday in October. 1 Press SETUP button to display - Sharp DV-SR45U | Operation Manual - Page 25
Before you start Connections Getting started Recording Getting started Selecting the TV aspect ratio You can select the TV aspect ratio to match the formats of what you are playing with the DVD recorder and your TV screen (4:3 standard or 16:9 widescreen TV). "4:3 Letter Box" has been selected - Sharp DV-SR45U | Operation Manual - Page 26
Recording Information on DVD recording Information Recording speed This DVD recorder can record to DVD-R and DVD-RW discs.When recording, you will need to select a recording format between Video mode and VR mode depending on the disc format.The disc format for DVD-R is always "Video format," so - Sharp DV-SR45U | Operation Manual - Page 27
Before you start Connections Getting started Recording Recording Information on DVD recording (cont'd) Information on copy control Some satellite broadcasts include copy-protected information. For recording these, refer to the following. Making discs playable in other DVD player (Finalize) After - Sharp DV-SR45U | Operation Manual - Page 28
Recording Formatting a disc Choosing the recording format of a blank disc Video DVD-RW VR DVD-RW When inserting a blank disc, the DVD recorder starts to initialize the blank disc. After that, you can record to the disc with the recording format selected in SETUP menu. You are allowed to - Sharp DV-SR45U | Operation Manual - Page 29
Before you start Connections Getting started Recording Recording Formatting a disc (cont'd) 6 Select "Auto Chapter" using K / L buttons, then press ENTER button. Option window will appear. Setup > Recording DVD-RW Recording Format Auto Chapter Timer Programming OVFRFmode 150mmiinnuutteess 10 - Sharp DV-SR45U | Operation Manual - Page 30
Recording Reformatting a disc Formatting a disc (cont'd) Video DVD-RW VR DVD-RW If you are using a DVD-RW disc, by default it will be VR mode.You can change this to Video mode from SETUP menu. 1 Press SETUP button to display SETUP/DISC menu. SETUP/DISC menu will appear. Screen: 4 Select " - Sharp DV-SR45U | Operation Manual - Page 31
Before you start Connections Getting started Recording Recording Basic recording Video DVD-RW VR DVD-RW DVD-R Follow the steps below to record TV programs. 1 Turn on the DVD recorder and load a recordable disc. Make sure that the TV input is set on the DVD recorder. This operation may take a - Sharp DV-SR45U | Operation Manual - Page 32
Recording Basic recording (cont'd) Checking the recording picture quality Video VR 2 DVD-RW DVD-RW DVD-R You can confirm the recording pic- ture quality with the recording speed you have selected before Press REC MONITOR button again to exit. 1 attempting to record to a DVD disc. 2 1 1 - Sharp DV-SR45U | Operation Manual - Page 33
Recording One-touch timer recording Before you start Connections Getting started Recording Playing discs Video VR DVD-RW DVD-RW DVD-R This is a simple way to set the 4 recording time in blocks of 30 minutes. Check that the disc you are recording onto has enough space for the time you set. - Sharp DV-SR45U | Operation Manual - Page 34
have not set the clock yet: A clock setting window will appear after step 4. Continue with the step 4 in "Auto Clock Setting" on page 21 or "Manual Clock Setting" on page 22 before making a timer programming. • Press { or B buttons to move the cursor to the left and the right in the timer - Sharp DV-SR45U | Operation Manual - Page 35
Recording Timer recording (cont'd) Before you start Connections Getting started Recording Playing discs 8 Select the channel number to record using K / L buttons, then press B button. Setup > Recording > Timer Programming Date Start 1. JAN/12 10:00PM 2. - - - End CH Speed 10:30PM CH8 To - Sharp DV-SR45U | Operation Manual - Page 36
Recording Timer recording (cont'd) Hints for timer recording • If there is a power failure or this unit has been unplugged for more than 30 seconds, the clock setting and all timer settings will be lost. • If a disc is not on the tray, the indicator flashes and timer recording cannot be performed. - Sharp DV-SR45U | Operation Manual - Page 37
. OUTPUT S- VIDEO VIDEO AUDIO LR Another source (VCR camcorder etc.) OUTPUT AUDIO VIDEO S -VIDEO RL or S-Video Video Audio cable cable cable or Audio cable Video S-Video cable cable or INPUT R AUDIO L (L1) VIDEO S-VIDEO To LINE 2 IN REC/OTR OPEN/CLOSE Front of DVD recorder 1. Press SETUP - Sharp DV-SR45U | Operation Manual - Page 38
for an external source (cont'd) Recording from an external source Video DVD-RW VR DVD-RW DVD-R Before recording from an external source, see the instructions for the connection on page 37. 1. Turn the TV and the DVD recorder on, and be sure to select the input of the TV to - Sharp DV-SR45U | Operation Manual - Page 39
Recording Finalizing the discs Before you start Connections Getting started Recording Playing discs Video DVD-RW VR DVD-RW DVD-R You will need to finalize the discs recorded in Video mode to play in other DVD players. Details are on pages 26-27. 1 Press SETUP button to display SETUP/DISC - Sharp DV-SR45U | Operation Manual - Page 40
Recording Setting a disc to protect VR DVD-RW To prevent accidental recording, editing, or erasing the titles, you can protect them from DISC menu. 1 Press SETUP button to display SETUP/DISC menu. SETUP/DISC menu will appear. Screen: Setup Menu 2 Select "DISC" using { / B buttons, then press ENTER - Sharp DV-SR45U | Operation Manual - Page 41
can be played on this unit but their performance is not guaranteed : • DVD-RW Ver 1.2 / 2-4x CPRM compatible • DVD-R General Ver 2.0 / 8x Guide to displays Title 1 Title 2 Chapter 1 Chapter 2 Chapter 3 Chapter 1 Chapter 2 Press DISPLAY button to call up the display menu.This menu will give you - Sharp DV-SR45U | Operation Manual - Page 42
open. 3 Place the disc onto the disc tray with its label facing up and make sure to align the disc to the disc tray guide. disc tray guide This operation may take a while to be recognized. 4 Press OPEN/CLOSE A button to close the disc tray. Basic playback VR mode: Original 1 12 3 JAN - Sharp DV-SR45U | Operation Manual - Page 43
and make sure to align the POWER OPEN/CLOSE TIMER 1 DISPLAY PROG. A 2 .@/: ABC DEF 1 2 3 remote control or the front disc to the disc tray guide. CH GHI JKL MNO 4 5 6 panel of the DVD recorder. REC MONITOR PQRS TUV WXYZ 4 When you are playing a DVD, turn the TV on and be - Sharp DV-SR45U | Operation Manual - Page 44
Playing discs Basic playback (cont'd) Playing discs using the disc menu DVD-V A DVD disc contains a disc menu that describes the contents or allows you to customize the playback. For example, the menu may offer choices for subtitle languages, special features, or chapter selection. Sometimes these - Sharp DV-SR45U | Operation Manual - Page 45
Before you start Connections Getting started Recording Playing discs Basic playback (cont'd) Playing discs using the title menu DVD-V Some DVDs have a title menu, which lists the titles available on them. It helps you to start play at a specific title. 1 Press TOP MENU button. The title menu will - Sharp DV-SR45U | Operation Manual - Page 46
Resume play DVD-V DVD-R Video DVD-RW Video DVD+RW VR DVD-RW DVD+R CD MP3 You can resume play from where you stopped playing the disc last. 1 During play, press STOP C button. The resume message will appear. Screen: Resume ON Playing discs Special playback 2 Press PLAY B button. In a few - Sharp DV-SR45U | Operation Manual - Page 47
Before you start Connections Getting started Recording Playing discs Special playback (cont'd) Skipping TV commercials during play Video DVD-RW VR DVD-RW DVD-R You can skip TV commercials by pressing CM SKIP button, so that you can enjoy the recorded pro- grams without interrupting. e.g. - Sharp DV-SR45U | Operation Manual - Page 48
Playing discs Special playback (cont'd) Step by step playback DVD-V Video DVD-RW VR DVD-RW DVD-R Video DVD+RW DVD+R 1 During play, press PAUSE F button. Play will pause and sound will be muted. 2 Press SKIP G button repeatedly. The play will advance one frame (or step) at a time when you - Sharp DV-SR45U | Operation Manual - Page 49
Playing discs Before you start Connections Getting started Recording Special playback (cont'd) Zoom B PLAY Video VR REV FWD h g DVD-V DVD-RW Video DVD-RW 2 STOP C SETUP TOP MENU K MENU/LIST DVD-R DVD+RW DVD+R 1 During play, press ZOOM but- Select a desired zoom factor to zoom - Sharp DV-SR45U | Operation Manual - Page 50
Playing discs Title/Chapter search Search DVD-V Video DVD-RW VR DVD-RW DVD-R Video DVD+RW DVD+R Using SKIP H / G buttons 1 During play, press SKIP G button to skip the current title or chapter and move to the next. The title or chapter will move forward by one at a time. To go back to - Sharp DV-SR45U | Operation Manual - Page 51
Before you start Connections Getting started Recording Playing discs Track search Playing discs Search (cont'd) CD MP3 Using SKIP H / G buttons 1 During play, press SKIP G button to skip the current track and move to the next. The track will move forward one at a time. To go back to the previous - Sharp DV-SR45U | Operation Manual - Page 52
Playing discs Repeat/Random/Program playback Repeat play DVD-V DVD-R Video DVD-RW Video DVD+RW VR DVD-RW DVD+R CD MP3 1 During play, press REPEAT button. Repeat menu will appear. Screen: 1 1 01:23:45 OFF Title Chapter A-B DVD-Video 2 00:00:30 OFF Track All A-B Audio CD 114 00:00:30 MP3 - Sharp DV-SR45U | Operation Manual - Page 53
Before you start Connections Getting started Recording Playing discs Repeat/Random/Program playback (cont'd) Program play CD You can program the disc to play in your desired order. 1 Press SETUP button to display SETUP/CD menu. SETUP/CD menu will appear. Screen: 3 Select "Program Play" using K / - Sharp DV-SR45U | Operation Manual - Page 54
Playing discs Selecting the format of audio and video You can select the format of audio and video as you prefer depending on the contents of the disc you are playing. Switching audio soundtrack DVD-V VR DVD-RW When playing a DVD-Video disc recorded with two or more soundtracks (these are - Sharp DV-SR45U | Operation Manual - Page 55
Before you start Connections Getting started Recording Playing discs Selecting the format of audio and video (cont'd) CD MP3 2 When playing Audio CDs or MP3 files you can switch between stereo, just the left channel or just the right channel. POWER OPEN/CLOSE TIMER Select icon using { / B - Sharp DV-SR45U | Operation Manual - Page 56
Playing discs Selecting the format of audio and video (cont'd) Switching camera angles DVD-V Some DVD Video discs feature scenes shot from two or more angles, check the case for details: it should be marked with a angle icon if it contains multi-angle scenes. 1 During play, press DISPLAY button. - Sharp DV-SR45U | Operation Manual - Page 57
Before you start Connections Getting started Recording Editing Information on disc editing Guide to a title list Title list allows you to check the titles recorded on the disc easily.You can choose a title to play from this screen - Sharp DV-SR45U | Operation Manual - Page 58
Editing Information on disc editing (cont'd) Editing discs with VR mode For discs with VR mode, you can edit from "Original" menu or "Playlist" menu, which is created from the original. Editing original titles The following items can be used to edit the original titles. • Deleting titles (Refer - Sharp DV-SR45U | Operation Manual - Page 59
Before you start Connections Getting started Recording Editing Editing DVD-RW discs in Video mode Deleting titles Video DVD-RW You can delete titles which you do not need anymore. Be advised that the titles once deleted cannot be brought back to the disc. When the last title in the title list in - Sharp DV-SR45U | Operation Manual - Page 60
appear. Disc > Edit > Edit Title Name 1 A B C a b c 1 2 3 @ ! ? JAN/ 1 1:00AM CH12 XP 0:01:25 5 To enter a title name, follow the steps of "Guide to edit title name" on this page. character set Disc > Edit > Edit Title Name 1 A B C a b c 1 2 3 @ ! ? JAN/ 1 1:00AM CH12 XP 0:01:25 area - Sharp DV-SR45U | Operation Manual - Page 61
Before you start Connections Getting started Recording Editing Editing DVD-RW discs in Video mode (cont'd) 6 Select "Yes" using { / B buttons, then press ENTER button. The name you entered will be activated for the title. Disc > Edit > Edit Title Name 1 A B C a b c 1 2 3 @ ! ? abc Writing - Sharp DV-SR45U | Operation Manual - Page 62
Editing Editing DVD-RW discs in Video mode (cont'd) Setting or clearing chapter markers Video DVD-RW You can put chapter markers in each title. Once a chapter is marked, you can use it for the chapter search feature. You can set chapter markers at a specified time you selected for titles with more - Sharp DV-SR45U | Operation Manual - Page 63
Editing Before you start Connections Getting started Recording Editing DVD-RW discs in VR mode (Original) Deleting titles VR Deleting titles DVD-RW When a title is deleted from an 4 original list in VR mode, the disc Select a desired title using K / space to record will be increased. L / { - Sharp DV-SR45U | Operation Manual - Page 64
Editing Editing DVD-RW discs in VR mode (Original) (cont'd) Deleting parts of titles VR DVD-RW You can delete part of a title, the disc space to record will be increased. Be advised that the parts once deleted cannot be brought back to the disc. 1 Press SETUP button. Select "DISC" using { / B - Sharp DV-SR45U | Operation Manual - Page 65
SKIP SKIP H G B PLAY REV h STOP C SETUP TOP MENU K FWD g MENU/LIST REPEAT ENTER { B ZOOM RETURN L 1 2 Playing discs Editing Changing the SETUP menu Others Español Instructions continue on page 66 65 - Sharp DV-SR45U | Operation Manual - Page 66
) (cont'd) 3 Select "Original" using { / B buttons, then press ENTER button. Original list will appear. 6 To enter a title name, follow the steps of "Guide to edit title name" on this page. character set Disc > Edit > Original 1 12 3 JAN/1 1:00AM 4 JAN/1 2:00AM 5 JAN/1 3:00AM JAN/1 4:00AM - Sharp DV-SR45U | Operation Manual - Page 67
/LIST REPEAT ENTER { B ZOOM RETURN L 6 1 2 3 4 5 6 JAN/1 1:00AM 4 JAN/1 2:00AM 5 JAN/1 3:00AM Playing discs Editing Changing the SETUP menu Others Español JAN/1 4:00AM JAN/1 5:00AM Instructions continue on page 68 67 - Sharp DV-SR45U | Operation Manual - Page 68
Editing Editing DVD-RW discs in VR mode (Original) (cont'd) : Disc > Edit > Original 1 Chapter 2/2 F Title Delete Scene Delete Edit Title Name ChapterAMdadrk Index PiDcteulreete Protect OFF ON Yes No JAN/ 1 1:00AM CH12 XP 0:01:25 • You cannot delete the first chapter marker of each - Sharp DV-SR45U | Operation Manual - Page 69
Before you start Connections Getting started Recording Editing Editing DVD-RW discs in VR mode (Original) (cont'd) 3 Select "Original" using { / B buttons, then press ENTER button. Original list will appear. Disc > Edit > Original 1 12 3 JAN/1 1:00AM 4 JAN/1 2:00AM 5 JAN/1 3:00AM JAN/1 4: - Sharp DV-SR45U | Operation Manual - Page 70
Editing Editing DVD-RW discs in VR mode (Original) (cont'd) Setting titles to protect VR DVD-RW To prevent accidental editing, or erasing the titles, you can protect them from the original menu. 4 Select a desired title using K / L / { / B buttons, then press ENTER button. POWER DISPLAY OPEN/ - Sharp DV-SR45U | Operation Manual - Page 71
Before you start Connections Getting started Recording Editing Editing DVD-RW discs in VR mode (Original) (cont'd) Releasing titles from protecting VR DVD-RW You are allowed to release the titles protecting feature once protected. 1 4 Select a desired title using K / L / { / B buttons, then - Sharp DV-SR45U | Operation Manual - Page 72
Editing Editing DVD-RW discs in VR mode (Playlist) Deleting titles VR DVD-RW In VR mode, even when a title is deleted from a Playlist, the original 4 Select a desired title using K / POWER DISPLAY OPEN/CLOSE TIMER PROG. A title will remain in an Original list. The disc space to record will - Sharp DV-SR45U | Operation Manual - Page 73
JAN/1 3:00AM Add New Title Delete Playlist Before editing Start point End point Playing discs Editing Changing the SETUP menu Others Español Edited Instructions continue on page 74 73 - Sharp DV-SR45U | Operation Manual - Page 74
Editing Editing DVD-RW discs in VR mode (Playlist) (cont'd) 7 Select "Delete" using K / L buttons, then press ENTER button. Option window will appear. Disc > Edit > Playlist 1 Title Delete SECIncdhdeiaetnpxTetiePtlDreiSEPcMetNtnrulaeeadarrvtretmeikeew Delete Yes No JAN/ 1 1:00AM CH12 XP 0:01: - Sharp DV-SR45U | Operation Manual - Page 75
to disc is completed, press SETUP to exit DISC menu. JAN/ 1 1:00AM CH12 XP 0:01:25 6 To enter a title name, follow the steps of "Guide to edit title name" on this page. character set Disc > Edit > Playlist > Edit Title Name 1 A B C a b c 1 2 3 @ ! ? JAN/ 1 1:00AM CH12 XP 0:01:25 area for - Sharp DV-SR45U | Operation Manual - Page 76
Editing Editing DVD-RW discs in VR mode (Playlist) (cont'd) Setting or clearing chapter markers VR DVD-RW You can put chapter markers in each title. Once a chapter is Disc > Edit > Playlist 1 12 3 POWER DISPLAY OPEN/CLOSE TIMER PROG. A marked, you can use it for the chapter search feature. - Sharp DV-SR45U | Operation Manual - Page 77
buttons, then press ENTER button. Original/PlayList menu will appear. Screen: Disc > Edit Disc Edit Format Finalize Disc Protect OFF ON Original Instructions continue on page 78 8 POWER DISPLAY OPEN/CLOSE TIMER PROG. A .@/: 1 CH REC MONITOR GHI 4 PQRS 7 REC MODE CLEAR REC PAUSE F ABC - Sharp DV-SR45U | Operation Manual - Page 78
Editing Editing DVD-RW discs in VR mode (Playlist) (cont'd) 3 Select "PlayList" using { / B buttons, then press ENTER button. Playlist will appear. Disc > Edit > Playlist 1 12 3 JAN/1 1:00AM 4 JAN/1 4:00AM JAN/1 2:00AM 5 JAN/1 5:00AM JAN/1 3:00AM Add New Title Delete Playlist 6 Select "Yes" - Sharp DV-SR45U | Operation Manual - Page 79
Before you start Connections Getting started Recording Editing Editing DVD-RW discs in VR mode (Playlist) (cont'd) Adding titles to a Playlist VR DVD-RW You can add or delete a title in the playlist as you prefer. 4 Select "Add New Title" using POWER DISPLAY OPEN/CLOSE TIMER PROG. A You can - Sharp DV-SR45U | Operation Manual - Page 80
Editing Editing DVD-RW discs in VR mode (Playlist) (cont'd) Deleting a Playlist VR DVD-RW A Playlist can be deleted if no longer needed. 1 Press SETUP button. Select "DISC" using { / B buttons, then press ENTER button. DISC menu will appear. Disc Edit Format Finalize Disc Protect OFF ON 2 Select " - Sharp DV-SR45U | Operation Manual - Page 81
Before you start Connections Getting started Recording Deleting titles Editing Editing DVD-R discs DVD-R You can delete titles which you do not need, however the disc Disc > Edit 1 Title Delete Edit Title Name Chapter Mark POWER DISPLAY OPEN/CLOSE TIMER PROG. A space to record will not be - Sharp DV-SR45U | Operation Manual - Page 82
Edit Title Name 1 A B C a b c 1 2 3 @ ! ? JAN/ 1 1:00AM CH12 XP 0:01:25 Disc Edit Format Finalize 5 To enter a title name, follow the steps of "Guide to edit title name" on this page. character set 2 Select "Edit" using K / L buttons, then press ENTER button. Titlelist will appear. Screen - Sharp DV-SR45U | Operation Manual - Page 83
Before you start Connections Getting started Recording Playing discs Changing the SETUP menu Tour of the SETUP menu The following table is the contents which you can set and the default settings. Refer to the following table for useful operation. SETUP menu 1.Language setting Pages 84-85 Items - Sharp DV-SR45U | Operation Manual - Page 84
Audio 4:3 Letter Box All English Original OFF ON OFF 4 Select a desired item using K / L buttons, then press ENTER button. 84 Note • Only the languages supported by the disc can be selected. • Audio Language setting may not be available to some discs. • You can change or switch off the subtitles - Sharp DV-SR45U | Operation Manual - Page 85
Before you start Connections Getting started Recording Changing the SETUP menu Language setting (cont'd) Disc Menu Language (Default : English) Set the language for Disc Menu. Setup > Playback TV Aspect Parental Lock Disc Menu Language Audio Language Subtitle Language Digital Out Dynamic Range - Sharp DV-SR45U | Operation Manual - Page 86
Changing the SETUP menu Display setting Press STOP button if you are playing a disc. 1 Press SETUP button to display SETUP/DISC menu. SETUP/DISC menu will appear. Setup Menu 2 Select "SETUP" using { / B buttons, then press ENTER button. SETUP menu will appear. Setup 1 5 POWER DISPLAY OPEN/CLOSE - Sharp DV-SR45U | Operation Manual - Page 87
Before you start Connections Getting started Recording Changing the SETUP menu Display setting (cont'd) OSD Background Transparency (Default : 35%) Set the background transparency of OSD screen. You can choose one among 0% through 100%. Setup > Display OSD Background Transparency 35% OSD - Sharp DV-SR45U | Operation Manual - Page 88
Changing the SETUP menu Audio setting Choose the appropriate Audio settings for your equipment. It will only affect DVD discs during playback. Press STOP button if you are playing a disc. 1 Press SETUP button to display SETUP/DISC menu. SETUP/DISC menu will appear. 2 Select "SETUP" using { / B - Sharp DV-SR45U | Operation Manual - Page 89
Before you start Connections Getting started Recording Changing the SETUP menu Audio setting (cont'd) A Settings for PCM (Default : Auto) Original OFF PCM Auto ntrol DolbOyND4ig8iktaHlz udio DTSOFF96kHz • Select a setting using K / L buttons, then Note press ENTER button. When playing disc - Sharp DV-SR45U | Operation Manual - Page 90
Changing the SETUP menu Settings for Parental lock level Some DVD-Video discs feature a Parental Lock level. Playback will stop if the ratings exceed the levels you set, it will require you to enter a password before the disc will playback.This feature prevents your children from viewing - Sharp DV-SR45U | Operation Manual - Page 91
Before you start Connections Getting started Recording Changing the SETUP menu Settings for Parental lock level (cont'd) Parental Lock (Default : All) Set the Parental Lock level. Setup > Playback TV Aspect Parental Lock Disc Menu Language Audio Language Subtitle Language Digital Out Dynamic Range - Sharp DV-SR45U | Operation Manual - Page 92
. • Adjust TV antenna. • Adjust the picture (see the TV's instruction manual). • Place the DVD recorder and TV farther apart. • Place the TV and any bunched antenna cables farther apart. • Switch the input to TV. • Connect the antenna cable correctly (page 13). • Keep the equipment which may cause - Sharp DV-SR45U | Operation Manual - Page 93
Connections Getting started Recording Playing discs Others Troubleshooting (cont'd) Symptom Playback The disc does the disc, you may not be able to do some of the operations above. See the instruction manual supplied with the disc. • Multilingual tracks are not recorded on the DVD VIDEO, DVD-R - Sharp DV-SR45U | Operation Manual - Page 94
Others Troubleshooting (cont'd) Symptom Others The DVD recorder does not operate properly. The disc tray does not open when you press OPEN/CLOSE A button. "Repairing" appears on - Sharp DV-SR45U | Operation Manual - Page 95
Before you start Connections Getting started Recording Others Troubleshooting (cont'd) Error message Recording Error You cannot record more than 99 titles on one disc. (The maximum is 99) Recording Error You cannot record more - Sharp DV-SR45U | Operation Manual - Page 96
frame in order. Progressive Scan provides less flickering and higher image resolution than traditional (480i) TV signals. Refer to page 13 for instructions on selective Progressive Scan mode. Regions code Regions associate discs and players with particular areas of the world.This unit will only play - Sharp DV-SR45U | Operation Manual - Page 97
Note: The specifications and design of this product are subject to change without notice. Español Service Information (For the U.S.) For the location of the nearest Sharp Authorized Service Center, or to obtain product literature, accessories, supplies or customer assistance, please call 1-800-BE - Sharp DV-SR45U | Operation Manual - Page 98
futura referencia, anote los números de modelo y de serie (indicados en la parte posterior esta unidad) en el espacio provisto. No. de modelo: DV-SR45U No. de serie: AVISO: PARA REDUCIR EL RIESGO DE INCENDIO O ELECTROCHOQUE NO EXPONGA ESTE APARATO A LA HUMEDAD. PRECAUCIÓN: PARA EVITAR DESCARGAS - Sharp DV-SR45U | Operation Manual - Page 99
otros objetos sea mínima. Preste especial atención a las clavijas de los cables, a los receptáculos, y al punto por donde salen del producto. producto no funcione normalmente.Ajuste solamente los controles mencionados en el manual de instrucciones; el ajuste incorrecto de otros controles podrá - Sharp DV-SR45U | Operation Manual - Page 100
No Sí No *1 El DVD-RW (modo VR) sólo puede reproducirse en equipos de DV compatibles con VR. Nota: Para más detalles sobre las funciones anteriores y las limitaciones implícitas, lea las explicaciones en este manual. Formato del disco Coloque el disco en el grabador. Haga el formato del disco del - Sharp DV-SR45U | Operation Manual - Page 101
las grabaciones originales. Cualquier lista a reproducir no ocupa mucho espacio en el disco. ¿Qué significa "Original" o "Playlist"? A lo largo de este manual encontrará Original y Playlist que se refieren a las grabaciones reales y la versión editada. • La grabación Original se refiere a la grabaci - Sharp DV-SR45U | Operation Manual - Page 102
batteries. Where to Obtain Service: Call Sharp Electronics corporation toll free at 1-800-BE-SHARP for instructions on how to obtain service on your DVD recorder. What to do to Obtain Service: Ship your product, prepaid, as per the instruction given by the Sharp representative at the toll free
-
 1
1 -
 2
2 -
 3
3 -
 4
4 -
 5
5 -
 6
6 -
 7
7 -
8
-
9
-
10
-
11
-
12
-
13
-
14
-
15
-
16
-
17
-
18
-
19
-
20
-
21
-
22
-
23
-
24
-
25
-
26
-
27
-
28
-
29
-
30
-
31
-
32
-
33
-
34
-
35
-
36
-
37
-
38
-
39
-
40
-
41
-
42
-
43
-
44
-
45
-
46
-
47
-
48
-
49
-
50
-
51
-
52
-
53
-
54
-
55
-
56
-
57
-
58
-
59
-
60
-
61
-
62
-
63
-
64
-
65
-
66
-
67
-
68
-
69
-
70
-
71
-
72
-
73
-
74
-
75
-
76
-
77
-
78
-
79
-
80
-
81
-
82
-
83
-
84
-
85
-
86
-
87
-
88
-
89
-
90
-
91
-
92
-
93
-
94
-
95
-
96
-
97
-
98
-
99
-
100
-
101
-
102
 |
 |
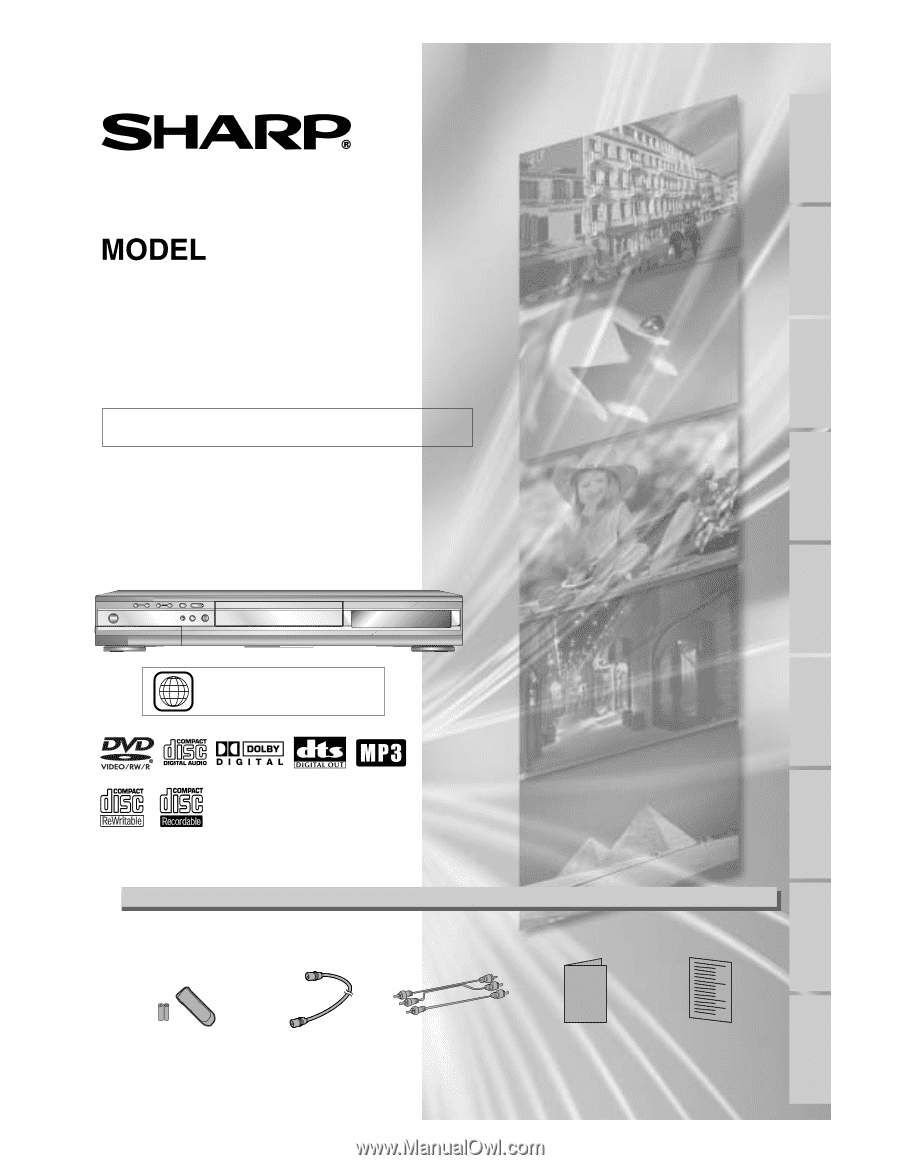
DVD RECORDER
OPERATION MANUAL
Please read this Operation Manual carefully before using
your DVD recorder.
1
The region number for this
DVD recorder is 1.
INSTRUCCIONES EN ESPAÑOL INCLUIDAS.
DV-SR45U
• Remote control
(9HSNB006UD)
with two “AA” size
batteries
• Round Coaxial cable
(9HSWPZ090
1
TM003)
• Audio/Video cables
(9HSWX
1
E56B5-00
1
)
• Operation Manual
(9HS
1
VMN20
1
85)
• Quick Use Guide
(9HS
1
VMN20228)
Operation Manual
Recording
Playing discs
Editing
Before you start
Connections
Getting started
Changing the SETUP menu
Others
Español
Supplied Accessory