Sharp LC-15B9U-S Service Manual - Page 7
Part Names of the Remote Control, TV Signals in Your Region, Preparation - lc sm
 |
View all Sharp LC-15B9U-S manuals
Add to My Manuals
Save this manual to your list of manuals |
Page 7 highlights
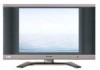
Part Names of the Remote Control POWER Switches the Liquid Crystal Television power on or standby. PIC.FLIP Sets the orientation of the picture. SLEEP Sets the sleep timer. MENU RETURN Returns to the previous screen. ENTER Executes a command. MUTE Mutes the sound. AUDIO ONLY Outputs audio without screen image. VOL (+)/(-) Sets the volume. MTS Selects audio settings. DISPLAY Displays the receiving channel and the current time for 10 seconds. AV MODE Selects preferred AV MODE. BACKLIGHT Adjusts the brightness of the screen Cursor control) Selects a desired item on the screen. MENU Displays the menu screen. INPUT Switches the input source between INPUT1, INPUT2, INPUT3 and TV mode. CC Displays Closed Caption subtitles. FLASHBACK Returns to the previous channel. CH ( )/( ) Selects a channel. Channel Select Sets the channel. Preparation Installing Batteries in the Remote Control Before using the LCD TV set for the first time, install the two "AAA" size batteries supplied in the remote control. When the batteries become depleted and the remote control fails to operate, replace the batteries with new "AAA" size batteries. 1 Open the battery cover. 2 Insert two "AAA" size batteries. 3 Close the battery cover. s Slide the cover while pressing the ( ) part. s Place batteries with their terminals corresponding to the (+) and (-) indications in the battery compartment. s Engaging the lower claw with the remote control, close the cover. Caution! Precautions regarding batteries s Improper use of batteries can result in a leakage of chemicals and/or explosion. Be sure to follow the instructions below. • Place batteries with their terminals corresponding to the (+) and (-) indications. • Different types of batteries have different characteristics. Do not mix batteries of different types. • Do not mix old and new batteries. Mixing old and new batteries can shorten the life of new batteries and/or cause old batteries to leak chemicals. • Remove batteries as soon as they are depleted. Chemicals that leak from batteries can cause a rash. If chemical leakage is found, wipe it off with a cloth. • The batteries supplied with the LCD TV set may have a shorter operating time due to storage conditions. • If the remote control is not to be used for a long period of time, remove the batteries from the remote control. LC-13B8U-S LC-15B8U-S LC-15B9U-SM 7 TV Signals in Your Region This product is factory set to comply with the TV broadcasting system in the United States. For Brazil, Argentina and Uruguay, set the color system according to the country before using this product by following the table below. The VIDEO INPUT mode is compatible with color systems worldwide and is automatically set. Country U.S.A. Canada, Mexico, Latin America Brazil Argentina, Uruguay TV broadcasting system Color: NTSC TV ch: US ch Color: NTSC TV ch: US ch Color: PAL-M TV ch: US ch Color: PAL-N TV ch: US ch Factory setting of color system TV Video NTSC (N358) US ch NTSC (N358) US ch NTSC (N358) US ch NTSC (N358) US ch World Multi Auto System World Multi Auto System World Multi Auto System World Multi Auto System User setting TV Not required or N/A Not required or N/A Set color system to PAL-M Set color system to PAL-N The World Multi Auto System is compatible with all color systems indicated below. 1 N358 2 N443 3 PAL 4 PAL-M 5 PAL-N 6 SECAM 7 PAL-60 Using the Remote Control s Use the remote control by pointing it towards the remote sensor window of the main unit. Objects between the remote control and sensor window may prevent proper operation. Cautions regarding use of the remote control s Do not apply shock to the remote control. In addition, do not expose the remote control to liquids, and do not place it in an area with high humidity. s Do not install or place the remote control in direct sunlight. The heat may cause deformation of the unit. s The remote control may not work properly if the remote sensor window is in direct sunlight or strong lighting. In such a case, change the angle of the lighting or main unit, or operate the remote control closer to the remote sensor window. Headphone jack OPC indicator POWER/WAKE UP TIMER indicator Remote sensor OPC sensor
-
 1
1 -
 2
2 -
 3
3 -
 4
4 -
 5
5 -
 6
6 -
 7
7 -
 8
8 -
 9
9 -
 10
10 -
 11
11 -
 12
12 -
13
-
14
-
15
-
16
-
17
-
18
-
19
-
20
-
21
-
22
-
23
-
24
-
25
-
26
-
27
-
28
-
29
-
30
-
31
-
32
-
33
-
34
-
35
-
36
-
37
-
38
-
39
-
40
-
41
-
42
-
43
-
44
-
45
-
46
-
47
-
48
-
49
-
50
-
51
-
52
-
53
-
54
-
55
-
56
-
57
-
58
-
59
-
60
-
61
-
62
-
63
-
64
-
65
-
66
-
67
-
68
-
69
-
70
-
71
-
72
-
73
-
74
-
75
-
76
-
77
-
78
-
79
-
80
-
81
-
82
-
83
-
84
-
85
-
86
-
87
-
88
-
89
-
90
-
91
-
92
-
93
-
94
-
95
-
96
-
97
-
98
-
99
-
100
-
101
-
102
-
103
-
104
-
105
-
106
-
107
-
108
-
109
-
110
 |
 |
