Sharp MX-2600N Scan To Email Instructions - Page 6
Scan To E-mail
 |
View all Sharp MX-2600N manuals
Add to My Manuals
Save this manual to your list of manuals |
Page 6 highlights
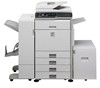
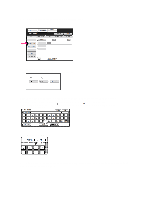
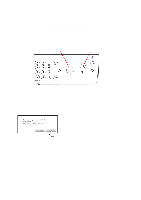
Sharp Copier - MX-2600N SCAN TO E-MAIL - ADVANCED INSTRUCTIONS To enter a custom subject or a custom "Reply-To" address for the e-mail message, or to enter a custom name for the attached file, follow these steps after you've entered or selected a destination e-mail address for the e-mail message (steps 1 - 3 in Basic Instructions). NOTE: The "Reply-To" address for the e-mail message cannot be changed if the copier's "User Authentication" mode is enabled. 1 Touch the [Send Settings] key in the base screen. NOTE: If you skip these settings, the e-mail message that is sent from the copier will automatically use preconfigured values for subject, file name, and sender name. 2 To change the subject text of the e-mail message, touch the [Subject] key. The subject selection screen appears. If any subject names have been pre-registered on the copier a list of those subjects is displayed as subject keys. 2a Select the desired subject from the list or manually input the subject text. To select among the displayed subjects, touch the desired subject key. The selected subject will become highlighted. If you made a mistake, touch the correct key. The highlighting will move to the new key. To enter the subject manually, touch the [Direct Entry] key to open the text entry screen. You can use the on-screen keyboard or you can use the physical pull-out keyboard to enter the subject text. Enter the text and touch the [OK] key. The selected or entered subject will be the subject text of the e-mail message. 6
-
 1
1 -
 2
2 -
 3
3 -
 4
4 -
 5
5 -
 6
6 -
 7
7 -
 8
8 -
 9
9
 |
 |