Sharp PG A20X Operation Manual
Sharp PG A20X - Notevision XGA LCD Projector Manual
 |
UPC - 074000364004
View all Sharp PG A20X manuals
Add to My Manuals
Save this manual to your list of manuals |
Sharp PG A20X manual content summary:
- Sharp PG A20X | Operation Manual - Page 1
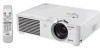
Introduction OPERATION MANUAL MODEL PG-A20X Connections and Setup Basic Operation Easy to Use Functions Appendix LCD PROJECTOR PG-A20X_E_PDF_Hyo1.p65 1 03.4.23, 9:53 AM - Sharp PG A20X | Operation Manual - Page 2
Number located on the bottom of the projector and retain this information. Before recycling the packaging, please be sure that you have checked the contents of the carton thoroughly against the list of "Supplied accessories" on page 14. Model No.: PG-A20X Serial No.: This equipment complies with - Sharp PG A20X | Operation Manual - Page 3
plug supplied, cut red. Ensure that neither the brown nor the blue wire is connected to the earth terminal in your three-pin plug. Before replacing cord grip is clamped over the sheath of the mains lead, and not simply over the lead wires. IF YOU HAVE ANY DOUBT, CONSULT A QUALIFIED ELECTRICIAN. PG - Sharp PG A20X | Operation Manual - Page 4
The supplied CD-ROM contains operation instructions in English, German, French, Swedish, Spanish, Italian, Dutch, Portuguese, Chinese (Traditional Chinese and Simplified Chinese) and Korean. Carefully read through the operation instructions before operating the projector. Die mitgelieferte CD-ROM - Sharp PG A20X | Operation Manual - Page 5
operation manual carefully. Introduction ENGLISH There are two important reasons for prompt warranty registration of your new SHARP Projector, using the REGISTRATION CARD packed with the projector. 1. WARRANTY This is to assure that you immediately receive the full benefit of the parts, service - Sharp PG A20X | Operation Manual - Page 6
57. LAMP REPLACEMENT CAUTION BEFORE REMOVING THE SCREW, DISCONNECT POWER CORD. HOT SURFACE INSIDE. ALLOW 1 HOUR TO COOL BEFORE REPLACING THE LAMP. REPLACE WITH SAME SHARP LAMP UNIT TYPE BQC-PGA20X//1 ONLY. UV RADIATION : CAN CAUSE EYE DAMAGE. TURN OFF LAMP BEFORE SERVICING. HIGH PRESSURE LAMP : RISK - Sharp PG A20X | Operation Manual - Page 7
achieves excellent color uniformity and high brightness. • The Eco mode function reduces noise levels and power consumption while also extending lamp life. 5. Wide Input Signal Compatibility • Video systems compatible (NTSC3.58, PAL, SECAM, PAL-N, PAL-M, PAL-60 and NTSC4.43) • HD input compatible - Sharp PG A20X | Operation Manual - Page 8
to Other Devices .... 15 Before Connecting 15 This projector can be connected to 15 Connecting the Power Cord 15 Connecting the Projector to a Computer 16 Connecting to Video Equipment 18 Controlling the Projector Using a Computer ........ 20 Setup 21 Using the Adjustment Feet 21 Adjusting - Sharp PG A20X | Operation Manual - Page 9
Projector 51 How to Use the Carrying Case 51 Maintenance 52 Replacing the Air Filter 53 Cleaning and Replacing the Air Filter 53 Maintenance Indicators 55 Regarding the Lamp 57 Lamp 57 Caution Concerning the Lamp 57 Replacing the Lamp 57 Removing and Installing the Lamp Unit 58 Resetting - Sharp PG A20X | Operation Manual - Page 10
servicing. 1. Read Instructions All the safety and operating instructions should be read before the product is operated. 2. Retain Instructions The safety and operating instructions only fit into a grounding type power outlet. 13. Power-Cord Protection Power-supply cords should be routed so that - Sharp PG A20X | Operation Manual - Page 11
: a. When the power-supply cord or plug is damaged. b. If liquid has been spilled, or objects have fallen into the product. c. If the product has been exposed to rain or water. d. If the product does not operate normally by following the operating instructions. Adjust only those controls that are - Sharp PG A20X | Operation Manual - Page 12
of glass particles if lamp ruptures. In case of lamp rupture, contact your nearest Sharp Authorized Projector Dealer or Service Center for a replacement. See "Replacing the Lamp" on page 57. BQC-PGA20X//1 Caution concerning the setup of the projector I For minimal servicing and to maintain high - Sharp PG A20X | Operation Manual - Page 13
to view. 6 Double click the installation program and follow the instructions on the screen. For Macintosh: 1 Insert the CD-ROM in Double click the "A20" pdf file to access the projector manuals. Note • If the desired pdf file cannot be opened manual. PG-A20X_E_PDF_P06_14.p65 9 -9 03.4.23, 9:55 AM - Sharp PG A20X | Operation Manual - Page 14
lock it in place. • Press on the two buttons of the lens cap and remove it from the lens. -10 PG-A20X_E_PDF_P06_14.p65 10 22 Zoom knob 22 Focus ring Speaker 21 Foot release 21 Front adjustment foot 53 Air filter/cooling fan (Intake vent) (on the bottom of the projector) In this operation manual - Sharp PG A20X | Operation Manual - Page 15
Rear View) INPUT 1 terminal 16 Terminal for computer RGB and component signals. RS-232C terminal 20 For controlling the projector using a computer. Kensington Security Standard connector Using the Kensington Lock • This projector has a Kensington Security Standard connector for use with a Kensington - Sharp PG A20X | Operation Manual - Page 16
Part Names Numbers in refer to the main pages in this operation manual where the topic is explained. Remote Control (Front View) STANDBY button 28 For putting the projector into the standby mode. KEYSTONE button 29 For entering the Keystone Correction mode. UNDO button 29 For undoing an operation - Sharp PG A20X | Operation Manual - Page 17
. In this case, move the projector away from the fluorescent lamp. Remote control sensor 45° Remote 30° control signal transmitters 30° 23' (7 m) Remote control Inserting the Batteries The batteries (two R-6 batteries ("AA" size, UM/ SUM-3, HP-7 or similar)) are supplied in the package. 1 Press - Sharp PG A20X | Operation Manual - Page 18
control cable (32'10" (10.0 m)) AN-C3CP AN-C10BM (15-pin mini D-sub male connector) AN-C3BN AN-C10RS I Remote receiver AN-MR1EL Note • Some of the cables may not be available depending on the region. Please check with your nearest Sharp Authorized Projector Dealer or Service Center. -14 PG - Sharp PG A20X | Operation Manual - Page 19
page 19.) *DTV is the umbrella term used to describe the new digital television system in the United States. Connecting the Power Cord Plug the supplied power cord into the AC socket on the rear of the projector. Supplied accessory Power cord PG-A20X_E_PDF_P15_17.p65 15 03.4.23, 9:55 AM -15 - Sharp PG A20X | Operation Manual - Page 20
the connectors by tightening the thumbscrews. 2 To input an audio signal, connect the projector to the computer using a ø3.5 mm audio cable (commercially available or available as Sharp service part QCNWGA013WJPZ). Supplied accessories Computer RGB cable To RGB output terminal To audio output - Sharp PG A20X | Operation Manual - Page 21
to a 15-pin terminal) I This projector is compatible with VESA-standard DDC 1/DDC 2B. The projector and a VESA DDC compatible computer will sure to turn on the projector first and the connected computer last. Note • The DDC "Plug and Play" function of this projector operates only when used in - Sharp PG A20X | Operation Manual - Page 22
using an Svideo cable or a composite video cable (both commercially available). 2 Connect the projector to the video equipment using a ø3.5 mm minijack to RCA audio cable (commercially available). Note • The INPUT 2 (S-VIDEO) terminal uses a video signal system in which the picture is separated - Sharp PG A20X | Operation Manual - Page 23
in the United States. 1 Connect the projector to the video equipment using the 3 RCA to 15-pin player or DTV* decoder 2 Connect the projector to the video equipment using a ø3.5 mm minijack to When connecting the projector to the video equipment in this way, select "Component" for "Signal Type" in - Sharp PG A20X | Operation Manual - Page 24
to a computer with a DIN-D-sub RS232C adaptor and an RS-232C serial control cable (cross type, sold separately), the computer can be used to control the projector and check the status of the projector. See page 61 for details. 1 Connect the supplied DIN-D-sub RS-232C adaptor to an RS-232C serial - Sharp PG A20X | Operation Manual - Page 25
Correction will be automatically performed when the projector is tilted. If you want to adjust the Keystone Correction manually, see page 29. (For details and the projector. PG-A20X_E_PDF_P21_25.p65 21 Rear adjustment foot (on the bottom) Foot release (on the other side of the projector as well) - Sharp PG A20X | Operation Manual - Page 26
The image is focused and adjusted to the desired size using the focus ring or zoom knob on the projector. Focus ring Zoom knob 1 Adjust the focus by rotating the focus ring. 2 Adjust zooming by moving the zoom knob. Zoom out Zoom in -22 PG-A20X_E_PDF_P21_25.p65 22 03.4.23, 9:56 AM - Sharp PG A20X | Operation Manual - Page 27
lights when setting up the screen in a sunny or bright room. • A polarizing screen cannot be used with this projector. Standard Setup (Front Projection) I Place the projector projector so that an imaginary horizontal line that passes through the center of the lens is perpendicular to the screen. PG- - Sharp PG A20X | Operation Manual - Page 28
an error of ± 3% in the above values. • Values with a minus (-) sign indicate the distance from the lens center below the bottom of the image. -24 PG-A20X_E_PDF_P21_25.p65 24 03.4.23, 9:56 AM - Sharp PG A20X | Operation Manual - Page 29
the mirror so the light does not shine into the eyes of the audience. Ceiling-mount Setup I It is recommended that you use the optional Sharp ceilingmount bracket for this installation. Before mounting the projector, contact your nearest Sharp Authorized Projector Dealer or Service Center to obtain - Sharp PG A20X | Operation Manual - Page 30
, reset the language according to the procedure on page 28. 1 Plug the power cord into the wall outlet. • The power indicator illuminates red, and the projector enters standby mode. 2 Press on the projector or on the remote control. • The power indicator illuminates green. After the lamp - Sharp PG A20X | Operation Manual - Page 31
Basic Operation 3 Press , or on the remote control to select the INPUT mode. • After pressing once on the projector, use to select the desired input mode. Note • When no signal is received, "NO SIGNAL" will be displayed. When a signal that the projector is not preset to receive is received, - Sharp PG A20X | Operation Manual - Page 32
the on-screen display. Turning the Power off 1 Press STANDBY on the projector or STANDBY on the remote control, then press that button again while power cord during projection or cooling fan operation. This can cause damage due to rise in internal temperature, as the cooling fan also stops. -28 PG - Sharp PG A20X | Operation Manual - Page 33
Correction mode is set to "Auto", or approximately ±35˚ when set to "manual" (when the picture display mode is set to "NORMAL" (see page 40 . • You can also use on the projector. Note • You can use the same settings used in NORMAL mode 4:3 for 16:9. PG-A20X_E_PDF_P26_31.p65 29 03.4.23, 9:57 AM - Sharp PG A20X | Operation Manual - Page 34
items that can be set in the projector. I INPUT 1 Mode Main menu Picture Page 36 Fine Sync Page 38 Contrast −30 +30 Bright −30 +30 Color −30 +30 Tint −30 +30 Sharp −30 +30 Red −30 +30 Blue −30 +30 Reset CLR Temp Gamma sRGB [ON/OFF] Signal Type Memory Clock −30 +30 Phase H-Pos - Sharp PG A20X | Operation Manual - Page 35
Sharp −30 +30 Red −30 +30 Blue −30 +30 Reset CLR Temp Gamma Memory Sub menu 5500 K 6500 K 7500 K 8500 K 9300 K 10500 K Standard Presentation Cinema Game Memory 1 Memory 5 Memory OFF Lamp Timer (Life) Keystone OSD Display [ON/OFF] Video System Background Eco Mode [Eco/Standard] Auto Power - Sharp PG A20X | Operation Manual - Page 36
allow you to adjust the image and various projector settings. You can operate the menus from the remote control using the following procedure. Example: "Picture" tree charts on pages 30 and 31. -32 PG-A20X_E_PDF_P32_39.p65 32 ENTER button UNDO button MENU button ', ", \, | buttons Menu icons - Sharp PG A20X | Operation Manual - Page 37
item, press after selecting the item. Only the selected adjustment item will be displayed. Then if you press ' or ", the following item ("Red" after "Bright") will be displayed. • Press to return to the previous screen. 4 Press \ or | to adjust the item selected. • The adjustment is - Sharp PG A20X | Operation Manual - Page 38
• The "Fine Sync" menu is not available for INPUT 2 or 3. • For details on the menus, see the tree charts on pages 30 and 31. -34 PG-A20X_E_PDF_P32_39.p65 34 03.4.23, 9:57 AM - Sharp PG A20X | Operation Manual - Page 39
- ting of the item displayed in the sub menu. 5 Press . • The item selected is set. 6 Press . • The menu screen will disappear. Sub menu Basic Operation PG-A20X_E_PDF_P32_39.p65 35 03.4.23, 9:57 AM -35 - Sharp PG A20X | Operation Manual - Page 40
recognized as an RGB signal. • "Sharp" can be adjusted when 480I, 480P, 540P, 580I, 580P, 720P, 1035I or 1080I signals are detected while "Signal Type" for INPUT 1 is set to "Component" or set to "Auto" and the input signal is recognized as a component signal. • To reset all adjustment items, select - Sharp PG A20X | Operation Manual - Page 41
"sRGB" is set to "ON"; • Gamma is not available. • "Red", "Blue" or "CLR Temp" on the "Picture" menu cannot be dark, but this does not indicate a malfunction. Signal Type (Signal Type Setting) The signal type setting is preset to "Auto"; however, PG-A20X_E_PDF_P32_39.p65 37 03.4.23, 9:57 AM - Sharp PG A20X | Operation Manual - Page 42
may occur, making the image hard to see.) • When a DVD player or Digital Video is connected, select 480P as the input signal. • See "Signal Info (Checking the Input Signal)" on the next page for information on the currently selected input signal. -38 PG-A20X_E_PDF_P32_39.p65 38 03.4.23, 9:57 AM - Sharp PG A20X | Operation Manual - Page 43
the current input signal information. Note • The projector will display the number of scanned lines available from audio-visual equipment such as a DVD player or Digital Video. Note • Auto Sync adjustment is also performed by pressing on the projector or on the remote control. • The Auto Sync - Sharp PG A20X | Operation Manual - Page 44
modify or customize the picture display mode to enhance the input image. Depending on the input signal, you can choose "NORMAL", "DOT BY DOT", "BORDER" or "STRETCH" image. which images cannot be projected. : Area where the signals are off screen. -40 PG-A20X_E_PDF_P40_50.p65 40 03.4.23, 9:58 AM - Sharp PG A20X | Operation Manual - Page 45
STRETCH" is fixed when 540P, 720P or 1080I signals are entered. BORDER 768 × 576 - STRETCH 1024 × 576 Input Signal DVD / Video Image type Output screen image NORMAL Projects a is not included in the original signals. Easy to Use Functions PG-A20X_E_PDF_P40_50.p65 41 03.4.23, 9:58 AM -41 - Sharp PG A20X | Operation Manual - Page 46
specific portion of an image with the remote control. Using these functions, you can explain Note ×1 ×2 ×3 ×4 ×9 ×16 ×36 ×64 -42 PG-A20X_E_PDF_P40_50.p65 42 • You can change the location of the enlarged • When the input signal is changed. • When the input signal resolution and re- fresh rate (vertical - Sharp PG A20X | Operation Manual - Page 47
projector. ON button Locking the Operation Buttons Hold down on the projector for about 3 seconds while the projector is being turned on. Taking the Keylock off Hold down on the projector for about 3 seconds. Note • The keylock function does not affect the operation with the remote control - Sharp PG A20X | Operation Manual - Page 48
that the lamp be changed when the remaining lamp life becomes 5%. For lamp replacement, contact your nearest Sharp Authorized Projector Dealer or Service Center. set to "manual" (when the picture display mode is set to "NORMAL" (see page 40)). -44 PG-A20X_E_PDF_P40_50.p65 44 03.4.23, 9:58 AM - Sharp PG A20X | Operation Manual - Page 49
FREEZE/ AUTO SYNC/ENLARGE/ "An invalid button has been pressed." / *"All buttons on Projector are locked." are not displayed. *Displayed when the STANDBY button is pressed. Video System (Setting the Video System) The video input system mode is preset to "Auto"; however, a clear picture from the - Sharp PG A20X | Operation Manual - Page 50
Video) mode Auto Power Off (Auto Power Off Function) When no input signal is detected for more than 15 minutes, the projector will automatically enter the standby mode if set to "ON". The Auto Power . -46 PG-A20X_E_PDF_P40_50.p65 46 part of the menu on the image becomes transparent. 03.4.23, - Sharp PG A20X | Operation Manual - Page 51
A password can only be set by using the remote control. Select "Password" on the "Options" menu, Sharp Authorized Projector Dealer or Service Center (see page 65). You may need to bring your projector to them to restore the projector to original factory condition (password and keycode reset). PG - Sharp PG A20X | Operation Manual - Page 52
contact your nearest Sharp Authorized Projector Dealer or Service Center (see page 65). You may need to bring your projector to them to restore the projector to original factory condition (password and keycode reset). -48 1 Press any button you like on the re- mote control or projector to set the - Sharp PG A20X | Operation Manual - Page 53
can change the keycode. 1 Press the buttons on the remote control or the projector to enter the preset 4-digit keycode in "Old Code". 2 Press any button you like on the re- mote control or the projector to enter the new keycode. 3 Enter the same 4-digit keycode in - Sharp PG A20X | Operation Manual - Page 54
Selectable settings Description Front Normal image Ceiling+Front Inverted image Rear Reversed image Ceiling+Rear Reversed and inverted image Note • This function is used for the reversed image and ceiling-mount setups. See page 25 for these setups. -50 PG-A20X_E_PDF_P40_50.p65 50 03.4.23 - Sharp PG A20X | Operation Manual - Page 55
Case When carrying the projector, attach the lens cap to the lens, and place it in the supplied carrying case. 1 Open projector to direct sunlight, near heat sources, or leave them in a car. The carrying case or projector may change color or become deformed. Lens cap Adjust the shoulder strap. PG - Sharp PG A20X | Operation Manual - Page 56
Be sure to unplug the power cord before cleaning the projector. I The cabinet as well as the operation panel is made of plastic. Avoid using benzene or thinner, as these can damage the finish on the cabinet. I Do not use volatile agents such as insecticides on the projector. Do not attach rubber or - Sharp PG A20X | Operation Manual - Page 57
. • Ask your nearest Sharp Authorized Projector Dealer or Service Center to exchange the filter (PFILDA008WJZZ) when it is no longer possible to clean. Cleaning and Replacing the Air Filter 1 Press STANDBY on the projector STANDBY or on the remote control to put the projector into the standby mode - Sharp PG A20X | Operation Manual - Page 58
extension hose. 6 Replace the air filter. • Place the air filter underneath the tabs on the filter/lamp unit cover. 7 Replace the filter/lamp unit cover. • Align the tab on the filter/lamp unit cover (1) and place it while pressing the tab (2) to close it. Then tighten the user service screw (3) to - Sharp PG A20X | Operation Manual - Page 59
Sharp Authorized Projector Dealer or Service Center (see page 65) • Burnt-out lamp for repair. • Lamp circuit failure • Please exercise care when replacing the lamp. Power Green on/ indicator Red on Red blinks The power indicator blinks in red when the projector is on. • The filter/lamp - Sharp PG A20X | Operation Manual - Page 60
the projector, and the power supply recovers immediately after that, the lamp indicator will illuminate in red and the lamp may not be lit. In this case, unplug the power cord from the AC outlet, replace the power cord in the AC outlet and then turn the power on again. • If you want to clean the air - Sharp PG A20X | Operation Manual - Page 61
the power cord is disconnected to allow the surface of the lamp unit to fully cool before removing the lamp unit. I If the new lamp does not light after replacement, take your projector to the nearest Sharp Authorized Projector Dealer or Service Center for repair. Purchase a replacement lamp unit - Sharp PG A20X | Operation Manual - Page 62
the power cord from the AC socket. • Leave the lamp until it has fully cooled down (about 1 hour). 3 Change the air filter. • Change the air filter whenever you install the lamp unit (see pages 53 and 54). 4 Remove the filter/lamp unit cover. • Turn the projector over. Loosen the user service screw - Sharp PG A20X | Operation Manual - Page 63
the user service screw (3) to secure the filter/ lamp unit cover. Info • If the lamp unit and filter/lamp unit cover are not correctly installed, the power will not turn on, even if the power cord is connected to the projector. Resetting the Lamp Timer Reset the lamp timer after replacing the lamp - Sharp PG A20X | Operation Manual - Page 64
Connecting Pin Assignments INPUT 1 RGB Signal Terminal: 15-pin Mini D-sub female connector RGB Input 1. Video input (red) 2. Video input (green/sync on green) 3. Video input (blue) 5 1 4. Not connected 10 6 5. Not connected 15 11 6. Earth (red) 7. Earth (green/sync on green) 8. Earth - Sharp PG A20X | Operation Manual - Page 65
Computer Projector → P OWR _ _ _ 1 ← OK BUTTONS & REMOTE CONTROL KEY CONTROL CONTENTS Standby Power On INPUT1 INPUT2 INPUT3 INPUT1 SIGNAL TYPE : AUTO INPUT1 SIGNAL TYPE : RGB INPUT1 SIGNAL TYPE : COMPONENT Lamp Usage Time (hour) Remaining Lamp Life (Percentage) Lamp Status Unit Status Model - Sharp PG A20X | Operation Manual - Page 66
, this projector supports other signals that are LCD display on the notebook computer and output the display data in "CRT only" mode. Details on how to change display modes can be found in your notebook computer's operation manual. • When this projector receives 640 × 350 VESA format VGA signals - Sharp PG A20X | Operation Manual - Page 67
Troubleshooting Problem No picture and no sound or projector does not start. Check • Projector power cord is not plugged into the wall outlet. • Power to the projector. • Remote control batteries have run out. • External output has not been set when connecting notebook computer. • The filter/lamp - Sharp PG A20X | Operation Manual - Page 68
Troubleshooting Problem Picture is green on INPUT 1 COMPONENT. Picture is pink (no green) on INPUT 1 RGB. Picture is dark. Picture is too bright and whitish. Check • Change the input signal type setting. • The lamp indicator is illuminating in red. Replace the lamp. • Picture adjustments are - Sharp PG A20X | Operation Manual - Page 69
If you encounter any problems during setup or operation of this projector, first refer to the "Troubleshooting" section on pages 63 and 64. If this operation manual does not answer your question, please contact the SHARP Service departments listed below. U.S.A. Sharp Electronics Corporation 1-888 - Sharp PG A20X | Operation Manual - Page 70
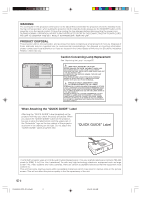
(attached), Extra air filter, Projector manual and technical reference CD-ROM, "QUICK GUIDE" label, Operation manual Replacement parts Lamp unit (Lamp/cage module) (BQC-PGA20X//1), Remote control (RRMCGA187WJSA), Two R-6 batteries ("AA" size, UM/SUM-3, HP-7, or similar), Power cord for U.S., Canada - Sharp PG A20X | Operation Manual - Page 71
(258.8) 6 21/32 (169) M4 49/64 (19.1) 7 7/64 (180.5) 7 53/64 (198.5) 7 3/32 (180) M4 13/64 (5) M4 5 55/64 (148.5) 7 11/16 (195) PG-A20X_E_PDF_P63_69.p65 67 03.4.23, 10:00 AM 1 35/64 (39.2) 3 13/64 (81) 3 33/64 (89) -67 Appendix - Sharp PG A20X | Operation Manual - Page 72
projector is not correctly entered, the projector will not operate even if signals are entered. Aspect Ratio Width and height ratio of an image. The normal aspect ratio of a computer and video projector projector's native resolution. Keylock Mode that can lock the operation of projector signals LCD - Sharp PG A20X | Operation Manual - Page 73
38 Picture Adjustment 36 Power cord 15 Power indicator 26 PRJ mode (Reversing/Inverting Projected Images) .... 50 Red 36 Remote control 12 Remote control sensor 13 Replacing the lamp 57 RESIZE button 40 RGB cable 16 RS-232C terminal 20 Sharp 36 Signal Info 39 Signal Type 37 Special - Sharp PG A20X | Operation Manual - Page 74
SHARP CORPORATION PG-A20X_E_PDF_Hyo4.p65 1 03.4.23, 9:53 AM
-
 1
1 -
 2
2 -
 3
3 -
 4
4 -
 5
5 -
 6
6 -
 7
7 -
8
-
9
-
10
-
11
-
12
-
13
-
14
-
15
-
16
-
17
-
18
-
19
-
20
-
21
-
22
-
23
-
24
-
25
-
26
-
27
-
28
-
29
-
30
-
31
-
32
-
33
-
34
-
35
-
36
-
37
-
38
-
39
-
40
-
41
-
42
-
43
-
44
-
45
-
46
-
47
-
48
-
49
-
50
-
51
-
52
-
53
-
54
-
55
-
56
-
57
-
58
-
59
-
60
-
61
-
62
-
63
-
64
-
65
-
66
-
67
-
68
-
69
-
70
-
71
-
72
-
73
-
74
 |
 |
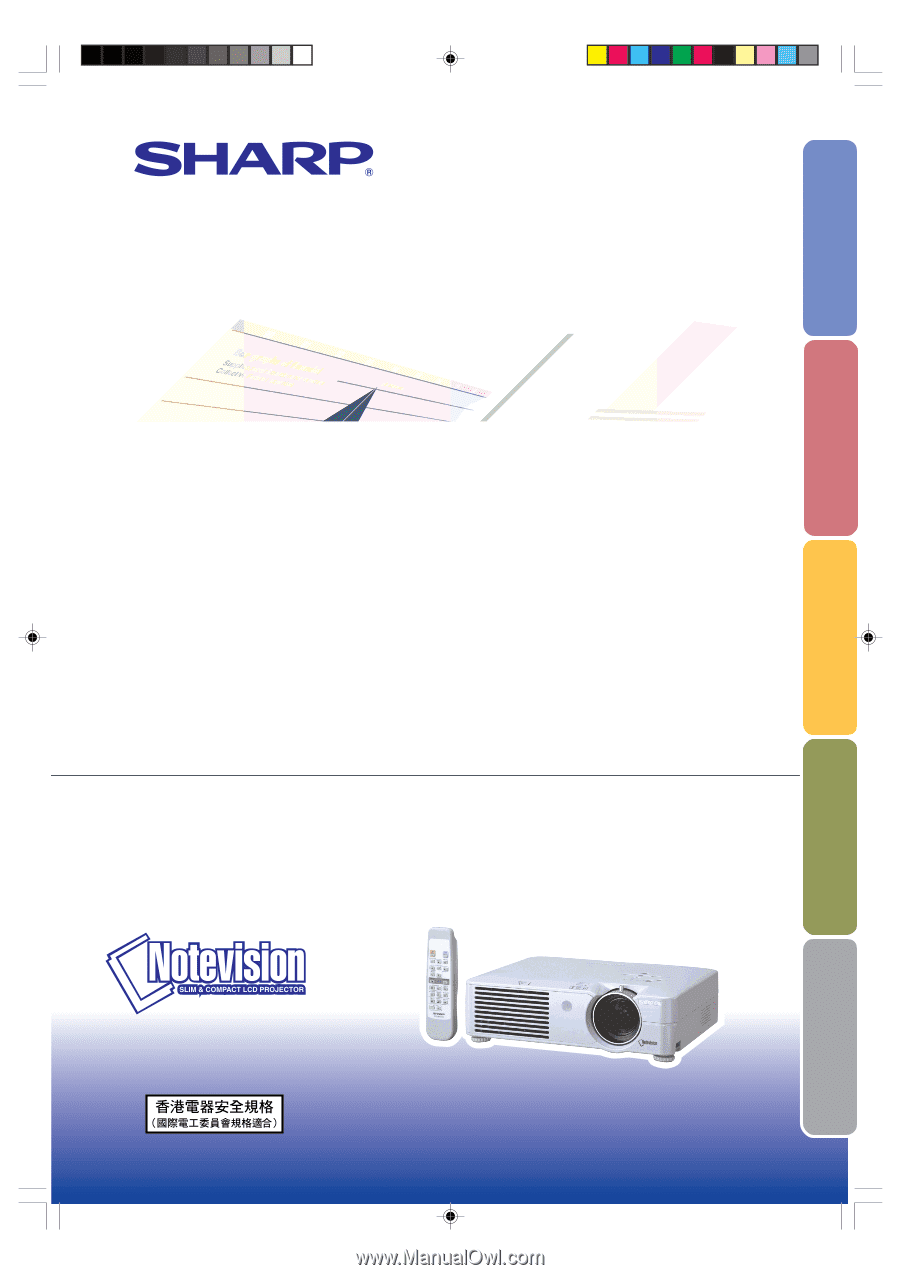
LCD PROJECTOR
MODEL
PG-A20X
OPERATION MANUAL
Introduction
Connections and Setup
Basic Operation
Easy to Use Functions
Appendix
PG-A20X_E_PDF_Hyo1.p65
03.4.23, 9:53 AM
1