Sharp PN-655UP PNG655U Operation Manual - Page 24
Menu Items, SCHEDULE, ADVANCED items AV input See
 |
View all Sharp PN-655UP manuals
Add to My Manuals
Save this manual to your list of manuals |
Page 24 highlights
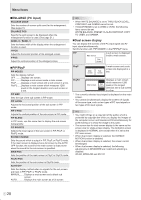
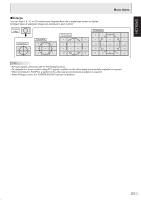
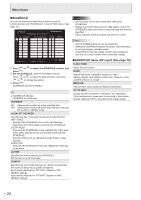
Menu Items SCHEDULE You can set the time to switch the monitor on and off. Set this function with "SCHEDULE" in the OPTION menu. (See page 19.) SCHEDULE XXXX/XX/XX XXX XX:XX:XX PC2 ANALOG No. (1) POWER (2) DAY OF THE WEEK (3) TIME (4) INPUT (5) Caution • Do not switch off the main power after setting the SCHEDULE. • Specify the correct date and time. (See pages 14 and 19.) SCHEDULE does not function unless the date and time are specified. • Check regularly that the set date and time are correct. TIPS • Up to 8 SCHEDULE items can be registered. • Setting the SCHEDULE flashes the power LED alternately in red and orange in standby mode. • A SCHEDULE that has a large number has precedence over that of a small number when schedules overlap. 1024x768 V: 60 Hz H: 48.4 kHz OK...[MENU] 1. Press or to select the SCHEDULE number, and press . 2. Set the SCHEDULE. (See the description below.) Press or to select the date and time, and press or to change the setting. 3. Press . MENU SCHEDULE becomes effective. (1) ●: SCHEDULE effective -: SCHEDULE not effective (2) POWER ON : Switches the monitor on at the specified time. OFF : Switches the monitor off at the specified time and puts the monitor in standby mode. (3) DAY OF THE WEEK Specifies the day of the week to execute the SCHEDULE. ONLY ONCE: Executes the SCHEDULE once on the specified day. Specify the day of the week to execute the SCHEDULE. EVERY WEEK: Executes the SCHEDULE on the specified day of the week every week. Specify the day of the week to execute the SCHEDULE. Periodic setting such as "Monday through Friday" is also possible. EVERY DAY: Executes the SCHEDULE every day regardless of the day of the week. (4) TIME Specifies the time to execute the SCHEDULE. Set the time on a 24-hour basis. (5) INPUT Specifies the input mode at power-on. When not specifying, the screen at the previous power-off appears. Input modes displayed on "PC1/AV1" depend on DVI SELECT settings. Input modes displayed on "PC3/AV2" depend on BNC SELECT settings. ADVANCED items (AV input) (See page 18.) FLESH TONE Adjust the hue control. 3D-NR Reduce the noise of playback images on video. Setting a higher level reduces more noise. However, it may cause blurring on an image. MPEG-NR Reduce block noise caused by digital compression. 3D-Y/C (AV3) Specify whether to perform 3-dimension Y/C separation. If dot interference or cross-color is occurring in fast-motion scenes, selecting "OFF" may improve the image quality. E 22
-
 1
1 -
2
-
3
-
4
-
5
-
6
-
7
-
8
-
9
-
10
-
11
-
12
-
13
-
14
-
15
-
16
-
17
-
18
-
 19
19 -
 20
20 -
 21
21 -
 22
22 -
 23
23 -
 24
24 -
 25
25 -
 26
26 -
 27
27 -
 28
28 -
 29
29 -
30
-
31
-
32
-
33
-
34
-
35
-
36
-
37
-
38
-
39
-
40
-
41
-
42
-
43
-
44
-
45
-
46
-
47
-
48
-
49
-
50
-
51
-
52
-
53
-
54
-
55
-
56
-
57
-
58
-
59
-
60
-
61
-
62
-
63
-
64
-
65
-
66
-
67
-
68
-
69
-
70
-
71
-
72
-
73
-
74
-
75
-
76
 |
 |
