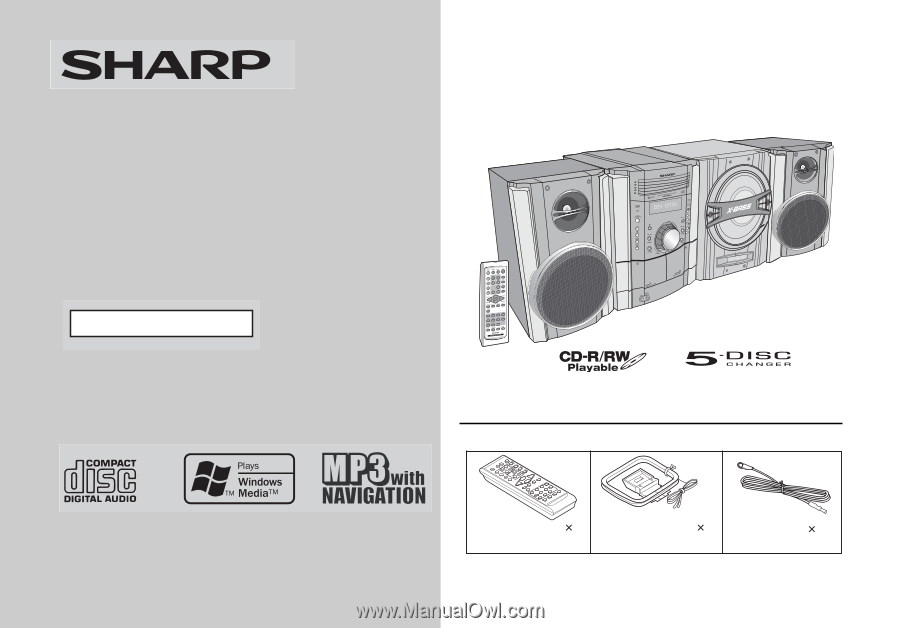
Sharp SW340 CD-SW340 Operation Manual
Sharp SW340 Manual
 |
UPC - 074000368927
View all Sharp SW340 manuals
Add to My Manuals
Save this manual to your list of manuals |
Sharp SW340 manual content summary:
- Sharp SW340 | CD-SW340 Operation Manual - Page 1
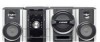
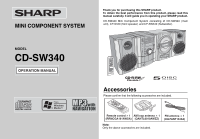
manual carefully. It will guide you in operating your SHARP product. CD-SW340 Mini Component System consisting of CD-SW340 (main unit), CP-S340 (front speaker) and CP-SW340 (Subwoofer). MODEL CD-SW340 OPERATION MANUAL Accessories Please confirm that the following accessories are included. Remote - Sharp SW340 | CD-SW340 Operation Manual - Page 2
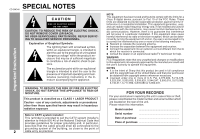
CD-SW340 Important Instruction CAUTION: TO REDUCE THE RISK OF ELECTRIC SHOCK, DO NOT REMOVE COVER (OR BACK). NO USER-SERVICEABLE PARTS INSIDE. REFER SERVICING TO QUALIFIED SERVICE the grounding system of intent of Sharp that model number and serial number which are located on the rear of the - Sharp SW340 | CD-SW340 Operation Manual - Page 3
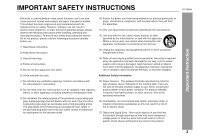
IMPORTANT SAFETY INSTRUCTIONS CD-SW340 Important Instruction Electricity is used to perform many 3) Heed all warnings. 4) Follow all instructions. 5) Do not use this apparatus near water. 14) Refer all servicing to qualified service personnel. Servicing is required when the apparatus has been - Sharp SW340 | CD-SW340 Operation Manual - Page 4
810-21) GROUND CLAMPS P OWER SERVICE GROUNDING ELECTRODE SYSTEM (NEC ART 250, PART H) 24) Protective Attachment Plug - The product is equipped with an attachment plug having overload protection. This is a safety feature. See Instruction Manual for replacement or resetting of protective device. If - Sharp SW340 | CD-SW340 Operation Manual - Page 5
CD-SW340 ENERGY STAR® Program Information Page General Information Precautions 6 Controls and indicators 7 - 10 Products that have earned the ENERGY STAR® are designed to protect the environment through superior energy efficiency. Preparation for Use System connections 11 - 13 Remote - Sharp SW340 | CD-SW340 Operation Manual - Page 6
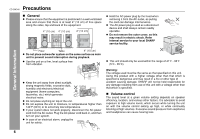
electronic/electrical equipment (home computers, facsimiles, etc.) which generate 5 4 3 2 1 TIMER 5 CD back in, and then turn on your system. In case of an electrical storm, unplug may result in electric shock. Refer internal service to your local SHARP service facility. AC INPUT This unit should - Sharp SW340 | CD-SW340 Operation Manual - Page 7
CD-SW340 Front panel Reference page 1. Disc Trays 18 2. Timer Indicator 33 3. Power On/Stand-by Button 15 4. CD Button 17 5. Tape (1 2) Button 28 6. Tuner (Band) Button 26 7. Audio In Button 35 8. CD or Tape Stop Button 19, 29 9. CD 14. Remote Sensor 14 15. Volume Control 15 16. CD Play or - Sharp SW340 | CD-SW340 Operation Manual - Page 8
General Information CD-SW340 Controls and indicators (continued) 3 4 5 6 7 8 1 9 2 8 Display Reference page 1. Disc Number Indicators 18 2. MP3/WMA Folder Indicator 22 3. MP3/WMA Title Indicators 22 4. MP3 Indicator 18 5. WMA - Sharp SW340 | CD-SW340 Operation Manual - Page 9
Front Speaker 1. Tweeter 2. Woofer 1 3 3. Bass Reflex Duct 4. Speaker Wire 5. Speaker Light-Up Wire 2 4 5 Subwoofer 1. Subwoofer 1 2. Bass Reflex Duct 3. Subwoofer Light-Up Wire 4. Speaker Wire 2 3 4 General Information CD-SW340 9 - Sharp SW340 | CD-SW340 Operation Manual - Page 10
CD-SW340 Controls and indicators (continued) General Information 1 13 17 8 9 14 18 10 15 19 2 20 11 16 21 12 22 23 3 4 24 25 5 26 27 28 29 6 7 Remote control Reference page 1. Remote Control Transmitter 14 2. Disc Number Select Buttons 17 3. Clock/Timer Button 16, 32 4. - Sharp SW340 | CD-SW340 Operation Manual - Page 11
System connections Make sure to unplug the AC power cord before making any connections. Antenna connection (see page 12) FM antenna AM loop antenna Right speaker Left speaker Subwoofer CD-SW340 Preparation for Use Speaker light-up wire Speaker connection (see page 12) Speaker light-up wire - Sharp SW340 | CD-SW340 Operation Manual - Page 12
CD-SW340 System connections (continued) Antenna connection Supplied FM antenna: Connect the FM for speaker illumination. To turn off the speaker light-up feature, press the CLEAR/DIMMER button on the remote control for 2 seconds or more. Note: Placing the right speaker light-up wire to the RIGHT - Sharp SW340 | CD-SW340 Operation Manual - Page 13
the speaker system There is no distinction between the right and left speakers. Subwoofer Left speaker Main unit Right speaker TIMER CD 5 4 of the fan with any obstacles, as this will block proper ventilation. CD-SW340 Demonstration mode The first time the unit is plugged in, the unit will - Sharp SW340 | CD-SW340 Operation Manual - Page 14
CD-SW340 Remote control Battery installation Use 2 "AA" size batteries (UM/SUM-3, R6, HP-7 or Press the ON/STAND-BY button. Does the power turn on? Now, you can enjoy the music. Remote sensor Preparation for Use Precautions for battery use: Replace all old batteries with new ones at the same - Sharp SW340 | CD-SW340 Operation Manual - Page 15
turn on/off the light, hold down the CLEAR/DIMMER button on the remote control for 2 seconds or more. Subwoofer and front speaker light up control X-BASS (SURROUND)/ DEMO button again. 0 ..... 30 MAXIMUM X-BASS CD-SW340 Basic Operation Equalizer When the power is first turned on, the unit will - Sharp SW340 | CD-SW340 Operation Manual - Page 16
CD-SW340 Setting the clock (Remote control only) 5 Press the or button to adjust the hour and then press the MEMORY or 24-hour display: 1 Clear all the programmed contents. [Refer to "Clearing all the memory (reset)" on page 37 for details.] 2 Perform "Setting the clock" from step 1 onwards. 16 - Sharp SW340 | CD-SW340 Operation Manual - Page 17
from the original audio source with very little loss CD in sound quality. This system supports MPEG 1 Layer 3, MPEG 2 Layer 3, and VBR CD button (main unit and remote control): The unit turns on and the "CD" function is activated. CD / button on the remote control: The unit turns on and CD - Sharp SW340 | CD-SW340 Operation Manual - Page 18
CD-SW340 Listening to a CD or MP3/WMA disc (continued) CD or MP3/WMA disc Playback 1 Press the ON/STAND-BY button to turn the power on. 2 Press the CD disc information, it takes longer to read an MP3/WMA disc than a normal CD (approximately 20 to 90 seconds). 6 You can place discs on the trays 2 - Sharp SW340 | CD-SW340 Operation Manual - Page 19
Various disc functions Function Main unit Play Remote control Operation Press in the stop mode. Advanced CD or MP3/WMA disc CD-SW340 playback To specify a disc to play You can play a disc by specifying the disc number. 1 Press one of the 1 - 5 buttons to select the desired disc. - Sharp SW340 | CD-SW340 Operation Manual - Page 20
MP3/WMA disc Playback CD-SW340 Advanced CD or MP3/WMA disc playback (continued) Direct track search By using the direct search buttons, the desired tracks on the current disc can be played. Use the direct search buttons on the remote control to select the desired track while playing the selected - Sharp SW340 | CD-SW340 Operation Manual - Page 21
CD-SW340 CD or MP3/WMA disc Playback Programmed play You can choose up to 32 selections for playback in the order you like. 1 While in the stop mode, press the MEMORY button on the remote control to enter the programming save mode. To clear the programmed selections: Press the CLEAR/DIMMER button - Sharp SW340 | CD-SW340 Operation Manual - Page 22
CD-SW340 MP3/WMA navigation (only for MP3/WMA files) CD or MP3/WMA disc Playback MP3/WMA navigation: You can search and play files by folder or title. For example, when you assign three titles - Sharp SW340 | CD-SW340 Operation Manual - Page 23
number of folders and files on the selected disc. MP3 indicator WMA indicator CD-SW340 7 Use the or cursor button to scroll and select a folder (or Press the NAVIGATION button. 5 Press the , , or cursor button on the remote control to select "FOL", "T-1", "T-2" or "T-3". To search files by folder - Sharp SW340 | CD-SW340 Operation Manual - Page 24
CD-SW340 MP3/WMA navigation (only for MP3/WMA files) (continued) Character search (for in uppercase. Some symbols do not appear properly. Character entry with direct buttons: The direct buttons on the remote control can also be used for character entry. In step 5 on the left, use buttons 0 9 to - Sharp SW340 | CD-SW340 Operation Manual - Page 25
CD-SW340 CD or MP3/WMA disc Playback Programmed play (for folder, title 1/2/3) or title 1/2/3)" on page 23. 2 Press the NAVIGATION button. 3 Press the , , or cursor button on the remote control to select "FOL", "T-1", "T-2" or "T-3" and then press the ENTER button. The total number of folders (or - Sharp SW340 | CD-SW340 Operation Manual - Page 26
CD-SW340 Listening to the AM/FM stations POWER ON/ STAND-BY TUNER (BAND) TIMER CD 5 4 3 2 1 PLAYBACK (PLAY & STOP) PHONES FM or AM). 3 Press the TUNING ( or ) button on the remote control to tune in to the desired station. Manual tuning: Press the TUNING ( or ) button as many times as required - Sharp SW340 | CD-SW340 Operation Manual - Page 27
CD-SW340 Memorizing a station You can store 40 AM and FM stations in memory and recall them at the push of a button. (Preset tuning) 1 Perform steps 1 - 3 in "Tuning" on page 26. 2 Press the MEMORY button on remote control to enter the preset tuning saving mode. 3 Within 30 seconds, press the - Sharp SW340 | CD-SW340 Operation Manual - Page 28
CD-SW340 Listening to a cassette tape (TAPE 1 or TAPE 2) Before playback: For function is activated. TAPE button (remote control): The unit turns on and the "TAPE" function is activated. / button (main unit): The unit turns on and playback of the last function starts (CD,TAPE,TUNER,AUDIO IN). Auto - Sharp SW340 | CD-SW340 Operation Manual - Page 29
Recording on a cassette tape CD-SW340 Various tape functions Function Main unit Remote control Playback Operation Press in the stop mode. Stop Press in the playback, fast forward or rewind mode. Before recording: When recording important selections, make a - Sharp SW340 | CD-SW340 Operation Manual - Page 30
CD-SW340 Recording on a cassette tape (continued) Tape Recording POWER ON/ STAND-BY CD TIMER CD OPEN/ CLOSE 5 5 4 3 2 1 4 3 PLAYBACK (PLAY & STOP) PHONES AUDIO IN RECORD/PLAYBACK 2 1 Recording from a CD or MP3/WMA disc 1 Press the ON/STAND-BY button to turn the power on. 2 Press - Sharp SW340 | CD-SW340 Operation Manual - Page 31
cassette compartment. Insert a blank tape into the TAPE 2 cassette compartment. CD PRESET TUNING - VOL. 5 4 3 PRESET 2 1 VOL. TUNING use. Timer and sleep operation (Remote control only) CD-SW340 Timer playback: The unit turns on and plays the desired source (CD, tuner, tape) at a - Sharp SW340 | CD-SW340 Operation Manual - Page 32
CD-SW340 Timer and sleep operation (Remote control only) (continued) 5 Press the or button Switch input with the or press the MEMORY button. button, and then To select the timer playback source: CD, TUNER, TAPE 1 or TAPE 2. To select the timer recording source: TUNER. When you select the - Sharp SW340 | CD-SW340 Operation Manual - Page 33
preset volume. 13 When the timer end time is reached, the system will enter the power stand-by mode automatically. Once timer: The not used. The "DAILY r" indicator will blinking during timer playback. CD-SW340 Advanced Features Note: When performing timer playback or recording using another - Sharp SW340 | CD-SW340 Operation Manual - Page 34
CD-SW340 Timer and sleep operation (Remote control only) (continued) Sleep operation The radio, CD, MP3/WMA disc and cassette tape can all be turned off automatically. 1 Play back the desired sound source. 2 Press the CLOCK/TIMER button. 3 Within 10 - Sharp SW340 | CD-SW340 Operation Manual - Page 35
Enhancing your system CD-SW340 The connection cord is not included. Purchase a commercially available cord as shown below. Portable audio player, etc. Auto power on function: When you press any of the following buttons, the unit turns on. AUDIO IN button (main unit and remote control): The unit - Sharp SW340 | CD-SW340 Operation Manual - Page 36
CD-SW340 Troubleshooting chart Many potential problems can be resolved by the owner without calling a service technician. If something is wrong with this product, check the following before calling your authorized SHARP dealer or service great force. Remote control Symptom The remote control does - Sharp SW340 | CD-SW340 Operation Manual - Page 37
plug in the unit, and then turn the power on. Note: If neither operation above restores the unit, clear all the memory by resetting it. CD-SW340 Clearing all the memory (reset) 1 Press the ON/STAND-BY button to enter the power stand-by mode. 2 While pressing down the button and the button, press - Sharp SW340 | CD-SW340 Operation Manual - Page 38
CD-SW340 Maintenance Cleaning demagnetizer's instructions carefully before use. Cleaning the CD pickup lens In order to ensure proper operation of the CD player, Specifications As part of our policy of continuous improvement, SHARP reserves the right to make design and specification changes for - Sharp SW340 | CD-SW340 Operation Manual - Page 39
/16" (220.5 mm) 7.0 lbs. (3.18 kg) /each Subwoofer Type Maximum input power Rated input power Impedance Dimensions Weight Subwoofer system 8" (20 cm) subwoofer 500 W 250 W 12 ohms Width: 9-13/16" (250 mm) Height: 13" (330 mm) Depth: 11-5/16" (288 mm) 12.9 lbs. (5.85 kg) References CD-SW340 39 - Sharp SW340 | CD-SW340 Operation Manual - Page 40
: CD-SW340 Mini Component System (Be sure to have this information available when you need service for your Product.) Warranty Period for this Product: One (1) year parts and labor from the date of purchase. Additional Item(s) Excluded from Warranty Coverage (if any): Non-functional accessories
-
 1
1 -
 2
2 -
 3
3 -
 4
4 -
 5
5 -
 6
6 -
 7
7 -
8
-
9
-
10
-
11
-
12
-
13
-
14
-
15
-
16
-
17
-
18
-
19
-
20
-
21
-
22
-
23
-
24
-
25
-
26
-
27
-
28
-
29
-
30
-
31
-
32
-
33
-
34
-
35
-
36
-
37
-
38
-
39
-
40
 |
 |
Thank you for purchasing this SHARP product.
To obtain the best performance from this product, please read this
manual carefully. It will guide you in operating your SHARP product.
MINI COMPONENT SYSTEM
CD-SW340 Mini Component System consisting of CD-SW340 (main
unit), CP-S340 (front speaker) and CP-SW340 (Subwoofer).
Accessories
Please confirm that the following accessories are included.
MODEL
OPERATION MANUAL
CD-SW340
Note:
Only the above accessories are included.
Remote control
1
(RRMCGA161AWSA)
AM loop antenna
1
(QANTL0010AWZZ)
FM antenna
1
(92LFANT1535A)