Sharp XE-A203 Service Manual - Page 14
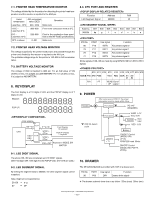
Keyboard Test, Mode Switch Test, Printer Sensor Test, Clock Display Test - h error
 |
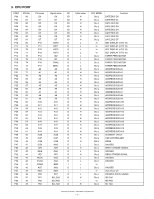
UPC - 074000049178
View all Sharp XE-A203 manuals
Add to My Manuals
Save this manual to your list of manuals |
Page 14 highlights
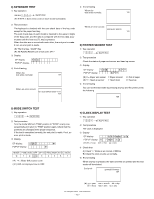
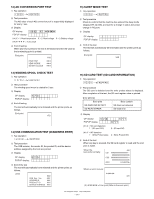
4) KEYBOARD TEST 1 Key operation **** 1 0 4 RCPT/PO (*) **** = Sum check code on each model (omissible) 2 Test procedure The keyboard is checked with the sum check data of the key code except for the paper feed key. The sum check data of each model is inputted to the upper 4 digits of the diag code, and the data is compared with the key data accumulated until the final key (TL key) is pressed. When the data are in accord with each other, the end print is made. If not, an error print is made. (*) The final key: "CA/AT" Key (*) XE-A203U/A203A sum check code: 3417 3 Display OP display: 104 POPUP display: 4 End of testing When the test ends normally: 104 When an error occurs: KEY SUM ERROR XXXX-YYYY 104 4 End of testing When the test ends normally: 105 When an error occurs: MODE KEY ERROR 105 6) PRINTER SENSOR TEST 1 Key operation 106 RCPT/PO 2 Test procedure Check the status of paper end sensor and head up sensor. 3 Display OP display: 106 POPUP display: X -Y X -Y (*) X = Paper end sensar 1: Paper present (*) Y = Head up sensor 1: Head down 4 End of testing 0: Out of paper 0: Head up You can exit the test mode by pressing any key and the printer prints the following. 106 5) MODE SWITCH TEST 1 Key operation 105 RCPT/PO 2 Test procedure Turn the mode SW from "PGM" position to "X2/Z2" one by one sequentially and return to "PGM" position again. Check that the positions are changed in the proper sequence. If the test is completed normally, the end print is made. If not, an error print is made. 3 Display OP display: 105 POPUP display: * * MODE PGM VOID OFF OP X/Z REG MGR X1/Z1 X2/Z2 * 1 2 nondisplay*1 3 456 7 (*) * = Mode SW position code (*1) LED not displayed due to OFF 7) CLOCK DISPLAY TEST 1 Key operation 107 RCPT/PO 2 Test procedure The clock is displayed. 3 Display OP display: h h -mm s s POPUP display: h - m m s s (*) hh = hour mm = min ss = sec 4 Check that A) Check "-" blinks at an interval of 500ms. B) Check the clock counts up normally. 5 End of testing When any key is pressed, the date and time are printed and the test mode will terminated. End print: yymmdd-hhmmss 107 (*) yy = year mm = month dd = day hh = hour mm = min ss = sec XE-A203U/XE-A203A TEST FUNCTION - 12 -
-
 1
1 -
2
-
3
-
4
-
5
-
6
-
7
-
8
-
 9
9 -
 10
10 -
 11
11 -
 12
12 -
 13
13 -
 14
14 -
 15
15 -
 16
16 -
 17
17 -
 18
18 -
 19
19 -
20
-
21
-
22
-
23
-
24
-
25
-
26
-
27
-
28
-
29
-
30
-
31
 |
 |
