Singer 1 One Instruction Manual 26 - Page 25
Note: For chain stitch :Use needle D.
 |
View all Singer 1 One manuals
Add to My Manuals
Save this manual to your list of manuals |
Page 25 highlights
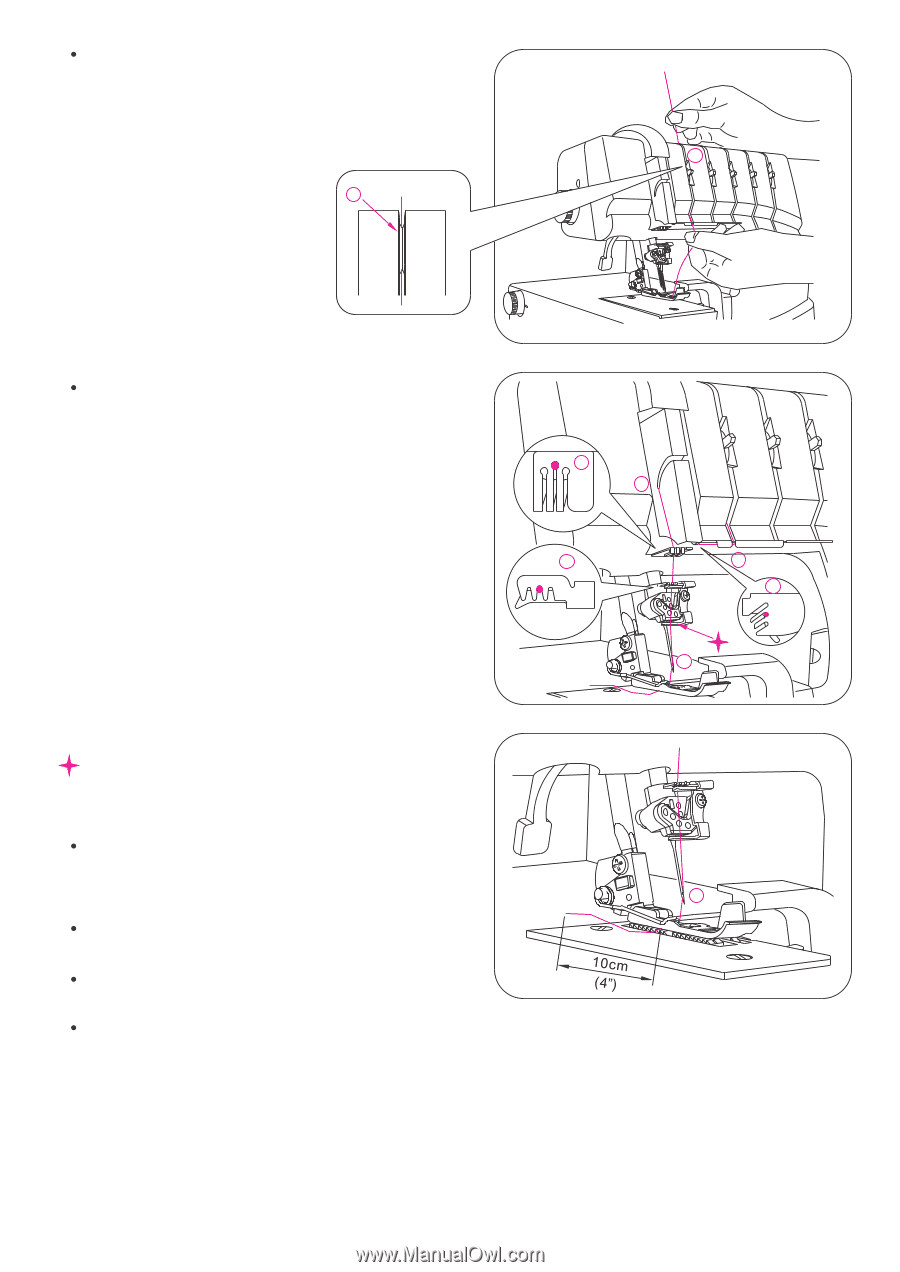
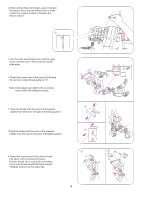
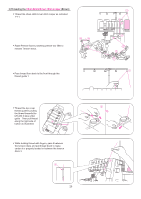
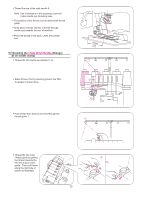
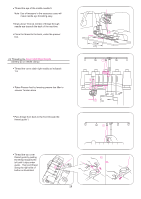
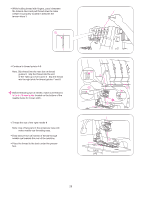
While holding thread with fingers, pass it between the tension discs and pull thread down to make certain it is properly located in between the tension discs 3. 3 3 Continue to thread points 4~8. Note: Slip thread into the middle slot of the thread guide 5 and into the slot of take-up lever cover 6. Then continue by slipping thread into the middle slot of the thread guides 7 and 8. Note: For 4 thread overlock left needle: Use needle A. Before threading eye of needle, slip thread behind thread guide located on the bottom of the needle clamp. Note: For chain stitch :Use needle D. Before threading eye of needle, make sure thread is in front of thread guide located on the bottom of the needle clamp. Thread the eye of the left needle 9. Note: Use of tweezers in the accessory case will make needle eye threading easy. The position of the thread must be behind the the thread guide. Draw about 10cm (4 inches) of thread through needle eye to hang free. Place the thread to the back, under the presser foot. 7 6 8 4 5 9 9 24
-
 1
1 -
2
-
3
-
4
-
5
-
6
-
7
-
8
-
9
-
10
-
11
-
12
-
13
-
14
-
15
-
16
-
17
-
18
-
19
-
 20
20 -
 21
21 -
 22
22 -
 23
23 -
 24
24 -
 25
25 -
 26
26 -
 27
27 -
 28
28 -
 29
29 -
 30
30 -
31
-
32
-
33
-
34
-
35
-
36
-
37
-
38
-
39
-
40
-
41
-
42
-
43
-
44
-
45
-
46
-
47
-
48
-
49
-
50
-
51
-
52
-
53
-
54
-
55
-
56
-
57
-
58
-
59
-
60
-
61
-
62
-
63
-
64
-
65
-
66
-
67
-
68
-
69
-
70
-
71
-
72
 |
 |