Singer One Instruction Manual 14 - Page 63
Multi, Stitch, Zig-Zag, Point, zig-zag, multiple, Puntos, Mtiltiples
 |
View all Singer One manuals
Add to My Manuals
Save this manual to your list of manuals |
Page 63 highlights
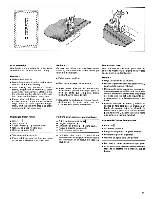
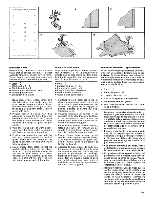
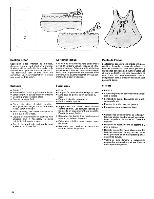
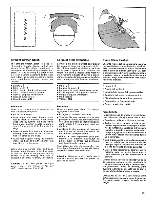
• 0 K Multi-Stitch Zig-Zag The multi-stitch zig-zag is an extremely versatile stitch. Use it. to mend, join, or reinforce without bulk. With this stitch you may attach elastic and stretch lace, construct lingerie and swimsuits, and finish seams. There are many other useful applications for the multi-stitch zig-zag. Mending a Tear • Stitch: K • Stitch width: 2 - 5 • Stitch length: 0 - 1 • General purpose needle plate • General purpose foot or special purpose foot • Trim ragged edges. • Place underlay on the wrong side of tear for reinforcement. Do not baste or pin the underlay, since you will be bringing the edges together in the next step. • Stitch on the right side, bringing the edges of the tear together. Shorten stitch length at ends and corners to give extra strength. • Trim underlay. Point zig-zag multiple Ce point possede de multiples usages. II s'utilise pour poser une piece, reparer un accroc ou renforcer une couture. En utilisant ce point, vous eviterez les epaisseurs. Zig-Zag de Puntos Mtiltiples El zig-zag de puntos multiples es un punto extremadamente versatil. Uselo para remendar, unir, o reforzar sin hacer mucho bulto. Con este punto Usted puede poner elasticos y encaje elastic°, hacer lenceria y banadores, y acabar costuras. Hay muchas otras aplicaciones utiles para el zig-zag de puntos multiples. Reparation d'un accroc • Point: K • Largeur de point: 2 - 5 • Longueur de point: 0 - 1 • Plaque a aiguille universelle • Pied presseur universel ou special • Coupez les bords effiloches de l'accroc. • Pour maintenir les bords de l'accroc, posez sur l'envers un morceau de toile thermo-collante. Fixez-la au fer chaud. • Piquez sur l'endroit. Raccourcissez le point aux extremites pour renforcer la reparation. • Recoupez sur l'envers l'excedent de toile thermo-collante. Para remendar un rasgon • Punto: K • Ancho del punto: 2-5 • Longitud del punto: 0-1 • Plancha de aguja pare uso general • Prensatelas para uso general o prensatelas para usos especiales • Recorte los bordes rasgados. • Coloque un calzo de tela en el reves del rasg6n para reforzar. No hilvane o prenda el calzo con alfileres, ya que en el prOximo paso usted pondra los bordes juntos. • Cosa por el lado derecho, poniendo los bordes del rasgOn juntos. Acorte la longitud del punto en los extremos y las esquinas para que de fuerza extra. • Recorte el calzo. Finishes for Hems and Facings Hem and facing edges in knit and stretch fabrics will be less apt to press through and mark when given a flat edge-finish. Edge finishing with the multi-stitch zigzag eliminates the bulk of turned-in edges and retains fabric flexibility. • Make a test sample to, check thread tension and stitch length if you are using the multi-stitch zig-zag. • Place stitching about 1.3 cm ( 1/2 inch) from hem or facing edge. Avoid stretching edge while sewing. • Press after stitching and trim away excess fabric close to the stitching line. Finitions pour ourlets et parementures La finition des bords d'ourlets et de parementures au point zig-zag multiple reduit leur epaisseur et conserve au tissu sa souplesse. • Faites un echantillon. • Placez la piciare a 1,5 cm de l'ourlet ou du parement. • Ecrasez au fer apres avoir pique et coupez l'excedent de tissu ores de la ligne de piqure. Acabados para Dobladillos y Revestimientos Los bordes de los dobladillos y los revestimientos en telas de punto y elasticas quedaran menos aptas para planchar a traves de los mismos y queden marcados cuando se les da un acabado de borde piano. El acabado de los bordes con el zig-zag de puntos multiples elimina el bulto de los bordes vueltos y retiene la flexibilidad de la tele. • Haga una muestra de prueba para comprobar la tension del hilo y la longitud del punto si este usando el zig-zag de punto • Coloque las puntadas mas o menos a 1,3 cms. del borde del dobladillo o el revestimiento. Evite estirar el borde mientras cose. • Planche despues de dar las puntadas y recorte el exceso de tela cerca de la linea de puntadas. 62
-
 1
1 -
2
-
3
-
4
-
5
-
6
-
7
-
8
-
9
-
10
-
11
-
12
-
13
-
14
-
15
-
16
-
17
-
18
-
19
-
20
-
21
-
22
-
23
-
24
-
25
-
26
-
27
-
28
-
29
-
30
-
31
-
32
-
33
-
34
-
35
-
36
-
37
-
38
-
39
-
40
-
41
-
42
-
43
-
44
-
45
-
46
-
47
-
48
-
49
-
50
-
51
-
52
-
53
-
54
-
55
-
56
-
57
-
 58
58 -
 59
59 -
 60
60 -
 61
61 -
 62
62 -
 63
63 -
 64
64 -
 65
65 -
 66
66 -
 67
67 -
 68
68 -
69
-
70
-
71
-
72
-
73
-
74
-
75
-
76
-
77
-
78
-
79
-
80
-
81
-
82
-
83
-
84
-
85
-
86
-
87
-
88
-
89
-
90
 |
 |
